Rust Tiếng Việt
![]()
The book is published at https://rust-tieng-viet.github.io.
    _~^~^~_
\) /  o o  \ (/
  '_   _   _'
  / '-----' \
Rust là một ngôn ngữ nhanh, an toàn và được bình chọn là ngôn ngữ được ưa thích nhất trong nhiều năm liền theo Stack Overflow Survey. Rust có một hệ thống tài liệu và sách đồ sộ, chi tiết. Nhưng đôi khi nó sẽ khó tiếp cận với một số người bởi đa số tài liệu là Tiếng Anh. Với những ghi chép trong sách này, hy vọng có thể giúp cho mọi người (cũng như các thành viên trong team mình tại Fossil) có thể tiếp cận với ngôn ngữ này một cách nhanh chóng và dễ dàng hơn. Cũng như truyền cảm hứng và mở rộng cộng đồng sử dụng Rust tại Việt Nam.
Mục tiêu của sách này không phải là dịch từ các sách tiếng Anh.
Mà sẽ là những ghi chép, những lưu ý cho một người mới bắt đầu học Rust
cho đến lúc thành thạo, từ lúc hello world cho đến các dự án thực tế.
Bao gồm những khó khăn mà bạn sẽ phải gặp, những thuật ngữ, concepts mới,
những thói quen lập trình mới mà bạn sẽ phải làm quen.
Mình vẫn luôn prefer đọc sách tiếng Anh nếu bạn có thể. Vui lòng xem mục references ở cuối các trang nếu bạn muốn đào sâu hơn.
Links
Cài đặt Rust
Dưới đây là hướng dẫn chi tiết về cách cài đặt Rust trên hệ điều hành Windows, macOS và Linux. Bạn cũng có thể tự tham khảo trên trang chủ của Rust: https://www.rust-lang.org/tools/install
Cài đặt Rust trên macOS, Linux
Mở Terminal và chạy lệnh sau:
curl --proto '=https' --tlsv1.2 -sSf https://sh.rustup.rs | sh
Sau khi hoàn thành quá trình cài đặt, bạn có thể kiểm tra phiên bản Rust bằng cách mở Terminal và chạy lệnh sau:
rustc --version
Cài đặt Rust trên Windows
Để tải xuống trình cài đặt Rust, bạn cần truy cập vào trang web chính thức của Rust tại địa chỉ https://forge.rust-lang.org/infra/other-installation-methods.html
Chạy tập tin rustup-init.exe để bắt đầu quá trình cài đặt Rust trên máy tính của mình.
References
Rust Playground
https://play.rust-lang.org giúp chúng ta chạy Rust code trực tiếp trên trình duyệt mà không cần cài đặt Rust trên máy.
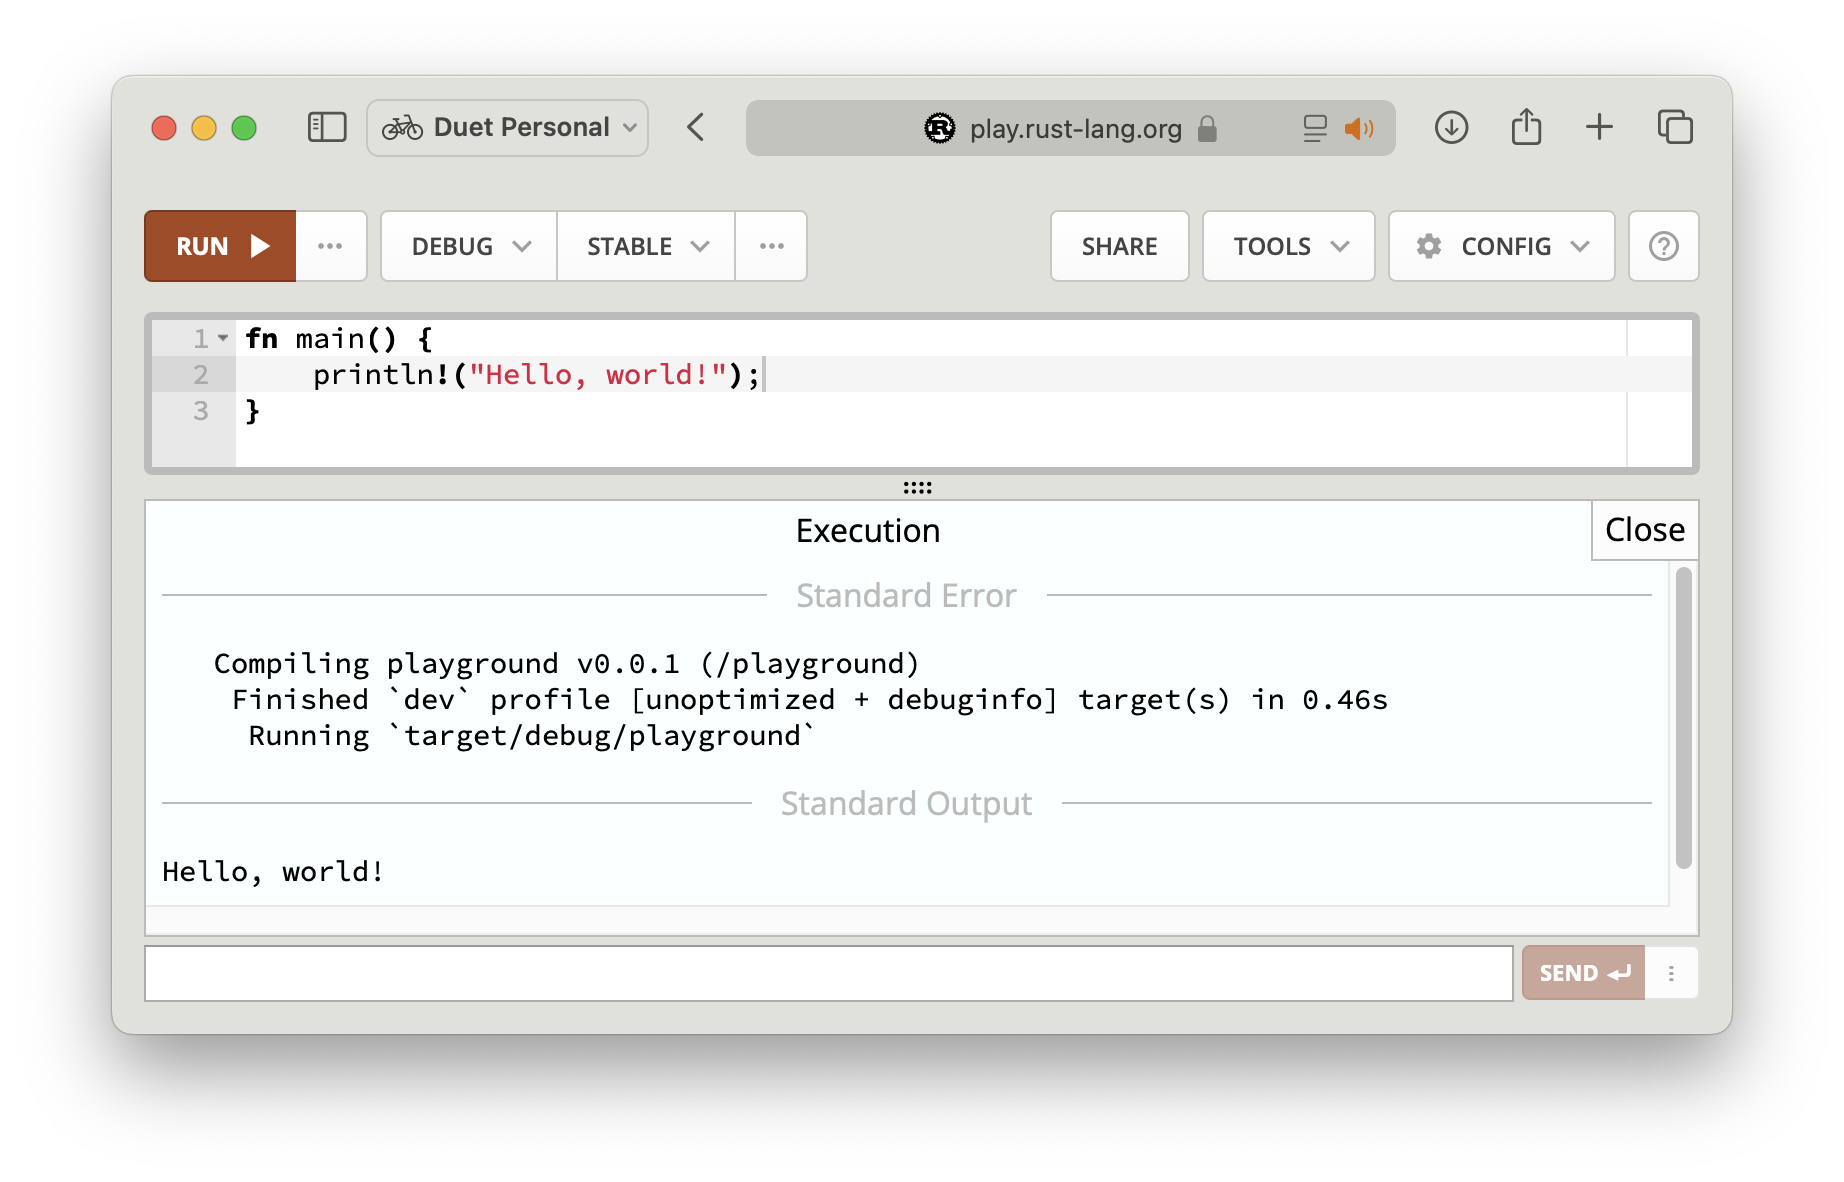
Một số tips:
- Bấm Run để chạy code. Có thể chuyển đổi giữa các version của Rust.
- Chọn Release thay vì Debug để chạy nhanh hơn (nhưng thiếu một số thông tin debug).
- Chọn Share để chia sẻ link đoạn code với người khác.
- Rustfmt sẽ tự động format code của bạn (như
cargo fmt). - Clippy sẽ kiểm tra code của bạn và đưa ra gợi ý (như
cargo clippy).
Project đầu tiên
Sau khi cài đặt Rust thành công, bạn có thể bắt đầu sử dụng Cargo (một công cụ quản lý gói mạnh mẽ được tích hợp sẵn trong Rust) để khởi tạo project hello world đầu tiên.
Bước 1: Tạo một package mới
Để bắt đầu với Cargo, bạn cần tạo một package mới bằng lệnh cargo new <name>. Ví dụ, để tạo một package mới với tên là hello_world, bạn chạy lệnh sau đây:
$ cargo new hello_world
# Created binary (application) `hello_world` package
Cargo sẽ tạo ra một package mới với một file Cargo.toml và một thư mục src. File Cargo.toml chứa tất cả các thông tin liên quan đến package của bạn.
$ tree .
.
├── Cargo.toml
└── src
    └── main.rs

2 directories, 2 files
Hãy xem nội dung của src/main.rs
fn main() {
    println!("Hello, world!");
}
Bước 2: Biên dịch và chạy chương trình
Tiếp theo, để biên dịch chương trình của bạn, hãy chạy lệnh cargo build. Sau khi quá trình biên dịch kết thúc, Cargo sẽ tạo ra một thư mục mới có tên target, chứa tệp thực thi của chương trình.
$ cargo build

# Compiling hello_world v0.1.0 (/Users/duyet/project/hello_world)
#    Finished dev [unoptimized + debuginfo] target(s) in 0.67s
Để chạy chương trình, bạn có thể sử dụng lệnh ./target/debug/<name>. Ví dụ, để chạy chương trình hello_world, bạn có thể chạy lệnh sau đây:
$ ./target/debug/hello_world
# Hello, world!
Kết quả sẽ hiển thị trên màn hình là “Hello, world!”. Ngoài ra, bạn cũng có thể biên dịch và chạy chương trình chỉ trong một bước bằng cách sử dụng lệnh cargo run.
$ cargo run
# Hello, world!
References
Variables
Variables trong Rust có kiểu dữ liệu tĩnh. Ta khai báo kiểu dữ liệu trong lúc khai báo biến. Trong đa số các trường hợp compiler có thể đoán được kiểu dữ liệu nên đôi khi ta có thể bỏ qua.
fn main() {
let an_integer = 1u32;
let a_boolean = true;
let unit = ();

// copy `an_integer` into `copied_integer`
let copied_integer = an_integer;
}
Mọi biến đều phải được sử dụng, nếu không, compiler sẽ warning. Để skip warning, thêm dấu underscore ở đầu tên biến.
fn check_error() {}
fn main() {
// The compiler warns about unused variable bindings; these warnings can
// be silenced by prefixing the variable name with an underscore
let _unused_variable = 3u32;

// Skip the result of function
let _ = check_error();
}
mut
Mọi biến trong Rust mặc định là immutable, có nghĩa là không thể thay đổi, không thể gán bằng một giá trị khác.
fn main() {
let a = 1;
a = 2;
}

// error[E0384]: cannot assign twice to immutable variable `a`
//  --> src/main.rs:4:1
//   |
// 3 | let a = 1;
//   |     -
//   |     |
//   |     first assignment to `a`
//   |     help: consider making this binding mutable: `mut a`
// 4 | a = 2;
//   | ^^^^^ cannot assign twice to immutable variable
Để có thể thay đổi giá trị của biến, ta thêm từ khóa mut sau let.
fn main() {
let mut a = 1;
a = 2;

println!("a = {}", a);
}
Ta cũng có thể khai báo lại biến đó để assign lại giá trị mới:
fn main() {
let a = 1;
let a = a + 1;
}
Scope
Giá trị của variables có thể được xác định tùy theo scope.
Scope là một tập hợp các dòng code nằm trong {}.
let a = 1;

{
    let a = 2;
    println!("inner: a = {}", a); // 2
}

println!("outer: a = {}", a); // 1
Return trong scope
Ta cũng có thể return giá trị trong một scope cho một variable.
let a = {
    let y = 10;
    let z = 100;

    y + z
};

println!("a = {}", a);
mut
mut
Mọi biến trong Rust mặc định là immutable, có nghĩa là không thể thay đổi, không thể gán bằng một giá trị khác.
fn main() {
let a = 1;
a = 2;
}

// error[E0384]: cannot assign twice to immutable variable `a`
//  --> src/main.rs:4:1
//   |
// 3 | let a = 1;
//   |     -
//   |     |
//   |     first assignment to `a`
//   |     help: consider making this binding mutable: `mut a`
// 4 | a = 2;
//   | ^^^^^ cannot assign twice to immutable variable
Để có thể thay đổi giá trị của biến, ta thêm từ khóa mut sau let.
fn main() {
let mut a = 1;
a = 2;

println!("a = {}", a);
}
Ta cũng có thể khai báo lại biến đó để assign lại giá trị mới:
fn main() {
let a = 1;
let a = a + 1;
}
uninitialized variable
Variable mà chưa được gán giá trị được gọi là uninitialized variable.
fn main() {
  let my_variable; // ⚠️
}
Rust sẽ không compile và bạn sẽ không thể sử dụng cho đến khi my_variable được gán giá trị nào đó. Ta có thể lợi dụng điều này:
- Khai báo uninitialized variable.
- Gán giá trị cho nó trong 1 scope khác
- Vẫn giữ được giá trị của của variable đó khi ra khỏi scope.
fn main() {
  let my_number;
  {
    my_number = 100;
  }

  println!("{}", my_number);
}
Hoặc phức tạp hơn
fn loop_then_return(mut counter: i32) -> i32 {
  loop {
    counter += 1;
    if counter % 50 == 0 {
      break;
    }
  }

  counter
}

fn main() {
  let my_number;

  {
    // Pretend we need to have this code block
    let number = {
      // Pretend there is code here to make a number
      // Lots of code, and finally:
      57
    };

    my_number = loop_then_return(number);
  }

  println!("{}", my_number); // 100
}
Closure
Hay còn được gọi là anonymous functions hay lambda functions. Khác với function bình thường, kiểu dữ liệu của tham số đầu vào và kiểu dữ liệu trả ra là không bắt buộc.
Function bình thường:
fn get_square_value(i: i32) -> i32 {
  i * i
}

fn main() {
  let x = 2;
  println!("{}", get_square_value(x));
}
Closure:
fn main() {
  let x = 2;

  let square = |i: i32| -> i32 {
      i * i
  };

  println!("{}", square(x));
}
Closure không cần data type
fn main() {
  let x = 2;

  let square = |i| {
    i * i
  };

  println!("{}", square(x));
}
Tham số của của closure được đặt giữa 2 dấu: | và |.
Closure không có tham số
Với closure không có tham số, ta viết như sau:
#![allow(unused)]
fn main() {
let func = || { 1 + 1 };
}
Closure chỉ có một mệnh đề
Dấu ngoặc {} cũng không bắt buộc nếu nội dung của closure chỉ có một mệnh đề.
#![allow(unused)]
fn main() {
let func = || 1 + 1;
}
Vừa định nghĩa, vừa thực thi
fn main() {
  let x = 2;

  let square = |i| -> i32 { // ⭐️ nhưng bắt buộc khai báo return type
    i * i
  }(x);

  println!("{}", square);
}
Cargo
cargo là package management tool official của Rust.
cargo có rất nhiều tính năng hữu ích để improve code quality và nâng cao tốc độ của lập trình viên.
cargo có hẳn một quyển sách riêng: The Cargo Book
Những tính năng phổ biến mà bạn sẽ phải dùng hằng ngày:
cargo add <crate>: cài đặt crate mới từ https://crates.io, crate sẽ được thêm vàoCargo.toml.cargo rhoặccargo run: biên dịch và chạy chương trình (main.rs).cargo thoặccargo test: run mọi tests (unit tests, doc tests, integration tests).cargo fmt: format code.cargo clippy: lint để bắt các lỗi phổ biến trong lập trình, code đẹp hơn, chạy nhanh hơn, etc. https://github.com/rust-lang/rust-clippy
Packages và Crates
Package là một hoặc nhiều crates. Một package gồm một file Cargo.toml mô tả cách để build các crates đó.
Crate có thể là một binary crate hoặc library crate.
- binary crate có thể được compile thành binary và có thể thực thi được, ví dụ như một command-line hoặc server. Một binary crate bắt buộc phải có một hàm
main() - library crate không cần hàm
main(). Library crate dùng để share các tính năng cho các project khác.
Package layout
Được mô tả trong Cargo book, một package trong Rust sẽ có layout như sau:
.
├── Cargo.lock
├── Cargo.toml
├── src/
│   ├── lib.rs
│   ├── main.rs
│   ├── helper.rs
│   ├── utils/
│   │   ├── mod.rs
│   │   └── math.rs
│   └── bin/
│       ├── named-executable.rs
│       └── another-executable.rs
├── benches/
│   ├── large-input.rs
│   └── multi-file-bench.rs
├── examples/
│   ├── simple.rs
│   └── complex.rs
└── tests/
    ├── some-integration-tests.rs
    └── multi-file-test/
        ├── main.rs
        └── test_module.rs
Cargo.tomlvàCargo.lockdược đặt ở thư mục gốc của package. Thường để sử dụng các library nào đó, người ta sẽ hướng dẫn bạn thêm một dòng ví dụlog = "0.6"bên dưới section[dependencies]hoặc[dev-dependencies]. Không nên đụng đến fileCargo.lockdo nó được generate tự động.- Source code được đặt trong thư mục
src. - File chính của library crate là
src/lib.rs. - File chính của binary crate là
src/main.rs. - Benchmark code được đặt trong thư mục
benches. - Code ví dụ (examples) được đặt trong thư mục
examples. - Integration tests được đặt trong thư mục
tests. helper.rsvàutils/được gọi là các module. Nếu module là một thư mục gồm nhiều file khác, filemod.rsđược coi như là file index của module đó. Xem thêm về modules tại đây.
Crate
Crate có thể là một binary crate hoặc library crate.
- binary crate có thể được compile thành binary và có thể thực thi được, ví dụ như một command-line hoặc server. Một binary crate bắt buộc phải có một hàm
main() - library crate không cần hàm
main(). Library crate dùng để share các tính năng cho các project khác.
Crate được publish trên https://crates.io.
Init crate
Để tạo một crate mới ta sử dụng cargo:
cargo new crate_name: binary crate.cargo new crate_name --lib: library crate.
Layout của binary crate và library crate
// Binary crate

├── Cargo.toml
└── src
    └── main.rs
// Library crate

├── Cargo.toml
└── src
    └── lib.rs
Một crate có thể vừa có lib.rs và main.rs.
Binary crate khi cargo build hoặc cargo run sẽ build ra một file binary bỏ trong ./target/debug/<crate_name>.
Khi build cho môi trường production, ta thêm --release lúc này cargo sẽ build thành binary bỏ trong ./target/release/<crate_name>.
debug hay release được gọi là các build target. Build trong release sẽ được apply nhiều optimization hơn, kích thước nhỏ hơn, chạy nhanh hơn nhưng compile lâu hơn.
use crate
Để sử dụng (import) một crate từ https://crates.io, ví dụ https://crates.io/crates/log.
1. Thêm crate vào Cargo.toml
Có 2 cách
Cách 1: Edit trực tiếp file Cargo.toml
[dependencies]
log = "0.4"
Cách 2: Sử dụng cargo add, cargo sẽ tự động update file Cargo.toml cho bạn
cargo add log
[dependencies]
log = "0.4.17"
Để thêm crate vào dev dependencies (dùng cho tests), ta thêm --dev vào lệnh:
cargo add --dev log
[dev-dependencies]
log = "0.4.17"
2. Sử dụng crate trong code
fn main() {
    log::info!("hello");
    log::error!("oops");
}
Sử dụng keyword use. Chức năng chính của use là bind lại full path
của element vào một tên mới, để chúng ta không cần phải lặp lại một tên dài mỗi lần sử dụng.
use log::info;
use log::error;

fn main() {
    info!("hello");
    error!("oops");
}
Nhóm các import lại với nhau:
use log::{info, error};

fn main() {
    info!("hello");
    error!("oops");
}
Import mọi thứ được public trong crate/module. Cách này thường hay tránh bởi
sẽ khó biết được function, struct, … nào đó đang thuộc crate nào, ngoại trừ các prelude::*.
use log::*;

fn main() {
    info!("hello");
    error!("oops");
}
use trong scope
use cũng thường được sử dụng import element vào trong scope hiện tại.
#![allow(unused)]
fn main() {
fn hello() -> String {
  "Hello, world!".to_string()
}

#[cfg(test)]
mod tests {
  use super::hello; // Import the `hello()` function into the scope

  #[test]
  fn test_hello() {
    assert_eq!("Hello, world!", hello()); // If not using the above `use` statement, we can run same via `super::hello()`
  }
}
}
Bạn sẽ sẽ hay gặp:
#![allow(unused)]
fn main() {
// ...

#[cfg(test)]
mod tests {
  use super::*;
  use log::info;

  // ...
}
}self::, super::
Mặc định thì use sẽ import đường dẫn tuyệt đối, bắt đầu từ crate root.
self và super thường dùng để import mod theo vị trí tương đối.
#![allow(unused)]
fn main() {
// src/level_1/level_2/mod.rs

use self::hello_1;
use super::super::level3::hello_2;
}
Re-export
Một trường hợp đặt biệt là sử dụng pub use là re-exporting,
khi bạn thiết kế một module bạn có thể export một số thứ từ module khác (*) từ module của bạn.
Do đó người sử dụng có thể sử dụng các module khác đó ngay từ module của bạn.
Module khác (*) đó có thể là một internal module, internal crate hoặc external crate.
#![allow(unused)]
fn main() {
// src/utils.rs
pub use log::*;

}
// src/main.rs
use crate::utils::info;
fn main() {
info!("...");
}Pattern này được sử dụng khá nhiều ở các thư viện lớn. Nó giúp ẩn đi các internal module phức tạp của library đối với user. Bởi vì user sẽ không cần quan tâm đến cấu trúc directory phức tạp khi sử dụng một library nào đó.
use self, use super
self::, super::
Mặc định thì use sẽ import đường dẫn tuyệt đối, bắt đầu từ crate root.
self và super thường dùng để import mod theo vị trí tương đối.
#![allow(unused)]
fn main() {
// src/level_1/level_2/mod.rs

use self::hello_1;
use super::super::level3::hello_2;
}
pub use
Re-export
Một trường hợp đặt biệt là sử dụng pub use là re-exporting,
khi bạn thiết kế một module bạn có thể export một số thứ từ module khác (*) từ module của bạn.
Do đó người sử dụng có thể sử dụng các module khác đó ngay từ module của bạn.
Module khác (*) đó có thể là một internal module, internal crate hoặc external crate.
#![allow(unused)]
fn main() {
// src/utils.rs
pub use log::*;

}
// src/main.rs
use crate::utils::info;
fn main() {
info!("...");
}Pattern này được sử dụng khá nhiều ở các thư viện lớn. Nó giúp ẩn đi các internal module phức tạp của library đối với user. Bởi vì user sẽ không cần quan tâm đến cấu trúc directory phức tạp khi sử dụng một library nào đó.
Preludes
Preludes là những thứ được định nghĩa trong std,
và được import sẵn, vì chúng thường sẽ phải được dùng trong mọi chương trình Rust.
Bạn có thể sử dụng mà không cần phải import, ví dụ như: Option,
Result, Ok, Err, …
Mặc dù std của Rust có rất nhiều module và tính năng, nhưng không phải mọi thứ đều được preludes.
Đây là danh sách những thứ được preludes: https://doc.rust-lang.org/std/prelude/#prelude-contents
std::marker::{Copy,Send,Sized,Sync,Unpin}std::ops::{Drop,Fn,FnMut,FnOnce}().std::mem::dropstd::boxed::Boxstd::borrow::ToOwnedto_owned, the generic method for creating an owned type from a borrowed type.std::clone::Cloneclone, the method for producing a copy of a value.std::cmp::{PartialEq,PartialOrd,Eq,Ord}std::convert::{AsRef,AsMut,Into,From}std::default::Defaultstd::iter::{Iterator,Extend,IntoIterator,DoubleEndedIterator,ExactSizeIterator}std::option::Option::{self,Some,None}std::result::Result::{self,Ok,Err}Option, its variants are exported as well.std::string::{String,ToString}std::vec::Vec
The prelude used in Rust 2021, std::prelude::rust_2021, includes all of the above,
and in addition re-exports:
Ownership
Ownership là một trong những tính năng đặc trưng của Rust, đây là cách giúp Rust đảm bảo memory safety mà không cần đến garbage collector.
Ownership là gì?
Ownership là một khái niệm mới. Tất cả các chương trình đều cần phải quản lý bộ nhớ mà chúng sử dụng trong quá trình thực thi. Một số ngôn ngữ sử dụng garbage collection để tìm và giải phóng bộ nhớ trong thời gian chạy, trong khi một số ngôn ngữ khác yêu cầu lập trình viên tự cấp phát (allocate) và giải phóng (free) bộ nhớ. Rust đi theo một hướng khác, trong đó bộ nhớ được quản lý bởi một hệ thống ownership với các quy tắc mà trình biên dịch sử dụng để kiểm tra (check) trong quá trình biên dịch. Bằng cách này, Rust buộc chúng ta phải viết mã theo cách an toàn cho bộ nhớ, và sẽ phát hiện lỗi ngay trong quá trình biên dịch. Càng hiểu rõ về khái niệm ownership, chúng ta càng có thể viết mã an toàn và hiệu quả hơn.
Để tìm hiểu kỹ hơn về Ownership, bạn có thể đọc Rust Book tại đây cực kỳ chi tiết: https://doc.rust-lang.org/book/ch04-01-what-is-ownership.html
Ownership Rules
Nói đơn giản về ownership rules thì có một số điều cơ bản sau:
- Mỗi giá trị trong Rust đều có một biến gọi là owner của nó.
- Chỉ có một owner tại một thời điểm.
- Khi owner ra khỏi scope, giá trị sẽ bị hủy.
Borrow checker
Bằng cách theo dõi data sử dụng thông qua bộ rules,
borrow checker có thể xác định khi nào data cần được khởi tạo
(initialized) và khi nào cần được giải phóng (freed, or dropped).
Thực tế sẽ có một trong ba trường hợp sau khi bạn sử dụng variable:
tự move data và bỏ ownership; copy data sang một variable khác;
hoặc sử dụng reference (con trỏ) đến data và vẫn giữ ownership,
cho mượn (borrow) nó một thời gian.
Chỉ cần nhớ hai quy tắc quan trọng:
- Khi truyền một variable (thay vì reference tới variable) cho một function khác, ta sẽ mất quyền ownership. Function đó sẽ là owner của variable này và bạn không thể sử dụng lại được nữa ở context cũ.
- Khi truyền một reference tới variable, bạn có thể immutable borrow không giới hạn; hoặc mutable borrow một lần.
Ví dụ: đoạn chương trình sau sẽ không compile được
fn hold_my_vec<T>(_: Vec<T>) {}

fn main() {
  let x = vec![1, 2, 3];
  hold_my_vec(x);

  let z = x.get(0);
  println!("Got: {:?}", z);
}
Compiler sẽ báo lỗi như sau: rustc main.rs
error[E0382]: borrow of moved value: `x`
    --> main.rs:7:13
  |
4 |  let x = vec![1, 2, 3];
  |      - move occurs because `x` has type `Vec<i32>`, which does not implement the `Copy` trait
5 |  hold_my_vec(x);
  |              - value moved here
6 |
7 |  let z = x.get(0);
  |          ^^^^^^^^ value borrowed here after move
  |
  = note: borrow occurs due to deref coercion to `[i32]`
Lỗi nói rằng Vec<i32> không implement
Copy trait,
vì thế data sẽ được di chuyển (move) hoặc mượn (borrow) vào function
hold_my_vec(). Do đó dòng 7 không thể thực hiện được do x được
được move vào trong function kia.
Mặc dùng không thể implement Copy trait, Vec vẫn có
Clone trait.
Chỉ để cho code chạy được thì đây là một cách nhanh để compiler ngưng báo lỗi.
Lưu ý thì việc clone thường sẽ tốn khá nhiều chi phí, nhất là đối với những object lớn.
fn hold_my_vec<T>(_: Vec<T>) {}

fn main() {
  let x = vec![1, 2, 3];
  hold_my_vec(x.clone()); // <-- x.clone()

  let z = x.get(0);
  println!("Got: {:?}", z);
}
Trong trường hợp này, function hold_my_vec không làm gì ngoài việc nhận ownership.
Có một cách tốt hơn là references.
Thay vì để function nhận ownership, ta có thể cho nó mượn giá trị.
Chúng ta sẽ truyền vào một reference — một giá trị được mượn.
fn hold_my_vec<T>(_: &Vec<T>) {}

fn main() {
  let x = vec![1, 2, 3];
  hold_my_vec(&x); // <--- &x

  let z = x.get(0);
  println!("Got: {:?}", z);
}
Với cách này thì chúng ta sẽ để function mượn trong khi vẫn có thể tiếp tục sử sử dụng trong chương trình.
Bạn có thể đọc thêm về Ownership, References and Borrowing và The Slice Type tại the Rust Book.
Struct
Struct được sử dụng trong Rust rất nhiều, hầu như là mọi lúc. Với struct ta có thể định nghĩa một kiểu dữ liệu riêng.
Tên của struct thường là UpperCamelCase. Nếu bạn định nghĩa tên struct là lowercase, compiler sẽ nhắc nhở ngay.
warning: type `duyet_struct` should have an upper camel case name
 --> src/main.rs:1:8
  |
1 | struct duyet_struct;
  |        ^^^^^^^^^^^^ help: convert the identifier to upper camel case: `DuyetStruct`
  |
  = note: `#[warn(non_camel_case_types)]` on by default
Có 3 loại struct:
Unit struct
Unit struct là một struct mà không có gì cả:
struct FileDirectory;
fn main() {}
Tuple struct
Tuple struct hay còn gọi là Unnamed struct. Bạn chỉ cần định nghĩa kiểu dữ liệu, không cần định tên field name.
struct Colour(u8, u8, u8);

fn main() {
  let my_colour = Colour(50, 0, 50); // Make a colour out of RGB (red, green, blue)

  println!("The first part of the colour is: {}", my_colour.0);
  println!("The second part of the colour is: {}", my_colour.1);
}

// The first part of the colour is: 50
// The second part of the colour is: 0
Named struct
Phổ biến nhất, bạn sẽ phải định nghĩa field name trong block {}
struct Colour(u8, u8, u8); // Declare the same Colour tuple struct

struct SizeAndColour {
  size: u32,
  colour: Colour, // And we put it in our new named struct
		  // The last comma is optional, but recommended
}

fn main() {
  let colour = Colour(50, 0, 50);

  let size_and_colour = SizeAndColour {
    size: 150,
    colour: colour
  };
}
colour: colour có thể được viết gọn lại thành:
let size_and_colour = SizeAndColour {
  size: 150,
  colour
};
Xem về Trait
Trait
Rust có nhiều loại data types như primitives (i8, i32, str, …), struct, enum và các loại kết hợp (aggregate) như tuples và array. Mọi types không có mối liên hệ nào với nhau. Các data types có các phương thức (methods) để tính toán hay convert từ loại này sang loại khác, nhưng chỉ để cho tiện lợi hơn, method chỉ là các function. Bạn sẽ làm gì nếu một tham số là nhiều loại kiểu dữ liệu? Một số ngôn ngữ như Typescript hay Python sẽ có cách sử dụng Union type như thế này:
function notify(data: string | number) {
  if (typeof data == 'number') {
    // ...
  } else if (typeof data == 'number') {
    // ...
  }
}
Còn trong Rust thì sao?

Trait là gì?
Có thể bạn đã thấy qua trait rồi: Debug, Copy, Clone, … là các trait.
Trait là một cơ chế abstract để thêm các tính năng (functionality) hay hành vi (behavior) khác nhau vào các kiểu dữ liệu (types) và tạo nên các mối quan hệ giữa chúng.
Trait thường đóng 2 vai trò:
- Giống như là interfaces trong Java hay C# (fun fact: lần đầu tiên nó được gọi là
interface). Ta có thể kế thừa (inheritance) interface, nhưng không kế thừa được implementation của interface*.* Cái này giúp Rust có thể hỗ trợ OOP. Nhưng có một chút khác biệt, nó không hẳn là interface. - Vai trò này phổ biến hơn, trait đóng vai trò là generic constraints. Dễ hiểu hơn, ví dụ, bạn định nghĩa một function, tham số là một kiểu dữ liệu bất kỳ nào đó, không quan tâm, miễn sau kiểu dữ liệu đó phải có phương thức
method_this(),method_that()nào đó cho tui. Kiểu dữ liệu nào đó gọi là genetic type. Function có chứa tham số generic type đó được gọi là generic function. Và việc ràng buộc phải cómethod_this(),method_that(), … gọi là generic constraints. Mình sẽ giải thích rõ cùng với các ví dụ sau dưới đây.
Để gắn một trait vào một type, bạn cần implement nó.
Bởi vì Debug hay Copy quá phổ biến, nên Rust có attribute để tự động implement:
#![allow(unused)]
fn main() {
#[derive(Debug)]
struct MyStruct {
  number: usize,
}
}
Nhưng một số trait phức tạp hơn bạn cần định nghĩa cụ thể
bằng cách impl nó. Ví dụ bạn có trait Add
(std::ops::Add)
để add 2 type lại với nhau. Nhưng Rust sẽ không biết cách bạn add 2
type đó lại như thế nào, bạn cần phải tự định nghĩa:
use std::ops::Add;

#[derive(Debug, PartialEq)]
struct MyStruct {
  number: usize,
}

impl Add for MyStruct {    // <-- here
  type Output = Self;
  fn add(self, other: Self) -> Self {
    Self { number: self.number + other.number }
  }
}

fn main() {
  let a1 = MyStruct { number: 1 };
  let a2 = MyStruct { number: 2 };
  let a3 = MyStruct { number: 3 };

  assert_eq!(a1 + a2, a3);
}
Note: Mình sẽ gọi Define Trait là việc định nghĩa,
khai báo một trait mới trong Rust (trait Add).
Implement Trait là việc khai báo nội dung của function được
liệu kê trong Trait cho một kiểu dữ liệu cụ thể nào đó (impl Add for MyStruct).
Chi tiết
- Khai báo Trait
- Implement Trait cho một Type
- Default Implementations
- Traits as Parameters
- Trait Bound
- Multiple Trait Bound
whereClauses- Returning Types that Implement Traits
- Using Trait Bounds to Conditionally Implement Methods
- Blanket implementations
- Trait Inheritance
- Supertraits
- Auto Trait
- Copy, Clone
- String và &str
- FromStr
- Display
Kết
Compiler sử dụng trait bound để kiểm tra các kiểu dữ liệu được sử dụng trong code có đúng behavior không. Trong Python hay các ngôn ngữ dynamic typed khác, ta sẽ gặp lỗi lúc runtime nếu chúng ta gọi các method mà kiểu dữ liệu đó không có hoặc không được định nghĩa.
Bạn có chắc chắn là a dưới đây có method summarize() hay không?
Nhớ rằng typing hint của Python3 chỉ có tác dụng là nhắc nhở cho lập trình viên thôi.
# Python
func print_it(a: Union[NewsArticle, Tweet]):
  print(a.summarize())

print_it(1)
print_it("what")
Do đó Rust bắt được mọi lỗi lúc compile time và force chúng ta phải fix hết trước khi chương trình chạy. Do đó chúng ta không cần phải viết thêm code để kiểm tra behavior (hay sự tồn tại của method) trước khi sử dụng lúc runtime nữa, tăng cường được performance mà không phải từ bỏ tính flexibility của generics.
Xem về Struct.
Khai báo / định nghĩa một Trait
Nhắc lại là Trait định nghĩa các hành vi (behavior). Các types khác nhau có thể chia sẻ cùng cá hành vi. Định nghĩa một trait giúp nhóm các hành vi để làm một việc gì đó.
Theo ví dụ của Rust Book, ví dụ ta các struct chứa nhiều loại text:
NewsArticlestruct chứa news story, vàTweetstruct có thể chứa tối đa 280 characters cùng với metadata.
Bây giờ chúng ta cần viết 1 crate name có tên là aggregator
có thể hiển thị summaries của data có thể store trên NewsArticle
hoặc Tweet instance. Chúng ta cần định nghĩa method summarize
trên mỗi instance. Để định nghĩa một trait, ta dùng trait theo sau
là trait name; dùng keyword pub nếu định nghĩa một public trait.
pub trait Summary {
  fn summarize(&self) -> String;
}
Trong ngoặc, ta định nghĩa các method signatures để định nghĩa hành vi:
fn summarize(&self) -> String. Ta có thể định nghĩa nội dung của function.
Hoặc không, ta dùng ; kết thúc method signature, để bắt buộc type nào
implement trait Summary đều phải định nghĩa riêng cho nó,
bởi vì mỗi type (NewsArticle hay Tweet) đều có cách riêng để summarize. Mỗi trait có thể có nhiều method.
Implement Trait cho một Type
Bây giờ ta định implement các method của trait Summary cho từng type.
Ví dụ dưới đây ta có struct NewsArticle và struct Tweet,
và ta định nghĩa summarize cho 2 struct này.
    pub trait Summary {
        fn summarize(&self) -> String;
    }

    pub struct NewsArticle {
        pub headline: String,
        pub location: String,
        pub author: String,
        pub content: String,
    }

    impl Summary for NewsArticle {
        fn summarize(&self) -> String {
            format!("{}, by {} ({})", self.headline, self.author, self.location)
        }
    }

    pub struct Tweet {
        pub username: String,
        pub content: String,
        pub reply: bool,
        pub retweet: bool,
    }

    impl Summary for Tweet {
        fn summarize(&self) -> String {
            format!("{}: {}", self.username, self.content)
        }
    }
Implement trait cho type giống như impl bình thường,
chỉ có khác là ta thêm trait name và keyword for sau impl.
Bây giờ Summary đã được implement cho NewsArticle và Tweet,
người sử dụng crate đã có thể sử dụng các phương thức của trait như các method function bình thường.
Chỉ một điều khác biệt là bạn cần mang trait đó vào cùng scope hiện tại cùng với type để có thể sử dụng.
Ví dụ:
use aggregator::{Summary, Tweet}; // <-- same scope

fn main() {
  let tweet = Tweet {
    username: String::from("horse_ebooks"),
    content: String::from("of course, as you probably already know, people"),
    reply: false,
    retweet: false,
  };

  println!("1 new tweet: {}", tweet.summarize());
  // 1 new tweet: horse_ebooks: of course, as you probably already know, people
}
Rust Playground: https://play.rust-lang.org/?version=stable&mode=debug&edition=2021&gist=dc563051aecebae4344776c06fb1b49d
Chúng ta có thể implement trait cho mọi type khác bất kỳ, ví dụ implement Summary cho Vec<T> trong scope của crate hiện tại.
pub trait Summary {
  fn summarize(&self) -> String;
}

impl<T> Summary for Vec<T> {    // <-- local scope
  fn summarize(&self) -> String {
    format!("There are {} items in vec", self.len())
  }
}

fn main() {
  let vec = vec![1i32, 2i32];
  println!("{}", vec.summarize());
  // There are 2 items in vec
}
Rust Playground: https://play.rust-lang.org/?version=stable&mode=debug&edition=2021&gist=dcaa812fab222ec0c713a38b066bda20
Bạn sẽ không thể implement external traits trên external types.
Ví dụ ta không thể implement Display cho Vec<T> bởi vì
Display và Vec<T> được định nghĩa trong standard library,
trong trong crate hiện tại. Rule này giúp tránh chống chéo và chắc chắn
rằng không ai có thể break code của người khác và ngược lại.
Default Implementations
Đôi khi bạn cần có default behavior mà không cần phải implement content cho từng type mỗi khi cần sử dụng:
pub trait Summary {
  fn summarize(&self) -> String {
    String::from("(Read more...)")
  }
}

pub struct NewsArticle {
  pub headline: String,
  pub location: String,
  pub author: String,
  pub content: String,
}

impl Summary for NewsArticle {}; // <-- sử dụng {}

fn main() {
  let article = NewsArticle { ... };
  println!("New article: {}", article.summarize());
  // New article: (Read more...)
}
Traits as Parameters
Trở lại ví dụ Typescript ở đầu tiên, với Trait bạn đã có thể define một function chấp nhận tham số là nhiều kiểu dữ liệu khác nhau. Nói theo một cách khác, bạn không cần biết kiểu dữ liệu, bạn cần biết kiểu dữ liệu đó mang các behavior nào thì đúng hơn.
fn notify(data: &impl Summary) {
  println!("News: {}", data.summarize());
}

fn main() {
  let news = NewsArticle {};
  notify(news);
}
Ở đây, thay vì cần biết data là type nào (NewsArticle hay Tweet?),
ta chỉ cần cho Rust compiler biết là notify sẽ chấp nhận mọi
type có implement trait Summary, mà trait Summary có behavior .summarize(),
do đó ta có thể sử dụng method .summary() bên trong function.
Trait Bound
Một syntax sugar khác mà ta có thể sử dụng thay cho &impl Summary ở trên,
gọi là trait bound, bạn sẽ bắt gặp nhiều trong Rust document:
pub fn notify<T: Summary>(item: &T) {
  println!("News: {}", item.summarize());
}
Đầu tiên chúng ta định nghĩa trait bound bằng cách định nghĩa
một generic type parameter trước, sau đó là : trong ngoặc < và >.
Ta có thể đọc là: item có kiểu generic là T và T phải được impl Summary.
notify<T>(khai báo generic typeTnotify<T: Summary>(generic type được implementtrait Summary
Cú pháp này có thể dài hơn và không dễ đọc như &impl Summary, nhưng hãy xem ví dụ dưới đây:
pub fn notify(item1: &impl Summary, item2: &impl Summary) {}  // (1)
pub fn notify<T: Summary>(item1: &T, item2: &T) {}            // (2)
Dùng trait bound giúp ta tái sử dụng lại T,
mà còn giúp force item1 và item2 có cùng kiểu dữ liệu,
đây là cách duy nhất (cả 2 đều là NewsArticle hoặc cả 2 đều là Tweet) mà (1) không thể.
Specifying Multiple Trait Bounds with the + Syntax
Ta có cú pháp + nếu muốn generic T có được impl nhiều trait khác nhau.
Ví dụ ta muốn item phải có cả Summary lẫn Display
pub fn notify(item: &(impl Summary + Display)) {}
pub fn notify<T: Summary + Display>(item: &T) {}
where Clauses
Đôi khi bạn sẽ có nhiều genenic type, mỗi generic type lại có nhiều trait bound,
khiến code khó đọc. Rust có một cú pháp where cho phép định nghĩa trait bound
phía sau function signature. Ví dụ:
fn some_function<T: Display + Clone, U: Clone + Debug>(t: &T, u: &U) -> i32 {Với where clause:
fn some_function<T, U>(t: &T, u: &U) -> i32
    where T: Display + Clone,
	  U: Clone + Debug,
{
Returning Types that Implement Traits
Chúng ta cũng có thể sử dụng impl Trait cho giá trị được trả về của function.
fn returns_summarizable() -> impl Summary {
    Tweet {
        username: String::from("horse_ebooks"),
        content: String::from("ahihi"),
        reply: false,
        retweet: false,
    }
}
Được đọc là: function returns_summarizable() trả về bất kỳ kiểu dữ liệu nào có impl Summary.
Tuy nhiên bạn chỉ có thể return về hoặc Tweet
hoặc NewsArticle do cách implement của compiler. Code sau sẽ có lỗi:
fn returns_summarizable(switch: bool) -> impl Summary {
    if switch { NewsArticle {} }
		else { Tweet {} }
}
Rust Book có một chương riêng để xử lý vấn đề này: Chapter 17: Using Trait Objects That Allow for Values of Different Types
Using Trait Bounds to Conditionally Implement Methods
Ta có thể implement 1 method có điều kiện cho bất kỳ type nào có implement một trait khác cụ thể. Ví dụ để dễ hiểu hơn dưới đây:
use std::fmt::Display;

struct Pair<T> {
  x: T,
  y: T,
}

impl<T> Pair<T> {
  fn new(x: T, y: T) -> Self {
    Self { x, y }
  }
}

impl<T: Display + PartialOrd> Pair<T> {
  fn cmp_display(&self) {
    if self.x >= self.y {
      println!("The largest member is x = {}", self.x);
    } else {
      println!("The largest member is y = {}", self.y);
    }
  }
}
impl<T> Pair<T> implement function new trả về kiểu dữ liệu Pair<T> với T là generic (bất kỳ kiểu dữ liệu nào.
impl<T: Display + PartialOrd> Pair<T> implement function cmp_display
cho mọi generic T với T đã được implement Display + PartialOrd
trước đó rồi (do đó mới có thể sử dụng các behavior của
Display (println!("{}")) và PartialOrd (>, <, …) được.
Blanket implementations
Ta cũng có thể implement 1 trait có điều kiện cho bất kỳ kiểu dữ liệu nào có implement một trait khác rồi. Implementation của một trait cho 1 kiểu dữ liệu khác thỏa mãn trait bound được gọi là blanket implementations và được sử dụng rộng rãi trong Rust standard library. Hơi xoắn não nhưng hãy xem ví dụ dưới đây.
Ví dụ: ToString trait trong
Rust standard library,
nó được implement cho mọi kiểu dữ liệu nào có được implement Display trait.
impl<T: Display> ToString for T {
  // --snip--
}
Có nghĩa là, với mọi type có impl Display, ta có hiển nhiên thể sử dụng được các thuộc tính của trait ToString.
let s = 3.to_string(); // do 3 thoaỏa manãn DisplayDo 3 thỏa mãn điều kiện là đã được impl Display for i32.
(https://doc.rust-lang.org/std/fmt/trait.Display.html#impl-Display-11)
Trait Inheritance
pub trait B: A {}Cái này không hẳn gọi là Trait Inheritance, cái này đúng hơn gọi là “cái nào implement cái B thì cũng nên implement cái A”. A và B vẫn là 2 trait độc lập nên vẫn phải implemenet cả 2.
impl B for Z {}
impl A for Z {}
Inheritance thì không được khuyến khích sử dụng.
Supertraits
Rust không có khái niệm “kế thừa” như trong OOP. Nhưng bạn có thể định nghĩa một trait là một tập hợp của các trait khác.
#![allow(unused)]
fn main() {
trait Person {
  fn name(&self) -> String;
}

// Person là một supertrait của Student.
// Implement Student yêu cầu bạn phải cũng phải impl Person.
trait Student: Person {
    fn university(&self) -> String;
}

trait Programmer {
    fn fav_language(&self) -> String;
}

// CompSciStudent (computer science student) là một subtrait
// của cả Programmer và Student.
//
// Implement CompSciStudent yêu cầu bạn phải impl tất cả supertraits.
trait CompSciStudent: Programmer + Student {
    fn git_username(&self) -> String;
}

fn comp_sci_student_greeting(student: &dyn CompSciStudent) -> String {
    format!(
        "My name is {} and I attend {}. My favorite language is {}. My Git username is {}",
        student.name(),
        student.university(),
        student.fav_language(),
        student.git_username()
    )
}

}
Auto Traits
Auto traits là các trait đánh dấu (marker trait) được tự động triển khai cho mọi kiểu dữ liệu,
trừ khi kiểu dữ liệu hoặc một kiểu dữ liệu mà nó chứa được khai báo tường minh là không impl bằng cách sử dụng negative_impls.
Ta cần bật feature auto_traits để khai báo auto trait.
#![allow(unused)]
#![feature(auto_traits)]

fn main() {
auto trait Valid {}
}
Sau đó, ta có thể triển khai trait Valid cho các kiểu dữ liệu khác nhau:
#![feature(auto_traits)]
#![feature(negative_impls)]
auto trait Valid {}

struct True;
struct False;

// Negative impl
// Có nghĩa là Valid không được auto impl cho struct False
impl !Valid for False {}

// Nếu T được impl trait Valid, thì MaybeValid<T> cũng được impl trait Valid
struct MaybeValid<T>(T);

fn must_be_valid<T: Valid>(_t: T) { }

fn main() {
    // Hoạt động
    must_be_valid(MaybeValid(True));

    // Báo lỗi - do `False` không được impl trait Valid
    // must_be_valid(MaybeValid(False));
}
Auto trait Valid, sẽ tự động impl cho mọi struct, enum, …
References
- https://doc.rust-lang.org/beta/unstable-book/language-features/auto-traits.html
Copy, Clone
Có một số kiểu dữ liệu trong Rust rất đơn giản (simple types),
bao gồm integers, floats, booleans (true và false), và char.
Các simple types này nằm trên stack bởi vì complier biết chính xác size của nó.
Chúng được gọi là copy types. Bởi vì nó simple và nhỏ gọn nên dễ dàng để copy,
do đó compiler luôn copy nếu bạn bỏ nó vào function.
Làm sao để biết đọc một kiểu dữ liệu có được implement Copy hay không.
Bạn có thể xem trong Rust document. Ví dụ char:
https://doc.rust-lang.org/std/primitive.char.html
Nếu bạn thấy:
- Copy: có thể được copy nếu bạn bỏ nó vào function.
- Display: bạn có thể sử dụng
{}để print. - Debug: bạn có thể sử dụng
{:?}để print.
fn prints_number(number: i32) {
  println!("{}", number);
}

fn main() {
  let my_number = 8;
  prints_number(my_number); // Prints 8. prints_number gets a copy of my_number
  prints_number(my_number); // Prints 8 again.
                            // No problem, because my_number is copy type!
}
Do i32 được Copy nên chúng ta có thể sử dụng my_number nhiều lần mà không cần borrow & như struct.
Clone trait
Nếu bạn đọc document của String: https://doc.rust-lang.org/std/string/struct.String.html
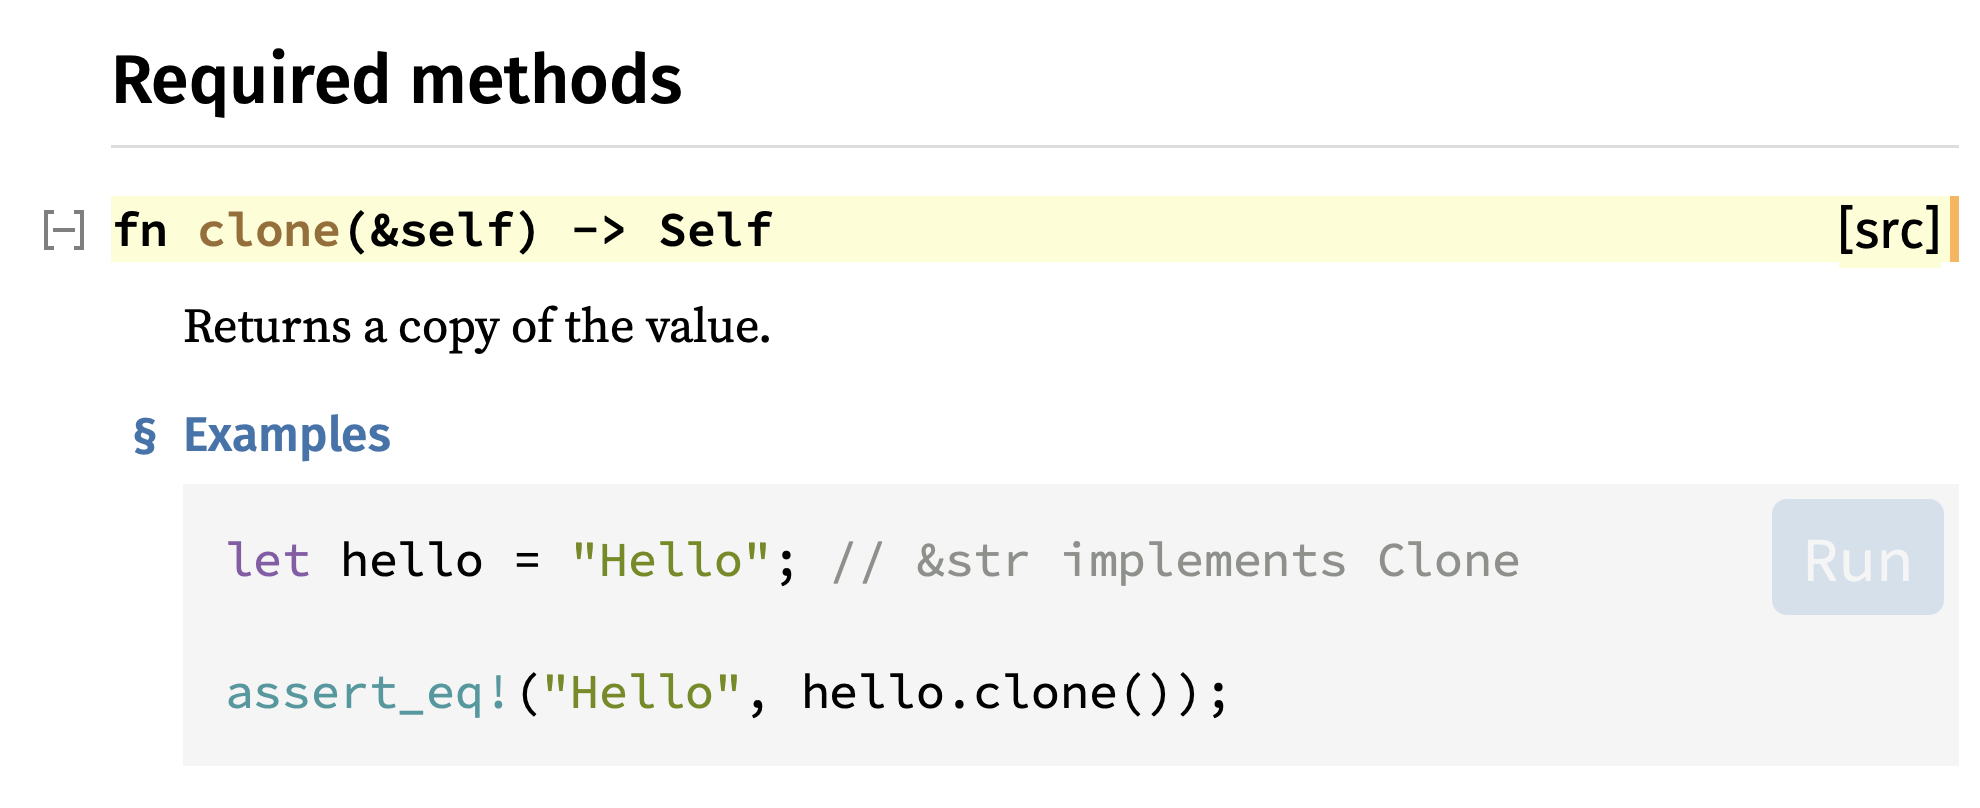
String không được implement Copy, thay vào đó là Clone. Clone cũng giúp copy giá trị nhưng sẽ cần rất nhiều memory, và ta phải tự gọi method .clone() chứ Rust sẽ không tự Clone.
fn prints_country(country_name: String) {
  println!("{}", country_name);
}

fn main() {
  let country = String::from("Duyet");
  prints_country(country);
  prints_country(country); // ⚠️
}
Sẽ báo lỗi, theo như compiler giải thích rằng country là String và không được implement Copy nên country bị move vào trong function. Do đó ta không thể sử dụng country được nữa.
error[E0382]: use of moved value: `country`
 --> src/main.rs:8:20
  |
6 | let country = String::from("Duyet");
  |     ------- move occurs because `country` has type `String`, which does not implement the `Copy` trait
7 | prints_country(country);
  |                ------- value moved here
8 | prints_country(country); // ⚠️
  |                ^^^^^^^ value used here after move

For more information about this error, try `rustc --explain E0382`.
Có hai cách:
(1) Sử dụng .clone()
fn prints_country(country_name: String) {
  println!("{}", country_name);
}

fn main() {
  let country = String::from("Duyet");
  prints_country(country.clone()); // <-- clone
  prints_country(country);
}
String rất lớn, do đó .copy() sẽ tốn rất nhiều bộ nhớ. Sử dụng & để reference sẽ nhanh hơn, nếu có thể.
(2) Sử dụng & reference
fn prints_country(country_name: &String) {
  println!("{}", country_name);
}

fn main() {
  let country = String::from("Duyet");
  prints_country(&country);
  prints_country(&country);
}
Bonus: String và &str
Nếu bạn có một String và & reference, Rust sẽ convert nó thành &str khi bạn cần.
fn prints_country(country_name: &str) {
  println!("{}", country_name);
}

fn main() {
  let country = String::from("Duyet");
  prints_country(&country);
  prints_country(&country);
}
&str là một kiểu hơi phức tạp.
- Nó có thể vừa là String literals
let s = "I am &str";. Trường hợp nàyscó kiểu&'staticbởi vì nó được ghi trực tiếp vào binary. &strcũng có thể là borrowed củastrhoặcString.
FromStr
FromStr là một trait để khởi tạo instance từ string trong Rust, nó tương đương abstract class nếu bạn có background OOP.
pub trait FromStr {
  type Err;
  fn from_str(s: &str) -> Result<Self, Self::Err>;
}
Thường phương thức from_str của FromStr thường được ngầm định
sử dụng thông qua phương thức
parse
của str. Ví dụ:
// Thay vì
let one = u32::from_str("1");

// thì sử dụng phương thức parse
let one: u32 = "1".parse().unwrap();
assert_eq!(1, one);

// parse() sử dụng turbofish ::<>
let two = "2".parse::<u32>();
assert_eq!(Ok(2), two);

let nope = "j".parse::<u32>();
assert!(nope.is_err());
parse là một phương thức general nên thường được sử dụng với kiểu dữ liệu
như trên hoặc sử dụng turbofish ::<> để thuật toán inference
có thể hiểu để parse thành đúng kiểu bạn cần.
Parse str to Struct
Bạn có 1 struct và muốn parse 1 str thành struct đó, bạn sẽ cần impl trait FromStr
use std::str::FromStr;
use std::num::ParseIntError;

#[derive(Debug, PartialEq)]
struct Point {
  x: i32,
  y: i32
}

impl FromStr for Point {
  type Err = ParseIntError;

  fn from_str(s: &str) -> Result<Self, Self::Err> {
    let coords: Vec<&str> = s.trim_matches(|p| p == '(' || p == ')' )
                               .split(',')
                               .collect();

    let x_fromstr = coords[0].parse::<i32>()?;
    let y_fromstr = coords[1].parse::<i32>()?;

    Ok(Point { x: x_fromstr, y: y_fromstr })
  }
}

// Có nhiều cách
let p: Point = "(1,2)".parse();
let p = "(1,2)".parse::<Point>();
let p = Point::from_str("(1,2)");

assert_eq!(p.unwrap(), Point{ x: 1, y: 2} )
Parse str to Enum
Một điều mình nhận thấy để code dễ đọc, dễ maintain hơn là ta nên sử dụng Enum thay cho string để so sánh giá trị. Ví dụ:
fn print(color: &str, text: &str) { ... }
print("Foobar", "blue");
Thay vì đó mà hãy sử dụng enum:
enum Color { Red, Green, CornflowerBlue }

fn print(color: Color, text: &str) { ... }
print(Green, "duyet");
Cũng nên hạn chế sử dụng quá nhiều Boolean, thực tế Boolean cũng chỉ là 1 enum
enum bool { true, false }Thay vào đó hãy tự định nghĩa enum cho các ngữ cảnh khác nhau để code dễ đọc hơn:
enum EnvVars { Clear, Inherit }
enum DisplayStyle { Color, Monochrome }
Chúng ta implement std::str::FromStr trait như sau:
use std::str::FromStr;

#[derive(Debug, PartialEq)]
enum Color {
  Red,
  Green,
  Blue
}

impl FromStr for Color {
  type Err = ();

  fn from_str(input: &str) -> Result<Color, Self::Err> {
    match input {
      "red"   => Ok(Color::Red),
      "green" => Ok(Color::Green),
      "blue"  => Ok(Color::Blue),
      _       => Err(()),
    }
  }
}

let c: Color = "red".parse().unwrap();
assert_eq!(c, Color::Red);
References
- Trait
- https://doc.rust-lang.org/nightly/std/primitive.str.html#method.parse
- https://doc.rust-lang.org/nightly/std/str/trait.FromStr.html
Display
Trait Display cho phép bạn định nghĩa cách một type được hiển thị khi sử dụng format string {}. Đây là trait quan trọng để tạo ra output thân thiện với người dùng.
Display vs Debug
Rust có hai trait chính cho việc formatting:
| Trait | Format Specifier | Mục đích |
|---|---|---|
Debug | {:?} hoặc {:#?} | Development, debugging (technical output) |
Display | {} | User-facing output (human-readable) |
#[derive(Debug)]
struct Point {
    x: i32,
    y: i32,
}

fn main() {
    let p = Point { x: 3, y: 4 };

    // Debug - technical output
    println!("{:?}", p);  // Point { x: 3, y: 4 }

    // Display - compile error! Display không được derive tự động
    // println!("{}", p);  // ❌ Error: `Point` doesn't implement `Display`
}
Implement Display
Để implement Display, bạn cần định nghĩa method fmt:
use std::fmt;

struct Point {
    x: i32,
    y: i32,
}

impl fmt::Display for Point {
    fn fmt(&self, f: &mut fmt::Formatter<'_>) -> fmt::Result {
        write!(f, "({}, {})", self.x, self.y)
    }
}

fn main() {
    let p = Point { x: 3, y: 4 };
    println!("{}", p);  // In ra: (3, 4)
}
Ví dụ với Enum
use std::fmt;

enum Status {
    Active,
    Inactive,
    Pending,
}

impl fmt::Display for Status {
    fn fmt(&self, f: &mut fmt::Formatter<'_>) -> fmt::Result {
        match self {
            Status::Active => write!(f, "Đang hoạt động"),
            Status::Inactive => write!(f, "Không hoạt động"),
            Status::Pending => write!(f, "Đang chờ xử lý"),
        }
    }
}

fn main() {
    let status = Status::Active;
    println!("Trạng thái: {}", status);  // In ra: Trạng thái: Đang hoạt động
}
Ví dụ với Struct phức tạp
use std::fmt;

struct Person {
    name: String,
    age: u32,
    email: String,
}

impl fmt::Display for Person {
    fn fmt(&self, f: &mut fmt::Formatter<'_>) -> fmt::Result {
        write!(
            f,
            "{} (tuổi {}) - Email: {}",
            self.name, self.age, self.email
        )
    }
}

fn main() {
    let person = Person {
        name: String::from("Nguyễn Văn A"),
        age: 25,
        email: String::from("nguyenvana@example.com"),
    };

    println!("{}", person);
    // In ra: Nguyễn Văn A (tuổi 25) - Email: nguyenvana@example.com
}
Display với nhiều format options
Bạn có thể sử dụng các format options từ Formatter:
use std::fmt;

struct Currency {
    amount: f64,
    symbol: &'static str,
}

impl fmt::Display for Currency {
    fn fmt(&self, f: &mut fmt::Formatter<'_>) -> fmt::Result {
        // Sử dụng precision từ format string
        if let Some(precision) = f.precision() {
            write!(f, "{}{:.precision$}", self.symbol, self.amount, precision = precision)
        } else {
            write!(f, "{}{:.2}", self.symbol, self.amount)
        }
    }
}

fn main() {
    let price = Currency { amount: 1234.5678, symbol: "$" };

    println!("{}", price);       // $1234.57 (mặc định 2 chữ số)
    println!("{:.0}", price);    // $1235 (không có phần thập phân)
    println!("{:.4}", price);    // $1234.5678 (4 chữ số thập phân)
}
Display với Vec và collection
use std::fmt;

struct NumberList {
    numbers: Vec<i32>,
}

impl fmt::Display for NumberList {
    fn fmt(&self, f: &mut fmt::Formatter<'_>) -> fmt::Result {
        let numbers_str: Vec<String> = self.numbers
            .iter()
            .map(|n| n.to_string())
            .collect();

        write!(f, "[{}]", numbers_str.join(", "))
    }
}

fn main() {
    let list = NumberList {
        numbers: vec![1, 2, 3, 4, 5],
    };

    println!("{}", list);  // In ra: [1, 2, 3, 4, 5]
}
Kết hợp Debug và Display
Thường thì bạn implement cả hai:
use std::fmt;

#[derive(Debug)]
struct User {
    id: u32,
    username: String,
    is_active: bool,
}

impl fmt::Display for User {
    fn fmt(&self, f: &mut fmt::Formatter<'_>) -> fmt::Result {
        write!(f, "@{}", self.username)
    }
}

fn main() {
    let user = User {
        id: 1,
        username: String::from("duyet"),
        is_active: true,
    };

    // Display - user-facing
    println!("User: {}", user);
    // In ra: User: @duyet

    // Debug - developer-facing
    println!("Debug: {:?}", user);
    // In ra: Debug: User { id: 1, username: "duyet", is_active: true }
}
Error handling với Display
Display thường được sử dụng khi implement custom error types:
use std::fmt;
use std::error::Error;

#[derive(Debug)]
enum MyError {
    NotFound(String),
    InvalidInput(String),
    NetworkError,
}

impl fmt::Display for MyError {
    fn fmt(&self, f: &mut fmt::Formatter<'_>) -> fmt::Result {
        match self {
            MyError::NotFound(item) => write!(f, "Không tìm thấy: {}", item),
            MyError::InvalidInput(msg) => write!(f, "Dữ liệu không hợp lệ: {}", msg),
            MyError::NetworkError => write!(f, "Lỗi kết nối mạng"),
        }
    }
}

impl Error for MyError {}

fn main() {
    let error = MyError::NotFound(String::from("user.txt"));
    println!("Lỗi: {}", error);
    // In ra: Lỗi: Không tìm thấy: user.txt
}
Display với nested types
use std::fmt;

struct Address {
    street: String,
    city: String,
}

impl fmt::Display for Address {
    fn fmt(&self, f: &mut fmt::Formatter<'_>) -> fmt::Result {
        write!(f, "{}, {}", self.street, self.city)
    }
}

struct Company {
    name: String,
    address: Address,
}

impl fmt::Display for Company {
    fn fmt(&self, f: &mut fmt::Formatter<'_>) -> fmt::Result {
        write!(f, "{} tại {}", self.name, self.address)
    }
}

fn main() {
    let company = Company {
        name: String::from("Rust Corp"),
        address: Address {
            street: String::from("123 Nguyễn Huệ"),
            city: String::from("TP.HCM"),
        },
    };

    println!("{}", company);
    // In ra: Rust Corp tại 123 Nguyễn Huệ, TP.HCM
}
So sánh với các ngôn ngữ khác
Python
class Point:
    def __init__(self, x, y):
        self.x = x
        self.y = y

    def __str__(self):  # Tương đương Display
        return f"({self.x}, {self.y})"

    def __repr__(self):  # Tương đương Debug
        return f"Point(x={self.x}, y={self.y})"

p = Point(3, 4)
print(p)       # Gọi __str__
print(repr(p)) # Gọi __repr__
Java
class Point {
    private int x, y;

    public Point(int x, int y) {
        this.x = x;
        this.y = y;
    }

    @Override
    public String toString() {  // Tương đương Display
        return String.format("(%d, %d)", x, y);
    }
}

Point p = new Point(3, 4);
System.out.println(p);  // Gọi toString()
Rust - Type Safe
Ưu điểm của Rust:
- Compiler bắt buộc phải implement Display nếu muốn dùng
{} - Không thể vô tình in ra kiểu dữ liệu chưa implement Display
- Phân biệt rõ ràng giữa Debug (technical) và Display (user-facing)
Best Practices
1. Display cho user, Debug cho developer
#![allow(unused)]
fn main() {
// ✅ Tốt
impl fmt::Display for User {
    fn fmt(&self, f: &mut fmt::Formatter<'_>) -> fmt::Result {
        write!(f, "{}", self.username)  // Simple, user-friendly
    }
}

// ❌ Tránh
impl fmt::Display for User {
    fn fmt(&self, f: &mut fmt::Formatter<'_>) -> fmt::Result {
        write!(f, "User {{ id: {}, username: {} }}", self.id, self.username)
        // Quá technical, nên dùng Debug
    }
}
}
2. Concise và meaningful
#![allow(unused)]
fn main() {
// ✅ Tốt
write!(f, "Error: File not found")

// ❌ Tránh - quá dài dòng
write!(f, "An error has occurred during the file reading operation: The specified file could not be found in the filesystem")
}
3. Consistent formatting
#![allow(unused)]
fn main() {
// ✅ Tốt - consistent format cho cùng type
impl fmt::Display for Date {
    fn fmt(&self, f: &mut fmt::Formatter<'_>) -> fmt::Result {
        write!(f, "{:04}-{:02}-{:02}", self.year, self.month, self.day)
    }
}
}
Tổng kết
Display trait là công cụ mạnh mẽ để:
- Tạo output thân thiện với người dùng
- Implement custom formatting cho types
- Tích hợp với error handling
- Cung cấp API nhất quán cho printing
Khi implement Display:
- Giữ output đơn giản, dễ đọc
- Dùng cho user-facing messages
- Kết hợp với Debug cho developer output
- Follow consistent formatting conventions
References
Enum
Giống như các ngôn ngữ khác, Enum là một kiểu giá trị đơn, chứa các biến thể (variants).
#![allow(unused)]
fn main() {
enum Day {
  Sunday,
  Monday,
  Tuesday,
  Wednesday,
  Thursday,
  Friday,
  Saturday
}

let today = Day::Sunday;
}
Enum variant có thể là
- unit variant
- tuple variant
- struct variant
#![allow(unused)]
fn main() {
enum FlashMessage {
  Success, // unit variant
  Error(String), // tuple variant
  Warning { category: i32, message: String }, // struct variant
}
}
match Enum
match cực kỳ mạnh và được dùng trong Rust phổ biến.
Ví dụ sau là cách để kiểm tra một giá trị enum là variant nào.
enum Coin {
  Penny,
  Nickel,
  Dime,
  Quarter,
}

fn value_in_cents(coin: Coin) -> u8 {
  match coin {
    Coin::Penny => 1,
    Coin::Nickel => 5,
    Coin::Dime => 10,
    Coin::Quarter => 25,
  }
}

fn main() {}
match còn có thể trích xuất các giá trị từ tuple variant hoặc struct variant.
#![allow(unused)]
fn main() {
enum FlashMessage {
  Success, // unit variant
  Error(String), // tuple variant
  Warning { category: i32, message: String }, // struct variant
}

fn format_message(message: FlashMessage) -> String {
  match message {
    FlashMessage::Success => "success".to_string(),
    FlashMessage::Error(err) => format!("My error: {}", err),
    FlashMessage::Warning{ category, message } => format!("Warn: {} (category: {})", message, category),
  }
}

let m = format_message(FlashMessage::Error("something went wrong".to_string()));
println!("{m}");
}
References
- https://doc.rust-lang.org/book/ch06-02-match.html
- https://blog.logrocket.com/rust-enums-and-pattern-matching/
use Enum::
Ta có thể mang variants ra ngoài scope của enum bằng use.
enum Coin {
  Penny,
  Nickel,
  Dime,
  Quarter,
}

// hoặc
// use self::Coin::{Penny, Nickel, Dime, Quarter};
use Coin::*;

fn value_in_cents(coin: Coin) -> u8 {
  match coin {
    Penny => 1,
    Nickel => 5,
    Dime => 10,
    Quarter => 25,
  }
}

fn main() {
  assert_eq!(value_in_cents(Penny), 1);
  assert_eq!(value_in_cents(Coin::Penny), 1);
}
impl Enum
Ta cũng có thể impl cho enum giống như struct.
#![allow(unused)]
fn main() {
enum Day {
  Sunday,
  Monday,
  Tuesday,
  Wednesday,
  Thursday,
  Friday,
  Saturday
}

// impl enum
impl Day {
  fn today(self) -> Self {
    self
  }
}

// Trait
trait DayOff {
  fn day_off(self);
}

// impl trait for enum
impl DayOff for Day {
  fn day_off(self) {
    match self.today() {
      Self::Sunday | Self::Saturday => println!("day off"),
      _ => println!("noooo"),
    }
  }
}

let today = Day::Sunday;
today.day_off();
}
Option
Nhiều ngôn ngữ sử dụng kiểu dữ liệu null hoặc nil hoặc undefined
để đại diện cho các giá trị rỗng hoặc không tồn tại, và sử dụng Exception
để xử lý lỗi. Rust bỏ qua hai khái niệm này, để tránh gặp phải các lỗi phổ biến
như null pointer exceptions, hay lộ thông tin nhạy cảm thông qua exceptions, …
Thay vào đó, Rust giới thiệu hai generic enums Option
và Result để giải quyết các vấn đề trên.
Trong hầu hết các ngôn ngữ họ C (C, C#, Java, …), để xác định một cái gì đó failed
hay không tìm được giá trị thỏa mãn, chúng ta thường trả về một giá trị “đặc biệt” nào đó.
Ví dụ indexOf() của Javascript scan một phần tử trong mảng,
trả về vị trí của phần tử đó trong mảng. Và trả về -1 nếu không tìm thấy.
Dẫn đến, ta sẽ thường thấy một số đoạn code như sau đây:
// Typescript

let sentence = "The fox jumps over the dog";
let index = sentence.indexOf("fox");

if (index > -1) {
  let result = sentence.substr(index);
  console.log(result);
}
Như bạn thấy -1 là một trường hợp đặc biệt cần xử lý.
Có khi nào bạn đã từng mắc lỗi ngớ ngẫn vì tưởng giá trị đặc biệt đó là 0 chưa?
// Typescript

if (index > 0) {
  // 3000 days of debugging
}
"" hay null hay None cũng là một trong những trường hợp đặc biệt đó.
Bạn đã từng nghe đến Null References: The Billion Dollar Mistake?
Lý do cơ bản là không có gì chắc chắn và có thể ngăn bạn lại việc … quên xử lý mọi trường hợp giá trị đặc biệt, hoặc do chương trình trả về các giá trị đặc biệt không như mong đợi. Có nghĩa là ta có thể vô tình làm crash chương trình với một lỗi nhỏ ở bất kỳ đâu, ở bất kỳ thời điểm nào.
Rust làm điều này tốt hơn, chỉ với Option.
Một giá trị optional có thể mang một giá trị nào đó Some(something) hoặc không mang giá trị nào cả (None).
#![allow(unused)]
fn main() {
// An output can have either Some value or no value/ None.
enum Option<T> { // T is a generic and it can contain any type of value.
  Some(T),
  None,
}
}
Theo thiết kế, mặc định bạn sẽ không bao giờ lấy được giá trị bạn cần nếu không xử lý
các trường hợp có thể xảy ra với Option, là None chẳng hạn.
Điều này được bắt buộc bởi compiler lúc compile code,
có nghĩa là nếu bạn quên check, code sẽ không bao giờ được compile.
#![allow(unused)]
fn main() {
let sentence = "The fox jumps over the dog";
let index = sentence.find("fox");

if let Some(fox) = index {
  let words_after_fox = &sentence[fox..];
  println!("{}", words_after_fox);
}
}
Cách sử dụng Option
Option là standard library, do đã được
preludes
nên chúng ta không cần khai báo trước khi sử dụng. Ngoài enum
Option thì các variant của nó cũng đã được preludes
sẵn như Some
và None.
Ví dụ, ta có một function tính giá trị chia hai số, đôi khi sẽ không tìm ra được kết quả, ta sử dụng Some như sau:
fn get_id_from_name(name: &str) -> Option<i32> {
    if !name.starts_with('d') {
        return None;
    }

    Some(123)
}

fn main() {
    let name = "duyet";

    match get_id_from_name(name) {
        Some(id) => println!("User = {}", id),
        _ => println!("Not found"),
    }
}
Ta thường sử dụng match để bắt giá trị trả về (Some hoặc None).
Bạn sẽ bắt gặp rất nhiều method khác nhau để xử lý giá trị của Option
Option method overview: https://doc.rust-lang.org/std/option/#method-overview
.unwrap()
Trả về giá trị nằm trong Some(T). Nếu giá trị là None thì panic chương trình.
#![allow(unused)]
fn main() {
let x = Some("air");
assert_eq!(x.unwrap(), "air");

let x: Option<&str> = None;
assert_eq!(x.unwrap(), "air"); // panic!
}
.expect()
Giống .unwrap(), nhưng khi panic thì Rust sẽ kèm theo message
#![allow(unused)]
fn main() {
let x: Option<&str> = None;
x.expect("fruits are healthy"); // panics: `fruits are healthy`
}
.unwrap_or()
Trả về giá trị nằm trong Some, nếu không trả về giá trị nằm trong or
#![allow(unused)]
fn main() {
assert_eq!(Some("car").unwrap_or("bike"), "car");
}
.unwrap_or_default()
Trả về giá trị nằm trong Some, nếu không trả về giá default.
#![allow(unused)]
fn main() {
let good_year_from_input = "1909";
let bad_year_from_input = "190blarg";
let good_year = good_year_from_input.parse().ok().unwrap_or_default();
let bad_year = bad_year_from_input.parse().ok().unwrap_or_default();

assert_eq!(1909, good_year);
assert_eq!(0, bad_year);
}
.ok_or()
Convert Option<T> sang Result<T, E>,
mapping Some(v)
thành Ok(v)
và None
sang Err(err).
#![allow(unused)]
fn main() {
let x = Some("foo");
assert_eq!(x.ok_or(0), Ok("foo"));
}
match
Chúng ta có thể sử dụng pattern matching để code dễ đọc hơn
#![allow(unused)]
fn main() {
fn get_name(who: Option<String>) -> String {
  match who {
    Some(name) => format!("Hello {}", name),
    None       => "Who are you?".to_string(),
  }
}

get_name(Some("duyet"));
}
if let Some(x) = x
Có thể bạn sẽ gặp pattern này nhiều khi đọc code Rust.
Nếu giá trị của x là Some thì sẽ destruct
giá trị đó bỏ vào biến x nằm trong scope của if.
#![allow(unused)]
fn main() {
fn get_data() -> Option<String> {
    Some("ok".to_string())
}

if let Some(data) = get_data() {
    println!("data = {}", data);
} else {
    println!("no data");
}
}
unwrap()
.unwrap()
Trả về giá trị nằm trong Some(T). Nếu giá trị là None thì panic chương trình.
#![allow(unused)]
fn main() {
let x = Some("air");
assert_eq!(x.unwrap(), "air");

let x: Option<&str> = None;
assert_eq!(x.unwrap(), "air"); // panic!
}
expect()
.expect()
Giống .unwrap(), nhưng khi panic thì Rust sẽ kèm theo message
#![allow(unused)]
fn main() {
let x: Option<&str> = None;
x.expect("fruits are healthy"); // panics: `fruits are healthy`
}
unwrap_or_default()
.unwrap_or_default()
Trả về giá trị nằm trong Some, nếu không trả về giá default.
#![allow(unused)]
fn main() {
let good_year_from_input = "1909";
let bad_year_from_input = "190blarg";
let good_year = good_year_from_input.parse().ok().unwrap_or_default();
let bad_year = bad_year_from_input.parse().ok().unwrap_or_default();

assert_eq!(1909, good_year);
assert_eq!(0, bad_year);
}
if let Some(x) = x
if let Some(x) = x
Có thể bạn sẽ gặp pattern này nhiều khi đọc code Rust.
Nếu giá trị của x là Some thì sẽ destruct
giá trị đó bỏ vào biến x nằm trong scope của if.
#![allow(unused)]
fn main() {
fn get_data() -> Option<String> {
    Some("ok".to_string())
}

if let Some(data) = get_data() {
    println!("data = {}", data);
} else {
    println!("no data");
}
}
Result
Tương tự như Option.
Một kết quả trả về (Result)
của một function thường sẽ có hai trường hợp:
Result là một phiên bản cao cấp hơn của Option.
Nó mô tả lỗi gì đang xảy ra thay vì khả năng tồn tại giá trị hay không.
#![allow(unused)]
fn main() {
enum Result<T, E> {
  Ok(T),
  Err(E),
}
}
Ví dụ
fn get_id_from_name(name: &str) -> Result<i32, &str> {
    if !name.starts_with('d') {
        return Err("not found");
    }

    Ok(123)
}

fn main() -> Result<(), &'static str> {
    let name = "duyet";

    match get_id_from_name(name) {
        Ok(id) => println!("User = {}", id),
        Err(e) => println!("Error: {}", e),
    };

    Ok(())
}
Như bạn thấy thì main() cũng có thể return về Result<(), &'static str>
.unwrap()
Ví dụ trên nhưng sử dụng .unwrap() , chủ động panic (crash) dừng chương trình nếu gặp lỗi.
fn main() -> Result<(), &'static str> {
  let who = "duyet";
  let age = get_age(who).unwrap();
  println!("{} is {}", who, age);

  Ok(())
}
.expect()
Giống như unwrap(): chủ động panic (crash) dừng chương trình nếu gặp lỗi và kèm theo message. Sẽ rất có ích, nhất là khi có quá nhiều unwrap, bạn sẽ không biết nó panic ở đâu.
fn main() -> Result<(), &'static str> {
  let who = "ngan";
  let age = get_age(who).expect("could not get age");
  println!("{} is {}", who, age);

  Ok(())
}
Xem thêm mọi method khác của Result tại đây.
Convert Result -> Option
Đôi khi bạn sẽ cần convert từ:
Ok(v)–>Some(v)- hoặc ngược lại,
Err(e)–>Some(e)
.ok()
// .ok(v) = Some(v)
let x: Result<u32, &str> = Ok(2);
assert_eq!(x.ok(), Some(2));

let y: Result<u32, &str> = Err("Nothing here");
assert_eq!(y.ok(), None);
.err()
// .err()
let x: Result<u32, &str> = Ok(2);
assert_eq!(x.err(), None);

let x: Result<u32, &str> = Err("Nothing here");
assert_eq!(x.err(), Some("Nothing here"));
Toán tử ?
Khi viết code mà có quá nhiều functions trả về Result, việc handle Err sẽ khá nhàm chán.
Toán tử chấm hỏi ? cho phép dừng function tại vị trí đó và return cho function cha nếu Result ở vị trí đó là Err.
Nó sẽ thay thế đoạn code sau:
#![allow(unused)]
fn main() {
use std::fs::File;
use std::io::prelude::*;
use std::io;

struct Info {
  name: String,
  age: i32,
  rating: i32,
}

fn write_info(info: &Info) -> io::Result<()> {
  // Early return on error
  let mut file = match File::create("my_best_friends.txt") {
    Err(e) => return Err(e),
    Ok(f) => f,
  };
  if let Err(e) = file.write_all(format!("name: {}\n", info.name).as_bytes()) {
    return Err(e)
  }
  if let Err(e) = file.write_all(format!("age: {}\n", info.age).as_bytes()) {
    return Err(e)
  }
  if let Err(e) = file.write_all(format!("rating: {}\n", info.rating).as_bytes()) {
    return Err(e)
  }
  Ok(())
}
}
thành
#![allow(unused)]
fn main() {
use std::fs::File;
use std::io::prelude::*;
use std::io;

struct Info {
  name: String,
  age: i32,
  rating: i32,
}

fn write_info(info: &Info) -> io::Result<()> {
  let mut file = File::create("my_best_friends.txt")?;
  // Early return on error
  file.write_all(format!("name: {}\n", info.name).as_bytes())?;
  file.write_all(format!("age: {}\n", info.age).as_bytes())?;
  file.write_all(format!("rating: {}\n", info.rating).as_bytes())?;
  Ok(())
}
}
Gọn đẹp hơn rất nhiều.
Toán tử ? sẽ unwrap giá trị Ok, hoặc return giá trị Err ở vị trí gần toán tử đó.
? chỉ có thể được dùng trong function có kiểu dữ liệu trả về là Result.
Generics
Generics là một khái niệm để tổng quát hóa các kiểu dữ liệu hoặc tính năng cho các trường hợp rộng hơn. Tổng quát hóa cực kỳ hữu ích trong việc giảm số lượng code duplication. Một trong những ví dụ phổ biến nhất của tổng quát hóa là tổng quát một function có thể input nhiều loại kiểu dữ liệu khác nhau (type parameters).
Generic type parameters thường được biểu diễn dưới dạng <T>.
Ví dụ, định nghĩa một generic function foo nhận một tham số T của mọi kiểu dữ liệu.
#![allow(unused)]
fn main() {
fn foo<T>(arg: T) { ... }
}
Xem các trang sau để biết chi tiết về generic type được ứng dụng trong các trường hợp khác nhau như thế nào.
Generic Functions
Định nghĩa một generic function bằng cách khai báo generic type <T> sau tên của function.
#![allow(unused)]
fn main() {
fn foo<T>(x: T) {} // x có kiểu T, T là generic type

fn bar<T>(x: T, y: T) {} // x và y đều có kiểu T

fn baz<T, U>(x: T, y: U) {} // sử dụng nhiều generic type
}
Gọi một generic function đôi khi yêu cầu chỉ định kiểu dữ liệu tường minh cho tham số đó. Đôi khi là do function được gọi trả về kiểu dữ liệu là generic, hoặc compiler không có đủ thông tin. Thực thi một function và chỉ định kiểu dữ liệu tường minh có cú pháp như sau:
#![allow(unused)]
fn main() {
function_name::<A, B>()
}
Ví dụ:
fn print_me<T: ToString>(content: T) {
    println!("{}", content.to_string());
}

fn main() {
    print_me::<i32>(100);
    print_me::<u64>(1_000_000);
}
Cú pháp <T: ToString> có nghĩa là: function print_me chấp nhận mọi tham số có
kiểu T, miễn sau T được implement trait
ToString.
Một ví dụ khác phức tạp hơn từ Rust By Example
struct A;          // Type tường minh `A`.
struct S(A);       // Type tường minh `S`.
struct SGen<T>(T); // Type Generic `SGen`.

// Các function sau sẽ take ownership của variable
// sau đó thoát ra khỏi scope {}, sau đó giải phóng variable.

// Định nghĩa function `reg_fn` nhận tham số `_s` có kiểu `S`.
// Không có `<T>` vì vậy đây không phải là một generic function.
fn reg_fn(_s: S) {}

// Định nghĩa function `gen_spec_t` nhận tham số `_s` có kiểu `SGen<T>`.
// Ở đây tường minh kiểu `A` cho `S`, và bởi vì `A` không được khai báo
// như là một generic type parameter cho `gen_spec_t`,
// nên đây cũng không phải là một generic function.
fn gen_spec_t(_s: SGen<A>) {}

// Định nghĩa function `gen_spec_i32` nhận tham số `_s` có kiểu `SGen<i32>`.
// Giống như ở trên, ta khai báo tường minh `i32` cho `T`.
// Bởi vì `i32` không phải là một a generic type, nên function này cũng không
// phải là một genenic function.
fn gen_spec_i32(_s: SGen<i32>) {}

// Định nghĩa một `generic` function, nhận tham số `_s` có kiểu `SGen<T>`.
// Bởi vì `SGen<T>` được đứng trước bởi `<T>`, nên function này generic bởi `T`.
fn generic<T>(_s: SGen<T>) {}

fn main() {
    // Gọi non-generic functions
    reg_fn(S(A));          // Concrete type.
    gen_spec_t(SGen(A));   // Implicitly specified type parameter `A`.
    gen_spec_i32(SGen(6)); // Implicitly specified type parameter `i32`.

    // Chỉ định cụ thể parameter `char` cho `generic()`.
    generic::<char>(SGen('a'));

    // Chỉ định cụ thể `char` to `generic()`.
    generic(SGen('c'));
}
Generic Struct
Giống như function, ta cũng có thể sử dụng generic type cho Struct
struct Point<T> {
  x: T,
  y: T,
}

fn main() {
  let point_a = Point { x: 0, y: 0 }; // T is a int type
  let point_b = Point { x: 0.0, y: 0.0 }; // T is a float type
}
Generic Enum
Option và Result là 2 ví dụ của generic struct.
#![allow(unused)]
fn main() {
enum Option<T> {
    Some(T),
    None,
}

enum Result<T, E> {
    Ok(T),
    Err(E),
}
}
Sử dụng Option<T>:
fn get_id_from_name(name: &str) -> Option<i32> {
    if !name.starts_with('d') {
        return None;
    }

    Some(123)
}

fn main() {
    let name = "duyet";

    match get_id_from_name(name) {
        Some(id) => println!("User = {}", id),
        _ => println!("Not found"),
    }
}
Xem thêm: Enum > Option
Sử dụng Result<T, E>:
fn get_id_from_name(name: &str) -> Result<i32, &str> {
    if !name.starts_with('d') {
        return Err("not found");
    }

    Ok(123)
}

fn main() -> Result<(), &'static str> {
    let name = "duyet";

    match get_id_from_name(name) {
        Ok(id) => println!("User = {}", id),
        Err(e) => println!("Error: {}", e),
    };

    Ok(())
}
Xem tưhêm: Enum > Result<T, E>
Generic Implementation
Ta cũng có thể sử dụng generic type cho implementation.
Khai báo generic type sau từ khóa impl: impl<T, U> ....
struct S; // Kiểu tường minh `S`
struct GenericVal<T>(T); // Generic type `GenericVal`

// impl cho GenericVal, chúng ta có thể chỉ định cụ thể kiểu dữ liệu cho type parameters:
impl GenericVal<f32> {} // `f32`
impl GenericVal<S> {} // `S` được định nghĩa ở trên

// cần khai báo `<T>` để duy trì tính tổng quát
impl<T> GenericVal<T> {}

fn main() {}
Một ví dụ khác
struct GenVal<T> {
    gen_val: T,
}

// impl of GenVal for a generic type `T`
impl<T> GenVal<T> {
    fn value(&self) -> &T {
        &self.gen_val
    }
}

fn main() {
    let x = GenVal { gen_val: 3i32 };
    let y = GenVal::<u32> { gen_val: 6 };

    println!("{}, {}", x.value(), y.value());
}
Generic Trait
Trait cũng có thể được tổng quát hóa.
// Non-copyable types.
struct Empty;
struct Null;

// A trait generic over `T`.
trait DoubleDrop<T> {
    // Định nghĩa một method trên type hiện tại, method nhận
    // một giá trị khác cũng có kiểu `T` và không làm gì với nó.
    fn double_drop(self, _: T);
}

// Implement `DoubleDrop<T>` cho mọi generic parameter `T` và
// caller `U`.
impl<T, U> DoubleDrop<T> for U {
    // Method này take ownership của cả 2 arguments,
    // sau đó giải phóng bộ nhớ cho cả 2, do ra khỏi scope {}
    // mà không làm gì cả.
    fn double_drop(self, _: T) {}
}

fn main() {
    let empty = Empty;
    let null  = Null;

    // Deallocate `empty` and `null`.
    empty.double_drop(null);

    // TODO: uncomment
    // empty;
    // null;
}
Bounds
Cái này rất khó giải thích bằng tiếng Việt bằng một từ đơn giản. Khi sử dụng genenic, type parameter thường phải sử dụng các trait như các ràng buộc, giới hạn (bounds) để quy định chức năng (functionality) của kiểu đang được implement.
Trong ví dụ sau sử dụng trait Display để in, vì thế ta cần T bị ràng buộc (bound)
bởi Display. Có nghĩa là, ta cần tham số có kiểu T
và T bắt buộc phải đã được implement Display.
use std::fmt::Display;
fn printer<T: Display>(t: T) {
    println!("{}", t);
}
fn main() {}
Bounding giới hạn lại generic type.
#![allow(unused)]
fn main() {
use std::fmt::Display;
// T phải được impl `Display`
struct S<T: Display>(T);

// error[E0277]: `Vec<{integer}>` doesn't implement `std::fmt::Display`
let s = S(vec![1]);
}
T: Display + Debug
Để bounding nhiều trait, ta sử dụng +.
Ví dụ sau có nghĩa T phải được implement trait Display và Debug.
#![allow(unused)]
fn main() {
use std::fmt::Display;
use core::fmt::Debug;
fn printer<T: Display + Debug>(t: T) {
    println!("{:?}", t);
}
}
Mệnh đề where
Mệnh đề where được sử dụng để làm rõ ràng hơn trong việc định nghĩa các generic types và bounds.
Nó cho phép chúng ta chỉ định các bound một cách tường minh ngay trước hàm, giúp cho mã nguồn trở nên dễ đọc và hiểu hơn.
#![allow(unused)]
fn main() {
use std::fmt::Display;
use core::fmt::Debug;
fn printer<T>(t: T)
where
    T: Display + Debug
{
    println!("{:?}", t);
}
}
impl <A: TraitB + TraitC, D: TraitE + TraitF> MyTrait<A, D> for YourType {}
// Expressing bounds with a `where` clause
impl <A, D> MyTrait<A, D> for YourType where
A: TraitB + TraitC,
D: TraitE + TraitF {}Vectors
Vector có để được xem là re-sizable array nhưng mọi phần tử trong vec phải có cùng kiểu dữ liệu.
Vector là một generic type: Vec<T>, T có thể là bất kỳ kiểu dữ liệu nào. Ví dụ một vector chứa i32 được viết là Vec<i32>.
Tạo vector
#![allow(unused)]
fn main() {
let a1: Vec<i32> = Vec::new();
let a2: Vec<i32> = vec![];

// Khai báo kiểu cho phần tử đầu tiên
let b2 = vec![1i32, 2, 3];

// Vec chứa mười số 0
let b3 = vec![0; 10];
}
In vector
#![allow(unused)]
fn main() {
let c = vec![5, 4, 3, 2, 1];
println!("vec = {:?}", c);
}
Push và Pop
#![allow(unused)]
fn main() {
let mut d: Vec<i32> = vec![];
d.push(1);
d.push(2);
d.pop();
}
Kiểm tra kích thước của vector
#![allow(unused)]
fn main() {
let d = vec![0; 10];

println!("len = {}", d.len());
}
Iterators
Iterator pattern cho phép bạn thực hiện một số tác vụ trên từng phần tử một cách tuần tự. Một iterator chịu trách nhiệm về logic của việc lặp qua từng phần tử và xác định khi nào chuỗi đã kết thúc. Khi bạn sử dụng iterators, bạn không cần phải tái hiện lại logic đó một lần nữa.
Trong Rust, iterators là lazy, nghĩa là chúng không có tác dụng gì cho đến khi bạn gọi các phương thức consume iterator (e.g. sum, count, …).
#![allow(unused)]
fn main() {
let v1 = vec![1, 2, 3];
let v1_iter = v1.iter(); // lazy

for val in v1_iter {
    println!("Got: {val}");
}
// Got: 1
// Got: 2
// Got: 3
}
The Iterator Trait and the next Method
Tất cả iterators được implement một trait tên là Iterator được định nghĩa trong standard library. Định nghĩa của trait trông như sau:
#![allow(unused)]
fn main() {
pub trait Iterator {
    type Item;

    fn next(&mut self) -> Option<Self::Item>;

    // methods with default implementations elided
}
}
Consume the Iterator
Phương thức gọi next được gọi là consuming adaptors.
#![allow(unused)]
fn main() {
let v1 = vec![1, 2, 3];
let v1_iter = v1.iter(); // lazy

let total: i32 = v1_iter.sum(); // Consume
println!("Total: {}", &total);  // Total: 6
}
v1_iter không thể sử dụng bởi vì sum đã takes ownership của iterator.
Produce Other Iterators
Iterator adaptors là các phương thức được định nghĩa trên trait Iterator không consume iterator.
Thay vào đó, chúng produce ra các iterator khác bằng cách thay đổi một ít từ iterator gốc.
#![allow(unused)]
fn main() {
let v1: Vec<i32> = vec![1, 2, 3];

v1.iter().map(|x| x + 1); // new iter
}
#![allow(unused)]
fn main() {
let v1: Vec<i32> = vec![1, 2, 3];
let v2: Vec<_> = v1.iter().map(|x| x + 1).collect();
println!("{:?}", v2); // [2, 3, 4]
}References
Sử dụng Enum để chứa nhiều loại dữ liệu
Trong Rust, Vec<T> chỉ có thể chứa các phần tử cùng type T. Khi cần lưu nhiều loại dữ liệu khác nhau trong cùng một Vec, ta có thể sử dụng Enum để wrap các types khác nhau.
Vấn đề: Vec chỉ chứa một type
fn main() {
    // ❌ Compile error - Vec chỉ chứa một type
    // let mixed = vec![42, "hello", 3.14];

    // Phải tạo nhiều Vecs riêng biệt
    let integers = vec![1, 2, 3];
    let strings = vec!["a", "b", "c"];
    let floats = vec![1.0, 2.0, 3.0];

    // Khó quản lý và xử lý
}
Giải pháp: Sử dụng Enum
#[derive(Debug)]
enum Value {
    Integer(i32),
    Float(f64),
    Text(String),
}

fn main() {
    // ✅ Vec chứa nhiều loại dữ liệu khác nhau
    let values = vec![
        Value::Integer(42),
        Value::Float(3.14),
        Value::Text(String::from("hello")),
        Value::Integer(100),
    ];

    // Xử lý từng value
    for value in &values {
        match value {
            Value::Integer(n) => println!("Integer: {}", n),
            Value::Float(f) => println!("Float: {}", f),
            Value::Text(s) => println!("Text: {}", s),
        }
    }
}
Output:
Integer: 42
Float: 3.14
Text: hello
Integer: 100
Ví dụ thực tế: Spreadsheet Cell
#[derive(Debug, Clone)]
enum SpreadsheetCell {
    Int(i32),
    Float(f64),
    Text(String),
    Bool(bool),
    Empty,
}

fn main() {
    // Một row trong spreadsheet
    let row = vec![
        SpreadsheetCell::Text(String::from("Name")),
        SpreadsheetCell::Int(42),
        SpreadsheetCell::Float(3.14159),
        SpreadsheetCell::Bool(true),
        SpreadsheetCell::Empty,
    ];

    // Process row
    for (i, cell) in row.iter().enumerate() {
        print!("Cell {}: ", i);
        match cell {
            SpreadsheetCell::Int(n) => println!("{}", n),
            SpreadsheetCell::Float(f) => println!("{:.2}", f),
            SpreadsheetCell::Text(s) => println!("'{}'", s),
            SpreadsheetCell::Bool(b) => println!("{}", b),
            SpreadsheetCell::Empty => println!("(empty)"),
        }
    }
}
Output:
Cell 0: 'Name'
Cell 1: 42
Cell 2: 3.14
Cell 3: true
Cell 4: (empty)
Data Engineering: Mixed Data Types
#[derive(Debug, Clone)]
enum DataValue {
    String(String),
    Integer(i64),
    Float(f64),
    Boolean(bool),
    Null,
}

impl DataValue {
    fn as_string(&self) -> String {
        match self {
            DataValue::String(s) => s.clone(),
            DataValue::Integer(n) => n.to_string(),
            DataValue::Float(f) => f.to_string(),
            DataValue::Boolean(b) => b.to_string(),
            DataValue::Null => String::from("NULL"),
        }
    }

    fn is_null(&self) -> bool {
        matches!(self, DataValue::Null)
    }
}

// Một record trong dataset
type Record = Vec<DataValue>;

fn main() {
    let records: Vec<Record> = vec![
        vec![
            DataValue::Integer(1),
            DataValue::String("Alice".to_string()),
            DataValue::Float(75.5),
            DataValue::Boolean(true),
        ],
        vec![
            DataValue::Integer(2),
            DataValue::String("Bob".to_string()),
            DataValue::Float(82.3),
            DataValue::Boolean(false),
        ],
        vec![
            DataValue::Integer(3),
            DataValue::String("Charlie".to_string()),
            DataValue::Null,
            DataValue::Boolean(true),
        ],
    ];

    // Print table
    println!("ID | Name    | Score | Active");
    println!("---|---------|-------|-------");

    for record in &records {
        for (i, value) in record.iter().enumerate() {
            if i > 0 {
                print!(" | ");
            }
            print!("{:<7}", value.as_string());
        }
        println!();
    }
}
Output:
ID | Name    | Score | Active
---|---------|-------|-------
1       | Alice   | 75.5    | true
2       | Bob     | 82.3    | false
3       | Charlie | NULL    | true
JSON-like Data Structure
#[derive(Debug, Clone)]
enum JsonValue {
    Null,
    Bool(bool),
    Number(f64),
    String(String),
    Array(Vec<JsonValue>),
    Object(Vec<(String, JsonValue)>),
}

impl JsonValue {
    fn pretty_print(&self, indent: usize) {
        let spaces = " ".repeat(indent);
        match self {
            JsonValue::Null => print!("null"),
            JsonValue::Bool(b) => print!("{}", b),
            JsonValue::Number(n) => print!("{}", n),
            JsonValue::String(s) => print!("\"{}\"", s),
            JsonValue::Array(arr) => {
                println!("[");
                for (i, item) in arr.iter().enumerate() {
                    print!("{}", " ".repeat(indent + 2));
                    item.pretty_print(indent + 2);
                    if i < arr.len() - 1 {
                        println!(",");
                    } else {
                        println!();
                    }
                }
                print!("{}]", spaces);
            }
            JsonValue::Object(obj) => {
                println!("{{");
                for (i, (key, value)) in obj.iter().enumerate() {
                    print!("{}\"{}\": ", " ".repeat(indent + 2), key);
                    value.pretty_print(indent + 2);
                    if i < obj.len() - 1 {
                        println!(",");
                    } else {
                        println!();
                    }
                }
                print!("{}}}", spaces);
            }
        }
    }
}

fn main() {
    let data = JsonValue::Object(vec![
        ("name".to_string(), JsonValue::String("Alice".to_string())),
        ("age".to_string(), JsonValue::Number(30.0)),
        ("active".to_string(), JsonValue::Bool(true)),
        ("scores".to_string(), JsonValue::Array(vec![
            JsonValue::Number(85.5),
            JsonValue::Number(92.0),
            JsonValue::Number(78.5),
        ])),
        ("address".to_string(), JsonValue::Object(vec![
            ("city".to_string(), JsonValue::String("NYC".to_string())),
            ("zip".to_string(), JsonValue::Number(10001.0)),
        ])),
    ]);

    data.pretty_print(0);
    println!();
}
Log Events với Enum
use std::time::{SystemTime, UNIX_EPOCH};

#[derive(Debug, Clone)]
enum LogLevel {
    Info,
    Warning,
    Error,
}

#[derive(Debug, Clone)]
enum LogEvent {
    Message {
        level: LogLevel,
        message: String,
        timestamp: u64,
    },
    Metric {
        name: String,
        value: f64,
        timestamp: u64,
    },
    Error {
        error: String,
        stack_trace: Option<String>,
        timestamp: u64,
    },
}

impl LogEvent {
    fn info(message: &str) -> Self {
        LogEvent::Message {
            level: LogLevel::Info,
            message: message.to_string(),
            timestamp: Self::now(),
        }
    }

    fn metric(name: &str, value: f64) -> Self {
        LogEvent::Metric {
            name: name.to_string(),
            value,
            timestamp: Self::now(),
        }
    }

    fn error(error: &str, stack_trace: Option<String>) -> Self {
        LogEvent::Error {
            error: error.to_string(),
            stack_trace,
            timestamp: Self::now(),
        }
    }

    fn now() -> u64 {
        SystemTime::now()
            .duration_since(UNIX_EPOCH)
            .unwrap()
            .as_secs()
    }

    fn format(&self) -> String {
        match self {
            LogEvent::Message { level, message, timestamp } => {
                format!("[{:?}] {} - {}", level, timestamp, message)
            }
            LogEvent::Metric { name, value, timestamp } => {
                format!("[METRIC] {} - {}: {}", timestamp, name, value)
            }
            LogEvent::Error { error, stack_trace, timestamp } => {
                let mut output = format!("[ERROR] {} - {}", timestamp, error);
                if let Some(trace) = stack_trace {
                    output.push_str(&format!("\n{}", trace));
                }
                output
            }
        }
    }
}

fn main() {
    let mut events: Vec<LogEvent> = Vec::new();

    // Log different types of events
    events.push(LogEvent::info("Application started"));
    events.push(LogEvent::metric("cpu_usage", 45.2));
    events.push(LogEvent::info("Processing request"));
    events.push(LogEvent::metric("response_time_ms", 123.5));
    events.push(LogEvent::error(
        "Database connection failed",
        Some("at main.rs:42".to_string()),
    ));

    // Print all events
    for event in &events {
        println!("{}", event.format());
    }
}
Database Row với Mixed Types
#[derive(Debug, Clone)]
enum SqlValue {
    Integer(i64),
    Real(f64),
    Text(String),
    Blob(Vec<u8>),
    Null,
}

impl SqlValue {
    fn type_name(&self) -> &str {
        match self {
            SqlValue::Integer(_) => "INTEGER",
            SqlValue::Real(_) => "REAL",
            SqlValue::Text(_) => "TEXT",
            SqlValue::Blob(_) => "BLOB",
            SqlValue::Null => "NULL",
        }
    }

    fn to_sql(&self) -> String {
        match self {
            SqlValue::Integer(n) => n.to_string(),
            SqlValue::Real(f) => f.to_string(),
            SqlValue::Text(s) => format!("'{}'", s.replace('\'', "''")),
            SqlValue::Blob(_) => "<binary data>".to_string(),
            SqlValue::Null => "NULL".to_string(),
        }
    }
}

type Row = Vec<SqlValue>;

struct Table {
    columns: Vec<String>,
    rows: Vec<Row>,
}

impl Table {
    fn new(columns: Vec<String>) -> Self {
        Table {
            columns,
            rows: Vec::new(),
        }
    }

    fn insert(&mut self, row: Row) {
        assert_eq!(row.len(), self.columns.len(), "Row size mismatch");
        self.rows.push(row);
    }

    fn print(&self) {
        // Print header
        for (i, col) in self.columns.iter().enumerate() {
            if i > 0 {
                print!(" | ");
            }
            print!("{:<15}", col);
        }
        println!();

        // Print separator
        println!("{}", "-".repeat(self.columns.len() * 18));

        // Print rows
        for row in &self.rows {
            for (i, value) in row.iter().enumerate() {
                if i > 0 {
                    print!(" | ");
                }
                print!("{:<15}", value.to_sql());
            }
            println!();
        }
    }
}

fn main() {
    let mut users = Table::new(vec![
        "id".to_string(),
        "name".to_string(),
        "age".to_string(),
        "salary".to_string(),
        "notes".to_string(),
    ]);

    users.insert(vec![
        SqlValue::Integer(1),
        SqlValue::Text("Alice".to_string()),
        SqlValue::Integer(30),
        SqlValue::Real(75000.50),
        SqlValue::Text("Team lead".to_string()),
    ]);

    users.insert(vec![
        SqlValue::Integer(2),
        SqlValue::Text("Bob".to_string()),
        SqlValue::Integer(25),
        SqlValue::Real(60000.00),
        SqlValue::Null,
    ]);

    users.insert(vec![
        SqlValue::Integer(3),
        SqlValue::Text("Charlie".to_string()),
        SqlValue::Null,
        SqlValue::Real(80000.75),
        SqlValue::Text("Senior dev".to_string()),
    ]);

    users.print();
}
Output:
id              | name            | age             | salary          | notes
----------------------------------------------------------------------
1               | 'Alice'         | 30              | 75000.5         | 'Team lead'
2               | 'Bob'           | 25              | 60000           | NULL
3               | 'Charlie'       | NULL            | 80000.75        | 'Senior dev'
Configuration Values
#[derive(Debug, Clone)]
enum ConfigValue {
    String(String),
    Integer(i64),
    Float(f64),
    Boolean(bool),
    Array(Vec<ConfigValue>),
    Map(Vec<(String, ConfigValue)>),
}

impl ConfigValue {
    fn as_string(&self) -> Option<&str> {
        if let ConfigValue::String(s) = self {
            Some(s)
        } else {
            None
        }
    }

    fn as_int(&self) -> Option<i64> {
        if let ConfigValue::Integer(n) = self {
            Some(*n)
        } else {
            None
        }
    }

    fn as_bool(&self) -> Option<bool> {
        if let ConfigValue::Boolean(b) = self {
            Some(*b)
        } else {
            None
        }
    }

    fn get(&self, key: &str) -> Option<&ConfigValue> {
        if let ConfigValue::Map(map) = self {
            map.iter()
                .find(|(k, _)| k == key)
                .map(|(_, v)| v)
        } else {
            None
        }
    }
}

fn main() {
    let config = ConfigValue::Map(vec![
        ("app_name".to_string(), ConfigValue::String("MyApp".to_string())),
        ("port".to_string(), ConfigValue::Integer(8080)),
        ("debug".to_string(), ConfigValue::Boolean(true)),
        ("allowed_hosts".to_string(), ConfigValue::Array(vec![
            ConfigValue::String("localhost".to_string()),
            ConfigValue::String("127.0.0.1".to_string()),
        ])),
        ("database".to_string(), ConfigValue::Map(vec![
            ("host".to_string(), ConfigValue::String("localhost".to_string())),
            ("port".to_string(), ConfigValue::Integer(5432)),
            ("name".to_string(), ConfigValue::String("mydb".to_string())),
        ])),
    ]);

    // Access config values
    if let Some(name) = config.get("app_name").and_then(|v| v.as_string()) {
        println!("App name: {}", name);
    }

    if let Some(port) = config.get("port").and_then(|v| v.as_int()) {
        println!("Port: {}", port);
    }

    if let Some(db) = config.get("database") {
        if let Some(db_host) = db.get("host").and_then(|v| v.as_string()) {
            println!("Database host: {}", db_host);
        }
    }
}
Processing Mixed Data Types
#[derive(Debug, Clone)]
enum DataType {
    Int(i64),
    Float(f64),
    String(String),
    Bool(bool),
}

impl DataType {
    fn to_float(&self) -> Option<f64> {
        match self {
            DataType::Int(n) => Some(*n as f64),
            DataType::Float(f) => Some(*f),
            DataType::String(s) => s.parse().ok(),
            DataType::Bool(b) => Some(if *b { 1.0 } else { 0.0 }),
        }
    }

    fn to_string(&self) -> String {
        match self {
            DataType::Int(n) => n.to_string(),
            DataType::Float(f) => f.to_string(),
            DataType::String(s) => s.clone(),
            DataType::Bool(b) => b.to_string(),
        }
    }
}

fn calculate_sum(values: &[DataType]) -> f64 {
    values.iter()
        .filter_map(|v| v.to_float())
        .sum()
}

fn calculate_average(values: &[DataType]) -> Option<f64> {
    let nums: Vec<f64> = values.iter()
        .filter_map(|v| v.to_float())
        .collect();

    if nums.is_empty() {
        None
    } else {
        Some(nums.iter().sum::<f64>() / nums.len() as f64)
    }
}

fn main() {
    let data = vec![
        DataType::Int(10),
        DataType::Float(20.5),
        DataType::String("15".to_string()),
        DataType::Bool(true),  // counts as 1.0
        DataType::Int(30),
    ];

    println!("Values: {:?}", data);
    println!("Sum: {}", calculate_sum(&data));

    if let Some(avg) = calculate_average(&data) {
        println!("Average: {:.2}", avg);
    }
}
Output:
Values: [Int(10), Float(20.5), String("15"), Bool(true), Int(30)]
Sum: 76.5
Average: 15.30
Message Queue Events
#[derive(Debug, Clone)]
enum Message {
    Text { user: String, content: String },
    Image { user: String, url: String, size: usize },
    Video { user: String, url: String, duration: u32 },
    System { message: String },
}

impl Message {
    fn user(&self) -> Option<&str> {
        match self {
            Message::Text { user, .. } => Some(user),
            Message::Image { user, .. } => Some(user),
            Message::Video { user, .. } => Some(user),
            Message::System { .. } => None,
        }
    }

    fn format(&self) -> String {
        match self {
            Message::Text { user, content } => {
                format!("[{}]: {}", user, content)
            }
            Message::Image { user, url, size } => {
                format!("[{}] sent an image ({} bytes): {}", user, size, url)
            }
            Message::Video { user, url, duration } => {
                format!("[{}] sent a video ({}s): {}", user, duration, url)
            }
            Message::System { message } => {
                format!("[SYSTEM] {}", message)
            }
        }
    }
}

fn main() {
    let messages: Vec<Message> = vec![
        Message::System {
            message: "Chat room opened".to_string(),
        },
        Message::Text {
            user: "Alice".to_string(),
            content: "Hello everyone!".to_string(),
        },
        Message::Image {
            user: "Bob".to_string(),
            url: "https://example.com/pic.jpg".to_string(),
            size: 1024000,
        },
        Message::Text {
            user: "Charlie".to_string(),
            content: "Nice pic!".to_string(),
        },
        Message::Video {
            user: "Alice".to_string(),
            url: "https://example.com/video.mp4".to_string(),
            duration: 120,
        },
    ];

    for msg in &messages {
        println!("{}", msg.format());
    }

    println!("\n--- User Statistics ---");
    let mut user_messages: std::collections::HashMap<String, usize> =
        std::collections::HashMap::new();

    for msg in &messages {
        if let Some(user) = msg.user() {
            *user_messages.entry(user.to_string()).or_insert(0) += 1;
        }
    }

    for (user, count) in user_messages {
        println!("{}: {} messages", user, count);
    }
}
Best Practices
1. Derive useful traits
#![allow(unused)]
fn main() {
// ✅ Derive Debug, Clone khi cần
#[derive(Debug, Clone, PartialEq)]
enum Value {
    Int(i32),
    String(String),
}
}
2. Provide helper methods
#![allow(unused)]
fn main() {
enum Value {
    Int(i32),
    Float(f64),
}

impl Value {
    fn as_int(&self) -> Option<i32> {
        if let Value::Int(n) = self {
            Some(*n)
        } else {
            None
        }
    }

    fn to_float(&self) -> f64 {
        match self {
            Value::Int(n) => *n as f64,
            Value::Float(f) => *f,
        }
    }
}
}
3. Use pattern matching
#![allow(unused)]
fn main() {
// ✅ Exhaustive match
fn process(value: &Value) {
    match value {
        Value::Int(n) => println!("Integer: {}", n),
        Value::Float(f) => println!("Float: {}", f),
        Value::String(s) => println!("String: {}", s),
    }
}
}
4. Consider memory layout
#![allow(unused)]
fn main() {
// ❌ Large size difference - wastes memory
enum Bad {
    Small(u8),        // 1 byte
    Large([u8; 1024]) // 1024 bytes
}
// Size = 1024 + tag + padding

// ✅ Box large variants
enum Better {
    Small(u8),
    Large(Box<[u8; 1024]>)  // Pointer size
}
// Size = 8 + tag + padding (on 64-bit)
}
Khi nào dùng Enum trong Vec?
✅ Nên dùng khi:
- Fixed set of types - Biết trước các types cần lưu
- Type-safe operations - Cần xử lý từng type khác nhau
- Pattern matching - Muốn use exhaustive matching
- No trait objects - Không thể dùng
dyn Trait
❌ Không phù hợp khi:
- Too many types - Enum quá lớn
- Dynamic types - Types chỉ biết runtime
- Large variants - Waste memory
- Shared behavior - Trait objects phù hợp hơn
So sánh với Trait Objects
Enum approach
#![allow(unused)]
fn main() {
enum Shape {
    Circle { radius: f64 },
    Rectangle { width: f64, height: f64 },
}

impl Shape {
    fn area(&self) -> f64 {
        match self {
            Shape::Circle { radius } => std::f64::consts::PI * radius * radius,
            Shape::Rectangle { width, height } => width * height,
        }
    }
}

let shapes = vec![
    Shape::Circle { radius: 5.0 },
    Shape::Rectangle { width: 10.0, height: 20.0 },
];
}
Trait object approach
#![allow(unused)]
fn main() {
trait Shape {
    fn area(&self) -> f64;
}

struct Circle { radius: f64 }
struct Rectangle { width: f64, height: f64 }

impl Shape for Circle {
    fn area(&self) -> f64 {
        std::f64::consts::PI * self.radius * self.radius
    }
}

impl Shape for Rectangle {
    fn area(&self) -> f64 {
        self.width * self.height
    }
}

let shapes: Vec<Box<dyn Shape>> = vec![
    Box::new(Circle { radius: 5.0 }),
    Box::new(Rectangle { width: 10.0, height: 20.0 }),
];
}Enum: Compile-time dispatch, exhaustive matching, no heap allocation Trait object: Runtime dispatch, extensible, heap allocation
Tổng kết
Sử dụng Enum để chứa nhiều loại dữ liệu trong Vec:
- ✅ Type-safe và compile-time checked
- ✅ Pattern matching exhaustive
- ✅ No heap allocation (except data inside variants)
- ✅ Clear và explicit về các types có thể chứa
Best practices:
- Derive useful traits (Debug, Clone, PartialEq)
- Provide helper methods (as_, to_, is_*)
- Use pattern matching cho type-safe operations
- Box large variants để tránh waste memory
- Consider trait objects nếu cần extensibility
Common use cases:
- Mixed data types trong database rows
- JSON/config values
- Log events
- Message queues
- Spreadsheet cells
References
/// code comment sao cho đúng
Comment sao cho đúng để đồng đội bớt chửi.
#![allow(unused)]
fn main() {
// hello, world
}
Regular comments
Trong Rust comment bắt đầu bằng 2 slashes // được gọi là Regular comments,
chú thích cho một đoạn code hoặc biểu thức theo sau nó.
Compiler sẽ không quan tâm đến các Regular comments này.
fn main() {
  // I’m feeling lucky today
  let lucky_number = 7;
}
Nếu comment có nhiều hơn một dòng, hãy ngắt nó thành nhiều dòng -.-
#![allow(unused)]
fn main() {
// So we’re doing something complicated here, long enough that we need
// multiple lines of comments to do it! Whew! Hopefully, this comment will
// explain what’s going on.
}
Comment cũng có thể được đặt cuối dòng code, nếu nó ngắn gọn và đơn giản:
fn main() {
  let lucky_number = 7; // I’m feeling lucky today
}
Doc comments
Doc comments sẽ được Compiler parse thành HTML documentation
khi render document bằng cargo doc.
#![allow(unused)]
fn main() {
/// Generate library docs for the following item.
//! Generate library docs for the enclosing item.
}
Doc comments sẽ cực kỳ hữu ích cho project lớn và cần một hệ thống document chính xác và up to date.
//! sẽ generate doc cho crate/mod trong file hiện tại.
#![crate_name = "playground"]

/// A human being is represented here
pub struct Person {
    /// A person must have a name, no matter how much Juliet may hate it
    name: String,
}

impl Person {
    /// Returns a person with the name given them
    ///
    /// # Arguments
    ///
    /// * `name` - A string slice that holds the name of the person
    ///
    /// # Examples
    ///
    /// ```
    /// // You can have rust code between fences inside the comments
    /// // If you pass --test to `rustdoc`, it will even test it for you!
    /// use doc::Person;
    /// let person = Person::new("name");
    /// ```
    pub fn new(name: &str) -> Person {
        Person {
            name: name.to_string(),
        }
    }

    /// Gives a friendly hello!
    ///
    /// Says "Hello, [name]" to the `Person` it is called on.
    pub fn hello(&self) {
        println!("Hello, {}!", self.name);
    }
}

fn main() {
    let john = Person::new("John");

    john.hello();
}
Chúng ta có thể thậm chí comment lại example code hoặc cách sử dụng một function nào đó, code này cũng sẽ được compile và test, đảm bảo được code và document luôn luôn chính xác với nhau, một giải pháp khá thông minh.
#![allow(unused)]
fn main() {
/// Adds one to the number given.
///
/// # Examples
///
/// ```
/// let arg = 5;
/// let answer = my_crate::add_one(arg);
///
/// assert_eq!(6, answer);
/// ```
pub fn add_one(x: i32) -> i32 {
    x + 1
}
}
Regular comments
Regular comments
Trong Rust comment bắt đầu bằng 2 slashes // được gọi là Regular comments,
chú thích cho một đoạn code hoặc biểu thức theo sau nó.
Compiler sẽ không quan tâm đến các Regular comments này.
fn main() {
  // I’m feeling lucky today
  let lucky_number = 7;
}
Nếu comment có nhiều hơn một dòng, hãy ngắt nó thành nhiều dòng -.-
#![allow(unused)]
fn main() {
// So we’re doing something complicated here, long enough that we need
// multiple lines of comments to do it! Whew! Hopefully, this comment will
// explain what’s going on.
}
Comment cũng có thể được đặt cuối dòng code, nếu nó ngắn gọn và đơn giản:
fn main() {
  let lucky_number = 7; // I’m feeling lucky today
}
Doc comments
Doc comments
Doc comments sẽ được Compiler parse thành HTML documentation
khi render document bằng cargo doc.
#![allow(unused)]
fn main() {
/// Generate library docs for the following item.
//! Generate library docs for the enclosing item.
}
Doc comments sẽ cực kỳ hữu ích cho project lớn và cần một hệ thống document chính xác và up to date.
//! sẽ generate doc cho crate/mod trong file hiện tại.
#![crate_name = "playground"]

/// A human being is represented here
pub struct Person {
    /// A person must have a name, no matter how much Juliet may hate it
    name: String,
}

impl Person {
    /// Returns a person with the name given them
    ///
    /// # Arguments
    ///
    /// * `name` - A string slice that holds the name of the person
    ///
    /// # Examples
    ///
    /// ```
    /// // You can have rust code between fences inside the comments
    /// // If you pass --test to `rustdoc`, it will even test it for you!
    /// use doc::Person;
    /// let person = Person::new("name");
    /// ```
    pub fn new(name: &str) -> Person {
        Person {
            name: name.to_string(),
        }
    }

    /// Gives a friendly hello!
    ///
    /// Says "Hello, [name]" to the `Person` it is called on.
    pub fn hello(&self) {
        println!("Hello, {}!", self.name);
    }
}

fn main() {
    let john = Person::new("John");

    john.hello();
}
Chúng ta có thể thậm chí comment lại example code hoặc cách sử dụng một function nào đó, code này cũng sẽ được compile và test, đảm bảo được code và document luôn luôn chính xác với nhau, một giải pháp khá thông minh.
#![allow(unused)]
fn main() {
/// Adds one to the number given.
///
/// # Examples
///
/// ```
/// let arg = 5;
/// let answer = my_crate::add_one(arg);
///
/// assert_eq!(6, answer);
/// ```
pub fn add_one(x: i32) -> i32 {
x + 1
}
}Turbofish ::<>

Trong trường hợp bạn cần chỉ định kiểu dữ liệu cho một generic function, method, struct, hoặc enum, Rust có một cú pháp đặc biệt để làm điều này gọi là turbofish. Quy tắc là khi nào bạn thấy
$ident<T>trong bất kỳ định nghĩa nào, thì bạn có thể sử dụng nó dưới dạng
$ident::<T>để chỉ định kiểu dữ liệu cho generic parameter. Sau đây là một số ví dụ để làm rõ hơn.
Generic Function
Ví dụ function std::mem::size_of() có definition như sau:
pub fn size_of<T>() -> usizeKhi gọi size_of với turbofish:
std::mem::size_of::<u32>()
// 4sẽ cho ta biết size của u32 theo số bytes.
Generic Method
Phương thức parse() của str bạn cũng sẽ hay gặp cách sử dụng với cú pháp turbofish:
fn parse<F>(&self) -> Result<F, F::Err> where F: FromStrChúng ta có thể sử dụng turbofish để mô tả kiểu dữ liệu sẽ được parsed từ str
"1234".parse::<u32>()Một ví dụ phổ biến nữa là collect() của Iterator
fn collect<B>(self) -> B where B: FromIterator<Self::Item> Bởi vì compiler đã biết kiểu dữ liệu của Self::Item mà ta đang collect rồi,
chúng ta thường không cần ghi ra. Thay vào đó là sử dụng _ để compiler tự động infer ra. Ví dụ:
let a = vec![1u8, 2, 3, 4];
a.iter().collect::<Vec<_>>();Sẵn tiện nói về Iterator chúng ta cũng có thể sử dụng turbofish syntax với sum() và product().
fn sum<S>(self) -> S where S: Sum<Self::Item>
fn product<P>(self) -> P where P: Product<Self::Item>Cú pháp như sau:
[1, 2, 3, 4].iter().sum::<u32>()
[1, 2, 3, 4].iter().product::<u32>()Generic Struct
Trong trường hợp compiler không có đủ thông tin để infer khi tạo generic struct,
chúng ta cũng có thể sử dụng turbofish syntax. Ví dụ struct Vec có định nghĩa như sau
pub struct Vec<T> { /* fields omitted */ }Ví dụ để khởi tạo Vec mới với Vec::new() ta có thể viết
Vec::<u8>::new()Nhớ là ta bỏ turbofish sau Vec:: không phải sau method new
bởi vì struct sử dụng generic type chứ không phải method new.
Hơi bựa nhưng nó vẫn thỏa quy tắc của turbofish. Một ví dụ khác
std::collections::HashSet::<u8>::with_capacity(10) Ta đang tạo một Hashset với 10 phần tử, bởi vì Hashset struct có định nghĩa như sau
pub struct HashSet<T, S = RandomState> { /* fields omitted */ } Chúng ta có thể sử dụng cú pháp này với mọi Rust collections.
Generic Enum
Tuy nhiên Enum lại không theo quy tắc trên, bởi vì enum trong Rust không được
scoped tại enum name, do đó ta đặt turbofish sau enum variant.
Ví dụ hãy xem enum Result được dùng rất nhiều trong Rust
#[must_use]
pub enum Result<T, E> {
Ok(T),
Err(E),
}Chúng ta sử dụng như thế này:
Result::Ok::<u8, ()>(10)
Result::Err::<u8, ()>(())Và bởi vì Result thường được prelude (import sẵn)
trong Rust, thực tế mọi người sẽ viết như thế này:
Ok::<u8, ()>(10)
Err::<u8, ()>(()) References
- Generic Types, Traits, and Lifetimes
- Generics in the rust book
- Rust syntax index
- https://matematikaadit.github.io/posts/rust-turbofish.html
- https://techblog.tonsser.com/posts/what-is-rusts-turbofish
macros!
Mới bắt đầu với Rust chúng ta thường sử dụng rất nhiều macro như println!.
Thực chất có 3 loại macro trong Rust.
- Custom
#[derive]macros that specify code added with the derive attribute used on structs and enums - Attribute-like macros that define custom attributes usable on any item
- Function-like macros that look like function calls but operate on the tokens specified as their argument
Nội dung:
Khác nhau giữa Macros và Functions
// Macros
macro_rules! print_message {
(msg: $msg:expr) => {
println!("Message: {}", $msg);
};
}
fn main() {
print_message!(msg: "Hello, world!");
}/// Functions
fn print_message(msg: &str) {
println!("Message: {}", msg);
}
fn main() {
print_message("Hello, world!");
}Điểm khác biệt trong thời điểm biên dịch
- Functions được thực thi trong quá trình thực thi của chương trình, còn Macros được đánh giá và mở rộng trong quá trình biên dịch.
- Functions chỉ có thể được gọi khi chương trình đang chạy, trong khi Macros có thể được gọi bất kỳ lúc nào trong quá trình biên dịch.
AST (Abstract Syntax Tree)
- Macros có thể truy cập vào AST của code được viết, cho phép thay đổi code theo cách động.
- Functions không có quyền truy cập vào AST của code được viết.
Input / Output
| Rust Macros | Rust Functions | |
|---|---|---|
| Input | Token stream | Tham số và đối số của hàm |
| Output | Đoạn mã Rust được mở rộng | Giá trị hoặc hiệu ứng sẽ được trả về |
macro_rules! math {
($x:expr + $y:expr) => { $x * $y };
}
fn main() {
let result = math!(4 + 5);
println!("4 * 5 = {}", result);
}Khi biên dịch, macro math! sẽ được mở rộng và tạo ra đoạn mã 4 * 5 được tính toán thành 20.
Tham số của macro lúc này là $x:expr + $y:expr là token stream, cho phép khả năng mở rộng cú pháp không giới hạn.
Sử dụng và ứng dụng
- Functions được sử dụng để đóng gói một khối lệnh nhất định, giúp tái sử dụng và quản lý code dễ dàng hơn.
- Macros được sử dụng để thay đổi code tại thời điểm biên dịch, giúp viết code ngắn gọn và hiệu quả hơn.
Standard Macros
Standard Macros được định nghĩa bởi compiler và std.
print!, println!, eprint!, eprintln!
format!, format_args!
write!, writeln!
concat!, concat_idents!, stringify // concat_idents: nightly-only experimental API
include!, include_bytes!, include_str!
assert!, assert_eq!, assert_ne!
debug_assert!, debug_assert_eq!, debug_assert_ne!
try!, panic!, compile_error!, unreachable!, unimplemented!
file!, line!, column!, module_path!
env!, option_env!
cfg!
select!, thread_local! // select: nightly-only experimental API
vec!
println!
Đây là một trong những macro được dùng nhiều nhất trong Rust. Giúp in nội dung ra standard output, với một dấu newline xuống dòng.
println! có cùng cú pháp với format!.
Ví dụ:
println!(); // prints just a newline
println!("hello there!");
println!("format {} arguments", "some");In một Struct
#[derive(Debug)]
struct MyStruct {
item: String,
n: i32,
}
let my_struct = MyStruct {
item: "duyet".to_string(),
n: 99,
};
println!("my struct = {:?}", my_struct); // my struct = MyStruct { item: "duyet", n: 99 }format!
Đây là một trong những macro được dùng nhiều nhất trong Rust.
format!() giúp khởi tạo một String. Tham số đầu tiên của format! là chuỗi định dạng.
Sức mạnh của format string này ở trong các {}.
Xem các ví dụ sau:
fn main() {
format!("test");
format!("hello {}", "world!");
format!("x = {}, y = {y}", 10, y = 30);
let z = 100;
format!("z = {z}");
}.to_string() để convert một giá trị thành String
Để convert một giá trị thành String, thay vì sử dụng format!() thì người ta hay sử dụng
to_string.
Method này sẽ sử dụng Display formatting trait.
fn main() {
// Thay vì
format!("single string");
// Sử dụng
"single string".to_string();
}References
- https://doc.rust-lang.org/std/macro.format.html
todo!
Đôi khi bạn sẽ cần viết code một cách tổng quát, định nghĩa một loạt các function trước để hình dung ra flow của project, liệt kê sẵn một loạt các function mà bạn dự định sẽ implementent và sử dụng sau:
struct Book {} // Okay, first I need a book struct.
// Nothing in there yet - will add later
enum BookType { // A book can be hardcover or softcover, so add an enum
HardCover,
SoftCover,
}
fn get_book(book: &Book) -> Option<String> {} // ⚠️ get_book should take a &Book and return an Option<String>
fn delete_book(book: Book) -> Result<(), String> {} // delete_book should take a Book and return a Result...
// TODO: impl block and make these functions methods...
fn check_book_type(book_type: &BookType) { // Let's make sure the match statement works
match book_type {
BookType::HardCover => println!("It's hardcover"),
BookType::SoftCover => println!("It's softcover"),
}
}
fn main() {
let book_type = BookType::HardCover;
check_book_type(&book_type); // Okay, let's check this function!
}Chúng ta chưa dùng đến, nhưng compiler vẫn sẽ không happy với get_book và delete_book.
error[E0308]: mismatched types
--> src\main.rs:32:29
|
32 | fn get_book(book: &Book) -> Option<String> {}
| -------- ^^^^^^^^^^^^^^ expected enum `std::option::Option`, found `()`
| |
| implicitly returns `()` as its body has no tail or `return` expression
|
= note: expected enum `std::option::Option<std::string::String>`
found unit type `()`
error[E0308]: mismatched types
--> src\main.rs:34:31
|
34 | fn delete_book(book: Book) -> Result<(), String> {}
| ----------- ^^^^^^^^^^^^^^^^^^ expected enum `std::result::Result`, found `()`
| |
| implicitly returns `()` as its body has no tail or `return` expression
|
= note: expected enum `std::result::Result<(), std::string::String>`
found unit type `()`
Khi này chúng ta sử dụng todo!(), Rust sẽ compile và không complain gì về những function dang dở này nữa.
struct Book {}
fn get_book(book: &Book) -> Option<String> {
todo!() // todo means "I will do it later, please be quiet"
}
fn delete_book(book: Book) -> Result<(), String> {
todo!()
}
fn main() {}References
macro_rules!
macro_rules! là một macro cho phép định nghĩa một macro khác. Với macro này, bạn có thể tạo ra các macros như println! hoặc vec!.
// This is a simple macro named `say_hello`.
macro_rules! say_hello {
// `()` indicates that the macro takes no argument.
() => {
// The macro will expand into the contents of this block.
println!("Hello!");
};
}
fn main() {
// This call will expand into `println!("Hello");`
say_hello!()
}Trong đó say_hello là tên của macro bạn đang định nghĩa.
Sau đó, bạn có thể xác định các rule cho macro trong các block code phía sau.
Các quy tắc này được xác định bằng cách sử dụng các pattern và các rule. Pattern được sử dụng để so khớp với các biểu thức mà macro được áp dụng. Rule được sử dụng để chỉ định mã được tạo ra bởi macro khi so khớp với pattern.
// This is a simple macro named `say_hello`.
macro_rules! say_hello {
// `()` indicates that the macro takes no argument.
() => {
// The macro will expand into the contents of this block.
println!("Hello!");
};
($name: expr) => {
println!("Hello {}!", $name);
};
}
fn main() {
// This call will expand into `println!("Hello {}", "Duyet");`
say_hello!("Duyet")
}Trong ví dụ trên, khi gọi say_hello!("Duyet") được so khớp với pattern ($name: expr) do đó sau khi biên dịch,
đoạn mã được thực thi sẽ là println!("Hello {}!", "Duyet");
Repeat *, +
Dưới đây là một ví dụ khác về cách sử dụng macro_rules! để định nghĩa một macro trong Rust:
macro_rules! vec_of_strings {
( $( $x:expr ),* ) => {
vec![ $( $x.to_string() ),* ]
};
}
fn main() {
let fruits = vec_of_strings!["apple", "banana", "cherry"];
println!("{:?}", fruits);
}Trong đó, pattern $( $x:expr ),* so khớp với một danh sách các biểu thức được chuyển vào macro,
được phân tách bằng dấu phẩy ,. Rule vec![ $( $x.to_string() ),* ] được sử dụng để tạo ra một Vec
các chuỗi được chuyển đổi từ các biểu thức được truyền vào.
Khi biên dịch, macro vec_of_strings! được mở rộng và tạo ra một Vec chứa các chuỗi "apple", "banana", và "cherry".
Kết quả khi chạy chương trình sẽ là ["apple", "banana", "cherry"] .
Đệ quy macros
Dưới đây là một ví dụ về cách sử dụng đệ quy trong macro_rules! để tạo ra các macro phức tạp hơn:
macro_rules! countdown {
($x:expr) => {
println!("{}", $x);
};
($x:expr, $($rest:expr),+) => {
println!("{}", $x);
countdown!($($rest),*);
};
}
fn main() {
countdown!(5, 4, 3, 2, 1);
}Trong quy tắc macro countdown!, chúng ta sử dụng cấu trúc $x:expr
để lấy giá trị biểu thức được truyền vào và in ra nó bằng lệnh println!.
Sau đó, chúng ta sử dụng cấu trúc $($rest:expr),+ để lấy danh sách các biểu thức còn lại,
và gọi lại macro countdown! với danh sách này.
Quá trình đệ quy này sẽ tiếp tục cho đến khi danh sách các biểu thức truyền vào rỗng,
khi đó macro sẽ không còn gọi lại chính nó nữa.
References
- https://doc.rust-lang.org/rust-by-example/macros.html
match
match được dùng khá phổ biến trong Rust (Pattern Syntax).
Nội dung
Matching giá trị
Pattern matching với literals (giá trị cụ thể) là cách sử dụng phổ biến nhất của match trong Rust. Bạn có thể match trực tiếp với các giá trị cụ thể như số, ký tự, hay chuỗi.
Match với số nguyên
fn describe_number(x: i32) {
match x {
1 => println!("Một"),
2 => println!("Hai"),
3 => println!("Ba"),
_ => println!("Số khác"),
}
}
fn main() {
describe_number(1); // In ra: Một
describe_number(5); // In ra: Số khác
}Pattern _ (underscore) là một wildcard pattern, match với mọi giá trị còn lại. Nó giống như default case trong switch của C/Java.
Match với ký tự
fn describe_char(c: char) {
match c {
'a' => println!("Chữ a"),
'b' => println!("Chữ b"),
'0'..='9' => println!("Một chữ số"),
_ => println!("Ký tự khác"),
}
}
fn main() {
describe_char('a'); // In ra: Chữ a
describe_char('5'); // In ra: Một chữ số
describe_char('z'); // In ra: Ký tự khác
}Ở ví dụ trên, '0'..='9' là range pattern, match với mọi ký tự từ ‘0’ đến ‘9’.
Match với boolean
fn is_true(b: bool) -> &'static str {
match b {
true => "Đúng rồi!",
false => "Sai rồi!",
}
}
fn main() {
println!("{}", is_true(true)); // In ra: Đúng rồi!
println!("{}", is_true(false)); // In ra: Sai rồi!
}Với boolean, bạn không cần dùng _ vì chỉ có 2 giá trị: true và false.
Match với range
fn categorize_age(age: u32) {
match age {
0 => println!("Trẻ sơ sinh"),
1..=12 => println!("Trẻ em"),
13..=19 => println!("Thiếu niên"),
20..=64 => println!("Người trưởng thành"),
65..=u32::MAX => println!("Người cao tuổi"),
}
}
fn main() {
categorize_age(5); // In ra: Trẻ em
categorize_age(25); // In ra: Người trưởng thành
categorize_age(70); // In ra: Người cao tuổi
}Cú pháp 1..=12 là inclusive range (bao gồm cả 1 và 12). Nếu dùng 1..12 thì sẽ là exclusive range (từ 1 đến 11, không bao gồm 12).
Exhaustiveness Checking
Một điểm mạnh của match trong Rust là compiler sẽ kiểm tra xem bạn đã xử lý hết tất cả các trường hợp chưa. Điều này giúp tránh bugs.
#![allow(unused)]
fn main() {
fn check_number(x: i32) {
match x {
1 => println!("Một"),
2 => println!("Hai"),
// ❌ Compiler sẽ báo lỗi: pattern `i32::MIN..=0_i32` and `3_i32..=i32::MAX` not covered
}
}
}Bạn phải xử lý tất cả các trường hợp, hoặc sử dụng _ để bắt các trường hợp còn lại:
#![allow(unused)]
fn main() {
fn check_number(x: i32) {
match x {
1 => println!("Một"),
2 => println!("Hai"),
_ => println!("Số khác"), // ✅ OK
}
}
}So sánh với if-else
Trong một số ngôn ngữ khác như JavaScript hay Python, bạn có thể dùng if-else để làm việc tương tự:
// JavaScript
function describeNumber(x) {
if (x === 1) {
console.log("Một");
} else if (x === 2) {
console.log("Hai");
} else if (x === 3) {
console.log("Ba");
} else {
console.log("Số khác");
}
}
Tuy nhiên match trong Rust có nhiều ưu điểm hơn:
- Compiler kiểm tra exhaustiveness (đã xử lý hết tất cả trường hợp chưa)
- Dễ đọc và rõ ràng hơn với nhiều trường hợp
- Có thể match với pattern phức tạp (struct, enum, …)
Trả về giá trị
match là một expression, có nghĩa là nó có thể trả về giá trị:
fn number_to_string(x: i32) -> String {
match x {
1 => "một".to_string(),
2 => "hai".to_string(),
3 => "ba".to_string(),
_ => format!("số {}", x),
}
}
fn main() {
let result = number_to_string(2);
println!("{}", result); // In ra: hai
}Tất cả các arm (nhánh) của match phải trả về cùng một kiểu dữ liệu.
References
Matching Named Variables
Named variables trong pattern matching cho phép bạn bind (gán) giá trị vào một biến mới trong match arm. Đây là một tính năng mạnh mẽ giúp bạn trích xuất và sử dụng giá trị từ các kiểu dữ liệu phức tạp.
Cơ bản về Named Variables
Khi bạn sử dụng một tên biến trong pattern, Rust sẽ tạo một biến mới và gán giá trị match được vào biến đó:
fn main() {
let x = 5;
match x {
value => println!("Giá trị là: {}", value),
}
// In ra: Giá trị là: 5
}Ở ví dụ trên, value là một named variable, nó sẽ match với bất kỳ giá trị nào và bind giá trị đó vào biến value.
Shadowing trong Match
Một điểm cần lưu ý là named variable trong match có thể shadow (che khuất) biến bên ngoài:
fn main() {
let x = Some(5);
let y = 10;
match x {
Some(50) => println!("Bằng 50"),
Some(y) => println!("Matched, y = {}", y), // y ở đây là biến mới!
_ => println!("Default case, x = {:?}", x),
}
println!("Kết thúc: x = {:?}, y = {}", x, y);
}Output:
Matched, y = 5
Kết thúc: x = Some(5), y = 10
Lưu ý rằng y trong pattern Some(y) là một biến mới, không phải là biến y = 10 ở ngoài. Biến y trong match arm có giá trị là 5 (được extract từ Some(5)), còn biến y bên ngoài vẫn giữ nguyên giá trị 10.
Match với Struct
Named variables rất hữu ích khi destructure struct:
struct Point {
x: i32,
y: i32,
}
fn main() {
let point = Point { x: 0, y: 7 };
match point {
Point { x, y: 0 } => println!("Trên trục x tại x = {}", x),
Point { x: 0, y } => println!("Trên trục y tại y = {}", y),
Point { x, y } => println!("Tại ({}, {})", x, y),
}
// In ra: Trên trục y tại y = 7
}Bạn có thể đặt tên khác cho biến:
struct Point {
x: i32,
y: i32,
}
fn main() {
let point = Point { x: 5, y: 10 };
match point {
Point { x: horizontal, y: vertical } => {
println!("Tọa độ ngang: {}, tọa độ dọc: {}", horizontal, vertical);
}
}
// In ra: Tọa độ ngang: 5, tọa độ dọc: 10
}Match với Enum
Named variables cho phép extract giá trị từ enum variants:
enum Message {
Quit,
Move { x: i32, y: i32 },
Write(String),
ChangeColor(i32, i32, i32),
}
fn process_message(msg: Message) {
match msg {
Message::Quit => println!("Thoát"),
Message::Move { x, y } => println!("Di chuyển đến ({}, {})", x, y),
Message::Write(text) => println!("Văn bản: {}", text),
Message::ChangeColor(r, g, b) => println!("Đổi màu RGB({}, {}, {})", r, g, b),
}
}
fn main() {
let msg1 = Message::Move { x: 10, y: 20 };
let msg2 = Message::Write(String::from("Hello"));
let msg3 = Message::ChangeColor(255, 0, 0);
process_message(msg1); // In ra: Di chuyển đến (10, 20)
process_message(msg2); // In ra: Văn bản: Hello
process_message(msg3); // In ra: Đổi màu RGB(255, 0, 0)
}Match với Tuple
fn main() {
let tuple = (1, 2, 3);
match tuple {
(0, y, z) => println!("Phần tử đầu là 0, y = {}, z = {}", y, z),
(x, 0, z) => println!("Phần tử giữa là 0, x = {}, z = {}", x, z),
(x, y, 0) => println!("Phần tử cuối là 0, x = {}, y = {}", x, y),
(x, y, z) => println!("x = {}, y = {}, z = {}", x, y, z),
}
// In ra: x = 1, y = 2, z = 3
}Sử dụng @ binding
@ operator cho phép bạn vừa test một giá trị với pattern, vừa bind giá trị đó vào một biến:
fn main() {
let age = 25;
match age {
n @ 0..=12 => println!("Trẻ em, tuổi: {}", n),
n @ 13..=19 => println!("Thiếu niên, tuổi: {}", n),
n @ 20..=64 => println!("Người trưởng thành, tuổi: {}", n),
n @ 65.. => println!("Người cao tuổi, tuổi: {}", n),
}
// In ra: Người trưởng thành, tuổi: 25
}Không có @, bạn sẽ không có biến để sử dụng:
#![allow(unused)]
fn main() {
match age {
0..=12 => println!("Trẻ em"), // không biết tuổi cụ thể
// ...
}
}@ với enum
@ binding rất hữu ích khi làm việc với enum:
enum Message {
Hello { id: i32 },
}
fn main() {
let msg = Message::Hello { id: 5 };
match msg {
Message::Hello { id: id_var @ 3..=7 } => {
println!("ID trong khoảng 3-7: {}", id_var);
}
Message::Hello { id: 10..=12 } => {
println!("ID trong khoảng 10-12");
}
Message::Hello { id } => {
println!("ID khác: {}", id);
}
}
// In ra: ID trong khoảng 3-7: 5
}Phân biệt với _
Named variable sẽ match và bind giá trị, trong khi _ chỉ match mà không bind:
fn main() {
let x = 5;
match x {
value => println!("Có giá trị: {}", value), // OK, có thể dùng value
}
match x {
_ => println!("Có giá trị: {}", x), // Dùng x từ outer scope
}
}Sử dụng _ khi bạn không quan tâm đến giá trị:
struct Point {
x: i32,
y: i32,
z: i32,
}
fn main() {
let point = Point { x: 0, y: 0, z: 8 };
match point {
Point { x: 0, y: 0, z } => println!("Trên trục z tại z = {}", z),
Point { x: 0, y, z: _ } => println!("Trên mặt phẳng yz, y = {}", y),
Point { x, y: _, z: _ } => println!("x = {}, không quan tâm y và z", x),
_ => println!("Điểm khác"),
}
}Ví dụ thực tế: Parse kết quả
fn parse_config(input: &str) -> Result<(String, u16), String> {
let parts: Vec<&str> = input.split(':').collect();
match parts.as_slice() {
[host, port] => {
match port.parse::<u16>() {
Ok(port_num) => Ok((host.to_string(), port_num)),
Err(_) => Err("Port không hợp lệ".to_string()),
}
}
_ => Err("Format không đúng".to_string()),
}
}
fn main() {
match parse_config("localhost:8080") {
Ok((host, port)) => println!("Server: {} trên port {}", host, port),
Err(e) => println!("Lỗi: {}", e),
}
// In ra: Server: localhost trên port 8080
}References
Matching Multiple
Trong Rust, bạn có thể match nhiều pattern trong cùng một arm của match expression. Điều này giúp code ngắn gọn và dễ đọc hơn khi nhiều giá trị cần được xử lý giống nhau.
Match nhiều giá trị với | (OR pattern)
Toán tử | (pipe) cho phép bạn match nhiều pattern trong cùng một arm:
fn describe_number(x: i32) {
match x {
1 | 2 => println!("Một hoặc hai"),
3 | 4 | 5 => println!("Ba, bốn hoặc năm"),
_ => println!("Số khác"),
}
}
fn main() {
describe_number(1); // In ra: Một hoặc hai
describe_number(4); // In ra: Ba, bốn hoặc năm
describe_number(7); // In ra: Số khác
}Kết hợp OR pattern với range
Bạn có thể kết hợp nhiều pattern và range trong cùng một arm:
fn categorize_number(x: i32) {
match x {
0 => println!("Số không"),
1..=10 | 100 => println!("Từ 1 đến 10, hoặc 100"),
-1 | -2 | -3 => println!("Số âm nhỏ"),
_ => println!("Số khác"),
}
}
fn main() {
categorize_number(5); // In ra: Từ 1 đến 10, hoặc 100
categorize_number(100); // In ra: Từ 1 đến 10, hoặc 100
categorize_number(-2); // In ra: Số âm nhỏ
}Match với ký tự
fn is_vowel(c: char) -> bool {
match c {
'a' | 'e' | 'i' | 'o' | 'u' => true,
'A' | 'E' | 'I' | 'O' | 'U' => true,
_ => false,
}
}
fn main() {
println!("{}", is_vowel('a')); // true
println!("{}", is_vowel('b')); // false
println!("{}", is_vowel('E')); // true
}Hoặc ngắn gọn hơn:
#![allow(unused)]
fn main() {
fn is_vowel(c: char) -> bool {
match c {
'a' | 'e' | 'i' | 'o' | 'u' | 'A' | 'E' | 'I' | 'O' | 'U' => true,
_ => false,
}
}
}Match với enum
OR pattern rất hữu ích khi làm việc với enum:
enum Direction {
North,
South,
East,
West,
}
fn is_horizontal(dir: Direction) -> bool {
match dir {
Direction::East | Direction::West => true,
Direction::North | Direction::South => false,
}
}
fn main() {
println!("{}", is_horizontal(Direction::East)); // true
println!("{}", is_horizontal(Direction::North)); // false
}Ví dụ thực tế: HTTP status codes
fn handle_status_code(code: u16) {
match code {
200 | 201 | 202 | 204 => println!("Success"),
301 | 302 | 303 | 307 | 308 => println!("Redirect"),
400 | 401 | 403 | 404 => println!("Client error"),
500 | 501 | 502 | 503 => println!("Server error"),
_ => println!("Unknown status"),
}
}
fn main() {
handle_status_code(200); // In ra: Success
handle_status_code(404); // In ra: Client error
handle_status_code(500); // In ra: Server error
}Hoặc kết hợp với range để ngắn gọn hơn:
#![allow(unused)]
fn main() {
fn handle_status_code(code: u16) {
match code {
200..=299 => println!("Success"),
300..=399 => println!("Redirect"),
400..=499 => println!("Client error"),
500..=599 => println!("Server error"),
_ => println!("Unknown status"),
}
}
}So sánh với ngôn ngữ khác
Trong JavaScript, bạn có thể sử dụng multiple case statements mà không có break:
// JavaScript
function describeNumber(x) {
switch (x) {
case 1:
case 2:
console.log("Một hoặc hai");
break;
case 3:
case 4:
case 5:
console.log("Ba, bốn hoặc năm");
break;
default:
console.log("Số khác");
}
}
Trong Python (từ version 3.10), bạn có thể dùng | trong match:
# Python 3.10+
def describe_number(x):
match x:
case 1 | 2:
print("Một hoặc hai")
case 3 | 4 | 5:
print("Ba, bốn hoặc năm")
case _:
print("Số khác")
Rust’s OR pattern (|) tương tự như Python, nhưng được kiểm tra tại compile time để đảm bảo type safety.
Match với tuple
Bạn cũng có thể sử dụng OR pattern với tuple:
fn describe_point(point: (i32, i32)) {
match point {
(0, 0) => println!("Gốc tọa độ"),
(0, _) | (_, 0) => println!("Nằm trên trục"),
(x, y) if x == y => println!("Nằm trên đường chéo"),
_ => println!("Điểm thông thường"),
}
}
fn main() {
describe_point((0, 0)); // In ra: Gốc tọa độ
describe_point((0, 5)); // In ra: Nằm trên trục
describe_point((3, 0)); // In ra: Nằm trên trục
describe_point((4, 4)); // In ra: Nằm trên đường chéo
describe_point((2, 3)); // In ra: Điểm thông thường
}Lưu ý quan trọng
Khi sử dụng OR pattern, tất cả các pattern phải bind (gán) cùng một tập hợp các biến. Ví dụ sau sẽ không compile:
#![allow(unused)]
fn main() {
// ❌ Lỗi: variable `x` is not bound in all patterns
match (1, 2) {
(x, _) | (_, x) => println!("{}", x), // lỗi!
}
}Lý do là trong pattern đầu tiên (x, _), x được bind với phần tử đầu tiên, nhưng trong pattern thứ hai (_, x), x được bind với phần tử thứ hai. Compiler không thể xác định x nên lấy giá trị nào.
References
#[attributes]
Attribute là metadata được apply cho một số module, crate hoặc item. Metadata này được dùng cho việc:
-
conditional compilation of code: compile code theo điều kiện, ví dụ một số code sẽ chỉ được compile cho tests, cho OS cụ thể, cho một số feature nào đó, etc.
// This function only gets compiled if the target OS is linux #[cfg(target_os = "linux")] fn are_you_on_linux() { println!("You are running linux!"); } // And this function only gets compiled if the target OS is *not* linux #[cfg(not(target_os = "linux"))] fn are_you_on_linux() { println!("You are *not* running linux!"); } -
set crate name, version and type (binary or library)
// This crate is a library #![crate_type = "lib"] // The library is named "rary" #![crate_name = "rary"] pub fn public_function() { println!("called rary's `public_function()`"); } -
disable lints (warnings)
-
bật một số tính năng của compiler (macros, glob imports, etc.)
-
link đến foreign library
-
đánh dấu các function là unit tests
#[test] fn test_hello() { assert!("hello"); } -
đánh dấu function là một phần của benchmark
Khi một attributes được apply cho cả crate, cú pháp là #![crate_attribute].
Khi apply cho một module hoặc item, cú pháp là #[item_attribute] (không có dấu !).
Attributes cũng có thể có tham số:
#[attribute = "value"]#[attribute(key = "value")]#[attribute(value)]
Attributes có thể có nhiều giá trị, có thể break thành nhiều dòng:
#[attribute(value, value2)]
#[attribute(value, value2, value3,
value4, value5)]Xử lý lỗi
Có rất nhiều cách để deal với error trong Rust. Bạn vui lòng xem trong các trang tiếp theo, mặc dù có nhiều cách để xử lý tùy theo các trường hợp khác nhau, có một quy luật chung:
panichầu hết hữu ích trong khi tests (panic khi test fail) hoặc đối mặt với các lỗi không thể xử lý được.Optionkhi một giá trị nào đó là không bắt buộc hoặc thiếu các giá trị này vẫn không gây lỗi cho chương trình. Chỉ sử dụngunwrap()khi prototyping hoặc các trường hợp chắc chắn luôn luôn có giá trị. Tuy nhiênexpect()thì ổn hơn bởi nó giúp chúng ta bỏ thêm error message khi có biến.- Khi có khả năng một function nào đó có thể lỗi, và người gọi function bắt buộc phải xử lý lỗi đó, hãy sử dụng
Result. Vui lòng chỉ sử dụngunwrap()vàexpect()trong khi test hoặc prototype.
Nội dung
panic
Cơ chế đơn giản nhất để xử lý lỗi là panic!. Panic sẽ in error message
và thường sẽ thoát chương trình.
fn drink(beverage: &str) {
if beverage == "lemonade" { panic!("AAAaaaaa!!!!"); }
println!("Some refreshing {} is all I need.", beverage);
}
fn main() {
drink("water");
drink("lemonade");
}Option
Nhiều ngôn ngữ sử dụng kiểu dữ liệu null hoặc nil hoặc undefined
để đại diện cho các giá trị rỗng hoặc không tồn tại, và sử dụng Exception
để xử lý lỗi. Rust bỏ qua hai khái niệm này, để tránh gặp phải các lỗi phổ biến
như null pointer exceptions, hay lộ thông tin nhạy cảm thông qua exceptions, …
Thay vào đó, Rust giới thiệu hai generic enums Option
và Result để giải quyết các vấn đề trên.
Trong hầu hết các ngôn ngữ họ C (C, C#, Java, …), để xác định một cái gì đó failed
hay không tìm được giá trị thỏa mãn, chúng ta thường trả về một giá trị “đặc biệt” nào đó.
Ví dụ indexOf() của Javascript scan một phần tử trong mảng,
trả về vị trí của phần tử đó trong mảng. Và trả về -1 nếu không tìm thấy.
Dẫn đến, ta sẽ thường thấy một số đoạn code như sau đây:
// Typescript
let sentence = "The fox jumps over the dog";
let index = sentence.indexOf("fox");
if (index > -1) {
let result = sentence.substr(index);
console.log(result);
}
Như bạn thấy -1 là một trường hợp đặc biệt cần xử lý.
Có khi nào bạn đã từng mắc lỗi ngớ ngẫn vì tưởng giá trị đặc biệt đó là 0 chưa?
// Typescript
if (index > 0) {
// 3000 days of debugging
}
"" hay null hay None cũng là một trong những trường hợp đặc biệt đó.
Bạn đã từng nghe đến Null References: The Billion Dollar Mistake?
Lý do cơ bản là không có gì chắc chắn và có thể ngăn bạn lại việc … quên xử lý mọi trường hợp giá trị đặc biệt, hoặc do chương trình trả về các giá trị đặc biệt không như mong đợi. Có nghĩa là ta có thể vô tình làm crash chương trình với một lỗi nhỏ ở bất kỳ đâu, ở bất kỳ thời điểm nào.
Rust làm điều này tốt hơn, chỉ với Option.
Một giá trị optional có thể mang một giá trị nào đó Some(something) hoặc không mang giá trị nào cả (None).
#![allow(unused)]
fn main() {
// An output can have either Some value or no value/ None.
enum Option<T> { // T is a generic and it can contain any type of value.
Some(T),
None,
}
}Theo thiết kế, mặc định bạn sẽ không bao giờ lấy được giá trị bạn cần nếu không xử lý
các trường hợp có thể xảy ra với Option, là None chẳng hạn.
Điều này được bắt buộc bởi compiler lúc compile code,
có nghĩa là nếu bạn quên check, code sẽ không bao giờ được compile.
#![allow(unused)]
fn main() {
let sentence = "The fox jumps over the dog";
let index = sentence.find("fox");
if let Some(fox) = index {
let words_after_fox = &sentence[fox..];
println!("{}", words_after_fox);
}
}Cách sử dụng Option
Option là standard library, do đã được
preludes
nên chúng ta không cần khai báo trước khi sử dụng. Ngoài enum
Option thì các variant của nó cũng đã được preludes
sẵn như Some
và None.
Ví dụ, ta có một function tính giá trị chia hai số, đôi khi sẽ không tìm ra được kết quả, ta sử dụng Some như sau:
fn get_id_from_name(name: &str) -> Option<i32> {
if !name.starts_with('d') {
return None;
}
Some(123)
}
fn main() {
let name = "duyet";
match get_id_from_name(name) {
Some(id) => println!("User = {}", id),
_ => println!("Not found"),
}
}Ta thường sử dụng match để bắt giá trị trả về (Some hoặc None).
Bạn sẽ bắt gặp rất nhiều method khác nhau để xử lý giá trị của Option
Option method overview: https://doc.rust-lang.org/std/option/#method-overview
.unwrap()
Trả về giá trị nằm trong Some(T). Nếu giá trị là None thì panic chương trình.
#![allow(unused)]
fn main() {
let x = Some("air");
assert_eq!(x.unwrap(), "air");
let x: Option<&str> = None;
assert_eq!(x.unwrap(), "air"); // panic!
}.expect()
Giống .unwrap(), nhưng khi panic thì Rust sẽ kèm theo message
#![allow(unused)]
fn main() {
let x: Option<&str> = None;
x.expect("fruits are healthy"); // panics: `fruits are healthy`
}.unwrap_or()
Trả về giá trị nằm trong Some, nếu không trả về giá trị nằm trong or
#![allow(unused)]
fn main() {
assert_eq!(Some("car").unwrap_or("bike"), "car");
}.unwrap_or_default()
Trả về giá trị nằm trong Some, nếu không trả về giá default.
#![allow(unused)]
fn main() {
let good_year_from_input = "1909";
let bad_year_from_input = "190blarg";
let good_year = good_year_from_input.parse().ok().unwrap_or_default();
let bad_year = bad_year_from_input.parse().ok().unwrap_or_default();
assert_eq!(1909, good_year);
assert_eq!(0, bad_year);
}.ok_or()
Convert Option<T> sang Result<T, E>,
mapping Some(v)
thành Ok(v)
và None
sang Err(err).
#![allow(unused)]
fn main() {
let x = Some("foo");
assert_eq!(x.ok_or(0), Ok("foo"));
}match
Chúng ta có thể sử dụng pattern matching để code dễ đọc hơn
#![allow(unused)]
fn main() {
fn get_name(who: Option<String>) -> String {
match who {
Some(name) => format!("Hello {}", name),
None => "Who are you?".to_string(),
}
}
get_name(Some("duyet"));
}if let Some(x) = x
Có thể bạn sẽ gặp pattern này nhiều khi đọc code Rust.
Nếu giá trị của x là Some thì sẽ destruct
giá trị đó bỏ vào biến x nằm trong scope của if.
#![allow(unused)]
fn main() {
fn get_data() -> Option<String> {
Some("ok".to_string())
}
if let Some(data) = get_data() {
println!("data = {}", data);
} else {
println!("no data");
}
}Result
Tương tự như Option.
Một kết quả trả về (Result)
của một function thường sẽ có hai trường hợp:
Result là một phiên bản cao cấp hơn của Option.
Nó mô tả lỗi gì đang xảy ra thay vì khả năng tồn tại giá trị hay không.
#![allow(unused)]
fn main() {
enum Result<T, E> {
Ok(T),
Err(E),
}
}Ví dụ
fn get_id_from_name(name: &str) -> Result<i32, &str> {
if !name.starts_with('d') {
return Err("not found");
}
Ok(123)
}
fn main() -> Result<(), &'static str> {
let name = "duyet";
match get_id_from_name(name) {
Ok(id) => println!("User = {}", id),
Err(e) => println!("Error: {}", e),
};
Ok(())
}Như bạn thấy thì main() cũng có thể return về Result<(), &'static str>
.unwrap()
Ví dụ trên nhưng sử dụng .unwrap() , chủ động panic (crash) dừng chương trình nếu gặp lỗi.
fn main() -> Result<(), &'static str> {
let who = "duyet";
let age = get_age(who).unwrap();
println!("{} is {}", who, age);
Ok(())
}.expect()
Giống như unwrap(): chủ động panic (crash) dừng chương trình nếu gặp lỗi và kèm theo message. Sẽ rất có ích, nhất là khi có quá nhiều unwrap, bạn sẽ không biết nó panic ở đâu.
fn main() -> Result<(), &'static str> {
let who = "ngan";
let age = get_age(who).expect("could not get age");
println!("{} is {}", who, age);
Ok(())
}Xem thêm mọi method khác của Result tại đây.
Convert Result -> Option
Đôi khi bạn sẽ cần convert từ:
Ok(v)–>Some(v)- hoặc ngược lại,
Err(e)–>Some(e)
.ok()
// .ok(v) = Some(v)
let x: Result<u32, &str> = Ok(2);
assert_eq!(x.ok(), Some(2));
let y: Result<u32, &str> = Err("Nothing here");
assert_eq!(y.ok(), None);.err()
// .err()
let x: Result<u32, &str> = Ok(2);
assert_eq!(x.err(), None);
let x: Result<u32, &str> = Err("Nothing here");
assert_eq!(x.err(), Some("Nothing here"));Toán tử ?
Khi viết code mà có quá nhiều functions trả về Result, việc handle Err sẽ khá nhàm chán.
Toán tử chấm hỏi ? cho phép dừng function tại vị trí đó và return cho function cha nếu Result ở vị trí đó là Err.
Nó sẽ thay thế đoạn code sau:
#![allow(unused)]
fn main() {
use std::fs::File;
use std::io::prelude::*;
use std::io;
struct Info {
name: String,
age: i32,
rating: i32,
}
fn write_info(info: &Info) -> io::Result<()> {
// Early return on error
let mut file = match File::create("my_best_friends.txt") {
Err(e) => return Err(e),
Ok(f) => f,
};
if let Err(e) = file.write_all(format!("name: {}\n", info.name).as_bytes()) {
return Err(e)
}
if let Err(e) = file.write_all(format!("age: {}\n", info.age).as_bytes()) {
return Err(e)
}
if let Err(e) = file.write_all(format!("rating: {}\n", info.rating).as_bytes()) {
return Err(e)
}
Ok(())
}
}thành
#![allow(unused)]
fn main() {
use std::fs::File;
use std::io::prelude::*;
use std::io;
struct Info {
name: String,
age: i32,
rating: i32,
}
fn write_info(info: &Info) -> io::Result<()> {
let mut file = File::create("my_best_friends.txt")?;
// Early return on error
file.write_all(format!("name: {}\n", info.name).as_bytes())?;
file.write_all(format!("age: {}\n", info.age).as_bytes())?;
file.write_all(format!("rating: {}\n", info.rating).as_bytes())?;
Ok(())
}
}Gọn đẹp hơn rất nhiều.
Toán tử ? sẽ unwrap giá trị Ok, hoặc return giá trị Err ở vị trí gần toán tử đó.
? chỉ có thể được dùng trong function có kiểu dữ liệu trả về là Result.
Result map
Ta có thể xử lý giá trị bên trong Result mà không cần xử lý Err,
trong trường hợp bạn muốn trả Err cho hàm bên trên đó tự lý.
use std::num::ParseIntError;
fn multiply(a: &str, b: &str) -> Result<i32, ParseIntError> {
match a.parse::<i32>() {
Ok(first) => {
match b.parse::<i32>() {
Ok(second) => Ok(first * second),
Err(e) => Err(e),
}
},
Err(e) => Err(e),
}
}
fn print(result: Result<i32, ParseIntError>) {
match result {
Ok(n) => println!("n is {}", n),
Err(e) => println!("Error: {}", e),
}
}
fn main() {
let twenty = multiply("10", "2");
print(twenty);
let tt = multiply("t", "2");
print(tt);
}Thay vào đó ta sử dụng .map(), .and_then() để đoạn code trên hiệu quả và dễ đọc hơn.
use std::num::ParseIntError;
fn multiply(a: &str, b: &str) -> Result<i32, ParseIntError> {
a.parse::<i32>().and_then(|first| {
b.parse::<i32>().map(|second| first * second)
})
}
fn print(result: Result<i32, ParseIntError>) {
match result {
Ok(n) => println!("n is {}", n),
Err(e) => println!("Error: {}", e),
}
}
fn main() {
let twenty = multiply("10", "2");
print(twenty);
let tt = multiply("t", "2");
print(tt);
}Result alias
Rust cho phép chúng ta tạo alias.
Việc alias Result sẽ tiết kiệm chúng ta rất nhiều thời gian,
nhất là trong cùng một module và ta đang cố reuse Result nhiều lần.
use std::num::ParseIntError;
// Define a generic alias for a `Result` with the error type `ParseIntError`.
type AliasedResult<T> = Result<T, ParseIntError>;
// Use the above alias to refer to our specific `Result` type.
fn multiply(a: &str, b: &str) -> AliasedResult<i32> {
a.parse::<i32>().and_then(|first| {
b.parse::<i32>().map(|second| first * second)
})
}
fn print(result: AliasedResult<i32>) {
match result {
Ok(n) => println!("n is {}", n),
Err(e) => println!("Error: {}", e),
}
}
fn main() {
print(multiply("10", "2"));
print(multiply("t", "2"));
}Boxing error
Một cách để viết code đơn giản trong khi vẫn giữ lại các lỗi gốc là bằng cách sử dụng Box. Nhược điểm là lỗi gốc bên dưới chỉ được biết lúc runtime và không được xác định trước (statically determined).
use std::error;
use std::fmt;
// Change the alias to use `Box<dyn error::Error>`.
type Result<T> = std::result::Result<T, Box<dyn error::Error>>;
#[derive(Debug, Clone)]
struct EmptyVec;
impl fmt::Display for EmptyVec {
fn fmt(&self, f: &mut fmt::Formatter) -> fmt::Result {
write!(f, "invalid first item to double")
}
}
impl error::Error for EmptyVec {}
fn double_first(vec: Vec<&str>) -> Result<i32> {
vec.first()
.ok_or_else(|| EmptyVec.into()) // Converts to Box
.and_then(|s| {
s.parse::<i32>()
.map_err(|e| e.into()) // Converts to Box
.map(|i| 2 * i)
})
}
fn print(result: Result<i32>) {
match result {
Ok(n) => println!("The first doubled is {}", n),
Err(e) => println!("Error: {}", e),
}
}
fn main() {
let numbers = vec!["42", "93", "18"];
let empty = vec![];
let strings = vec!["tofu", "93", "18"];
print(double_first(numbers));
print(double_first(empty));
print(double_first(strings));
}References
Custom error
Một cách khác để boxing errors là wrap chúng vào một kiểu dữ liệu được định nghĩa cụ thể. Cách này hơi mất thời gian nhưng code tường minh, lời khuyên là sử dụng một số thư viện khác thay cho việc tự định nghĩa lỗi một, ví dụ như thiserror, anyhow, etc.
use std::error;
use std::error::Error;
use std::num::ParseIntError;
use std::fmt;
type Result<T> = std::result::Result<T, DoubleError>;
#[derive(Debug)]
enum DoubleError {
EmptyVec,
// We will defer to the parse error implementation for their error.
// Supplying extra info requires adding more data to the type.
Parse(ParseIntError),
}
impl fmt::Display for DoubleError {
fn fmt(&self, f: &mut fmt::Formatter) -> fmt::Result {
match *self {
DoubleError::EmptyVec =>
write!(f, "please use a vector with at least one element"),
// The wrapped error contains additional information and is available
// via the source() method.
DoubleError::Parse(..) =>
write!(f, "the provided string could not be parsed as int"),
}
}
}
impl error::Error for DoubleError {
fn source(&self) -> Option<&(dyn error::Error + 'static)> {
match *self {
DoubleError::EmptyVec => None,
// The cause is the underlying implementation error type. Is implicitly
// cast to the trait object `&error::Error`. This works because the
// underlying type already implements the `Error` trait.
DoubleError::Parse(ref e) => Some(e),
}
}
}
// Implement the conversion from `ParseIntError` to `DoubleError`.
// This will be automatically called by `?` if a `ParseIntError`
// needs to be converted into a `DoubleError`.
impl From<ParseIntError> for DoubleError {
fn from(err: ParseIntError) -> DoubleError {
DoubleError::Parse(err)
}
}
fn double_first(vec: Vec<&str>) -> Result<i32> {
let first = vec.first().ok_or(DoubleError::EmptyVec)?;
// Here we implicitly use the `ParseIntError` implementation of `From` (which
// we defined above) in order to create a `DoubleError`.
let parsed = first.parse::<i32>()?;
Ok(2 * parsed)
}
fn print(result: Result<i32>) {
match result {
Ok(n) => println!("The first doubled is {}", n),
Err(e) => {
println!("Error: {}", e);
if let Some(source) = e.source() {
println!(" Caused by: {}", source);
}
},
}
}
fn main() {
let numbers = vec!["42", "93", "18"];
let empty = vec![];
let strings = vec!["tofu", "93", "18"];
print(double_first(numbers));
print(double_first(empty));
print(double_first(strings));
}References
Viết Tests
Rust được thiết kế để đưa tính đúng đắn của chương trình lên hàng đầu. Như bạn đã thấy với những gì mà borrow checkers của compiler hay hệ thống type đã làm. Nhưng tính đúng đắn thì cực kỳ phức tạp và Rust không thể đảm bảo hết điều này.
Tuy nhiên, testing lại là một kỹ năng phức tạp. Mục tiêu của phần này mình sẽ không bàn đến việc viết good tests như thế nào, chúng ta sẽ bàn về những gì mà Rust cung cấp để giúp chúng ta viết tests, những công cụ, macros, chạy tests, cách tổ chức unit tests và integration tests.
Nội dung
Tổ chức Tests
Testing là một kỹ năng phức tạp. Nhiều lập trình viên sử dụng nhiều thuật ngữ khác nhau và tổ chức code tests khác nhau. Cộng đồng Rust đặt ra hai loại tests:
- Unit tests: nhỏ và tập trung vào một function, module độc lập tại một thời điểm.
- Integration tests: tests nằm ngoài thư viện của bạn, sử dụng thư viện của bạn để tests như thể là một chương trình thực tế sẽ thực sự sử dụng. Chỉ test trên public interface và tập trung vào cả 1 module cho một test.
Unit Tests
Unit tests được đặt trong thư mục src trong mỗi file code mà bạn đang test.
Có một convention là tạo một module tên tests trong mỗi file chứa function cần test,
annotate module này với attribute #[cfg(test)].
#[cfg(test)]
#[cfg(test)] báo cho compiler biết module này được dùng để compile thành test, chỉ được dùng
khi chạy cargo test, không dùng khi cargo build.
File: src/lib.rs
#![allow(unused)]
fn main() {
pub fn adder(a: i32, b: i32) -> i32 {
a + b
}
#[cfg(test)]
mod tests {
use super::*;
#[test]
fn test_adder() {
let expected = 4;
let actual = adder(2, 2);
assert_eq!(expected, actual);
}
}
}Trong module tests có thể sẽ có một vài helper function khác, do đó những function nào
là function test sẽ được đánh dấu là #[test] để compiler nhận biết.
Test private function
Ở ví dụ trên thì public function adder được import vào trong module tests theo đúng rule của Rust.
Vậy còn private function thì sao? Có một cuộc tranh cãi trong cộng đồng về việc này.
Cuối cùng thì Rust cho phép import private function vào tests module.
#![allow(unused)]
fn main() {
pub fn adder(a: i32, b: i32) -> i32 {
adder_internal(a, b)
}
fn adder_internal(a: i32, b: i32) -> i32 {
a + b
}
#[cfg(test)]
mod tests {
use super::*;
#[test]
fn test_adder() {
let expected = 4;
let actual = adder_internal(2, 2);
assert_eq!(expected, actual);
}
}
}Integration Tests
Integration tests nằm hoàn toàn bên ngoài thư viện của bạn. Mục đích của integration tests nhằm kiểm tra các thành phần của thư viện của bạn hoạt động cùng với nhau có chính xác không.
Để bắt đầu viết integration tests, tạo thư mục tests nằm cùng cấp với src.
Trong thư mục tests, cargo sẽ compile mỗi file thành một thành một crate độc lập.
File: tests/integration_test.rs
#![allow(unused)]
fn main() {
use adder;
#[test]
fưn it_adds_two() {
assert_eq!(4, adder::adder(2, 2));
}
}Ở đây chúng ta import use adder thay vì use crate::
do file integration test này là một crate độc lập.
Chạy cargo test
$ cargo test
Compiling adder v0.1.0 (file:///projects/adder)
Finished test [unoptimized + debuginfo] target(s) in 1.31s
Running unittests (target/debug/deps/adder-1082c4b063a8fbe6)
running 1 test
test tests::test_adder ... ok
test result: ok. 1 passed; 0 failed; 0 ignored; 0 measured; 0 filtered out; finished in 0.00s
Running tests/integration_test.rs (target/debug/deps/integration_test-1082c4b063a8fbe6)
running 1 test
test it_adds_two ... ok
test result: ok. 1 passed; 0 failed; 0 ignored; 0 measured; 0 filtered out; finished in 0.00s
Doc-tests adder
running 0 tests
test result: ok. 0 passed; 0 failed; 0 ignored; 0 measured; 0 filtered out; finished in 0.00sđ
Do integration tests phải import thư viện để chạy test code, crate bắt buộc phải có src/lib.rs.
Các binary crates không thể test theo cách này.
Do đó các project Rust họ thường tổ chức theo kiểu build binary từ src/main.rs và import trực tiếp logic từ src/lib.rs.
References
Doc Tests
Rust cũng hỗ trợ execute code ví dụ trên document như là một test. Đây là giải pháp cực kỳ thông minh giúp đảm bảo example code luôn up to date và nó có hoạt động.
#![allow(unused)]
fn main() {
/// Function that adding two number
///
/// # Example
///
/// ```
/// use adder::adder;
///
/// assert_eq!(4, adder(2, 2));
/// ```
pub fn adder(a: i32, b: i32) -> i32 {
a + b
}
}Khi chạy cargo test hoặc cargo test --doc, cargo sẽ compile
phần example code này thành một crate test và thực thi nó.
Mặc định nếu không chỉ định ngôn ngữ cho block code thì rustdoc sẽ ngầm định nó là Rust code. Do đó
```
let x = 5;
```
sẽ tương đương với
```rust
let x = 5;
```
Ẩn một phần của example code
Đôi lúc bạn sẽ cần example code gọn hơn, ẩn bớt một số logic mà bạn chuẩn bị để code có thể chạy được, tránh làm distract của người xem.
/// ```
/// /// Some documentation.
/// # fn foo() {} // this function will be hidden
/// println!("Hello, World!");
/// ```
Chúng ta thêm # ở phần đầu của dòng code muốn ẩn đi trong generate doc,
nó vẫn sẽ được compile như mình thường.
Sử dụng ? trong doc tests
? chỉ có thể được sử dụng khi function trả về Result<T, E>. Hãy sử dụng cách sau:
/// A doc test using ?
///
/// ```
/// use std::io;
/// fn main() -> io::Result<()> {
/// let mut input = String::new();
/// io::stdin().read_line(&mut input)?;
/// Ok(())
/// }
/// ```
Cùng với việc sử dụng # như ở trên, chúng ta có thể ẩn đi bớt logic.
/// A doc test using ?
///
/// ```
/// # use std::io;
/// # fn main() -> io::Result<()> {
/// let mut input = String::new();
/// io::stdin().read_line(&mut input)?;
/// # Ok(())
/// # }
/// ```
References
Unit Tests
Unit Tests
Unit tests được đặt trong thư mục src trong mỗi file code mà bạn đang test.
Có một convention là tạo một module tên tests trong mỗi file chứa function cần test,
annotate module này với attribute #[cfg(test)].
#[cfg(test)]
#[cfg(test)] báo cho compiler biết module này được dùng để compile thành test, chỉ được dùng
khi chạy cargo test, không dùng khi cargo build.
File: src/lib.rs
#![allow(unused)]
fn main() {
pub fn adder(a: i32, b: i32) -> i32 {
a + b
}
#[cfg(test)]
mod tests {
use super::*;
#[test]
fn test_adder() {
let expected = 4;
let actual = adder(2, 2);
assert_eq!(expected, actual);
}
}
}Trong module tests có thể sẽ có một vài helper function khác, do đó những function nào
là function test sẽ được đánh dấu là #[test] để compiler nhận biết.
Test private function
Ở ví dụ trên thì public function adder được import vào trong module tests theo đúng rule của Rust.
Vậy còn private function thì sao? Có một cuộc tranh cãi trong cộng đồng về việc này.
Cuối cùng thì Rust cho phép import private function vào tests module.
#![allow(unused)]
fn main() {
pub fn adder(a: i32, b: i32) -> i32 {
adder_internal(a, b)
}
fn adder_internal(a: i32, b: i32) -> i32 {
a + b
}
#[cfg(test)]
mod tests {
use super::*;
#[test]
fn test_adder() {
let expected = 4;
let actual = adder_internal(2, 2);
assert_eq!(expected, actual);
}
}
}Integration Tests
Integration Tests
Integration tests nằm hoàn toàn bên ngoài thư viện của bạn. Mục đích của integration tests nhằm kiểm tra các thành phần của thư viện của bạn hoạt động cùng với nhau có chính xác không.
Để bắt đầu viết integration tests, tạo thư mục tests nằm cùng cấp với src.
Trong thư mục tests, cargo sẽ compile mỗi file thành một thành một crate độc lập.
File: tests/integration_test.rs
#![allow(unused)]
fn main() {
use adder;
#[test]
fưn it_adds_two() {
assert_eq!(4, adder::adder(2, 2));
}
}Ở đây chúng ta import use adder thay vì use crate::
do file integration test này là một crate độc lập.
Chạy cargo test
$ cargo test
Compiling adder v0.1.0 (file:///projects/adder)
Finished test [unoptimized + debuginfo] target(s) in 1.31s
Running unittests (target/debug/deps/adder-1082c4b063a8fbe6)
running 1 test
test tests::test_adder ... ok
test result: ok. 1 passed; 0 failed; 0 ignored; 0 measured; 0 filtered out; finished in 0.00s
Running tests/integration_test.rs (target/debug/deps/integration_test-1082c4b063a8fbe6)
running 1 test
test it_adds_two ... ok
test result: ok. 1 passed; 0 failed; 0 ignored; 0 measured; 0 filtered out; finished in 0.00s
Doc-tests adder
running 0 tests
test result: ok. 0 passed; 0 failed; 0 ignored; 0 measured; 0 filtered out; finished in 0.00sđ
Do integration tests phải import thư viện để chạy test code, crate bắt buộc phải có src/lib.rs.
Các binary crates không thể test theo cách này.
Do đó các project Rust họ thường tổ chức theo kiểu build binary từ src/main.rs và import trực tiếp logic từ src/lib.rs.
References
Doc Tests
Doc Tests
Rust cũng hỗ trợ execute code ví dụ trên document như là một test. Đây là giải pháp cực kỳ thông minh giúp đảm bảo example code luôn up to date và nó có hoạt động.
#![allow(unused)]
fn main() {
/// Function that adding two number
///
/// # Example
///
/// ```
/// use adder::adder;
///
/// assert_eq!(4, adder(2, 2));
/// ```
pub fn adder(a: i32, b: i32) -> i32 {
a + b
}
}Khi chạy cargo test hoặc cargo test --doc, cargo sẽ compile
phần example code này thành một crate test và thực thi nó.
Mặc định nếu không chỉ định ngôn ngữ cho block code thì rustdoc sẽ ngầm định nó là Rust code. Do đó
```
let x = 5;
```
sẽ tương đương với
```rust
let x = 5;
```
Ẩn một phần của example code
Đôi lúc bạn sẽ cần example code gọn hơn, ẩn bớt một số logic mà bạn chuẩn bị để code có thể chạy được, tránh làm distract của người xem.
/// ```
/// /// Some documentation.
/// # fn foo() {} // this function will be hidden
/// println!("Hello, World!");
/// ```
Chúng ta thêm # ở phần đầu của dòng code muốn ẩn đi trong generate doc,
nó vẫn sẽ được compile như mình thường.
Sử dụng ? trong doc tests
? chỉ có thể được sử dụng khi function trả về Result<T, E>. Hãy sử dụng cách sau:
/// A doc test using ?
///
/// ```
/// use std::io;
/// fn main() -> io::Result<()> {
/// let mut input = String::new();
/// io::stdin().read_line(&mut input)?;
/// Ok(())
/// }
/// ```
Cùng với việc sử dụng # như ở trên, chúng ta có thể ẩn đi bớt logic.
/// A doc test using ?
///
/// ```
/// # use std::io;
/// # fn main() -> io::Result<()> {
/// let mut input = String::new();
/// io::stdin().read_line(&mut input)?;
/// # Ok(())
/// # }
/// ```
References
Xung đột biến môi trường
Các unit tests trong cùng một module được thực thi song song nhau, trong cùng một process. Một trường hợp mà mình đã gặp phải là xung đột do 2 tests cùng sử dụng một biến môi trường hoặc biến môi trường ảnh hưởng đến kết quả của tests khác.
#![allow(unused)]
fn main() {
use std::env;
#[test]
fn test_one() {
env::set_var("KEY", "value_one");
assert_eq!(env::var("KEY"), Ok("value_one".to_string()));
}
#[test]
fn test_one() {
env::set_var("KEY", "value_two");
assert_eq!(env::var("KEY"), Ok("value_two".to_string()));
}
}Giải pháp ổn nhất hiện tại mình dùng để giải quyết là
serial_test
File: Cargo.toml
[dev-dependencies]
serial_test = "0.9"
#![allow(unused)]
fn main() {
use std::env;
#[test]
#[serial]
fn test_one() {
env::set_var("KEY", "value_one");
assert_eq!(env::var("KEY"), Ok("value_one".to_string()));
}
#[test]
#[serial]
fn test_one() {
env::set_var("KEY", "value_two");
assert_eq!(env::var("KEY"), Ok("value_two".to_string()));
}
}Các tests có #[serial] sẽ được thực hiện tuần tự nhau, tránh trường hợp xung đột như trước.
References
Viết Docs
Rust mặc định được phát hành cùng với một công cụ gọi là rustdoc hay cargo doc.
Giúp generate document cho Rust project.
Cơ bản
Thử viết 1 crate đơn giản và document nó:
cargo new duyet_lib --lib
cd duyet_lib
Trong src/lib.rs, Cargo đã generate sẵn 1 đoạn code, hãy xóa và thay nó bằng:
#![allow(unused)]
fn main() {
/// foo is a function
fn foo() {}
}Bây giờ hãy dùng lệnh sau để generate document và xem nó trên trình duyệt:
cargo doc --open
rustdoc đọc mọi comment ///, //! và generate document theo cấu trúc của project.
Nôi dung của document được viết bằng Markdown.
Hãy xem trang viết comment sao cho đúng và Doc comments để biết thêm về cách viết comment doc sao cho chuẩn.
References
Sử dụng README.md làm crate document
Nội dung comment dưới đây trong src/lib.rs được gọi là crate document,
được render thành nội dung trong trang chủ doc của library.
File: src/lib.rs
#![allow(unused)]
fn main() {
//! This is crate document
//!
//! # Usage
//!
//! ```
//! [dependencies]
//! duyet_lib = "0.9"
//! ```
//! ...
}Và nội dung này cũng thường sẽ giống với README.md để hiển thị trên Github.
Một cách để tránh lặp lại nội dung và đồng bộ với nhau là rustdoc render trực tiếp
nội dung từ README.md.
File: src/lib.rs
#![allow(unused)]
fn main() {
#[doc = include_str!("../README.md")]
}File: README.md
This is crate document
# Usage
```
[dependencies]
duyet_lib = "0.9"
```
...
Smart Pointers
Con trỏ (pointer) là một khái niệm chung cho một biến chứa một địa chỉ trong bộ nhớ. Địa chỉ này tham chiếu đến (reference), hoặc “trỏ đến” (“points at”), một số dữ liệu khác.
Loại pointer phổ biến nhất trong Rust là reference, được biểu thị bằng ký hiệu & và mượn giá trị chúng trỏ đến. Chúng không có bất kỳ khả năng đặc biệt nào ngoài việc tham chiếu đến dữ liệu, không tốn bất kỳ chi phí (overhead) nào.
Smart pointers là các kiểu dữ liệu hoạt động như một con trỏ nhưng có thêm metadata và method. Khái niệm về smart pointers không phải là đặc thù riêng của Rust: smart pointers xuất phát từ C++ và tồn tại trong các ngôn ngữ khác nữa.
Rust có nhiều loại Smart Pointers được định nghĩa trong standard library. Khác với reference, Smart Pointers sở hữu (own) luôn dữ liệu, bạn sẽ thường thấy smart pointers có kiểu Rc<T>, Box<T> với T là kiểu dữ liệu gốc nó chứa bên trong.
Để khám phá khái niệm chung, chúng ta sẽ xem xét một số ví dụ khác nhau của smart points, chẳng hạn như
- Reference counting (
Rc<T>): loại con trỏ này cho phép dữ liệu có nhiều owner bằng cách theo dõi số lượng owner và, khi không còn owner nào nữa, clean up giá trị đó. Box<T>allocation giá trị trên heap.Ref<T>vàRefMut<T>cho phép kiểu được borrow lúc runtime thay vì compile time.
Box<T>
Tất cả giá trị trên Rust mặc định đều được allocated trên stack. Giá trị có thể được boxed, allocated trên heap bằng cách sử dụng Box<T>.
Box<T> là một smart pointer của Rust cho phép allocated trên heap giá trị có kiểu T, còn pointer trỏ đến giá trị đó sẽ nằm trên stack.
Xem thêm về stack và heap tại đây.
Khi một Box nằm ngoài scope, destructor sẽ được gọi để giải phóng bộ nhớ. Sử dụng Box không ảnh hưởng nhiều đến performance do Box không bổ sung thêm thông tin metadata nào khác.
fn main() {
let b = Box::new(5);
println!("b = {}", b);
}Ở ví dụ trên, chúng ta định nghĩa b có giá trị của Box đang trỏ đến giá trị 5 và 5 đang được allocated trên heap. Chương trình sẽ in ra b = 5 , cách truy cập giống hệt cách allocated trên stack. Giống như owned value, khi box out of scope, cuối hàm main sẽ được giải phóng.
Lưu một giá trị đơn giản trên Box không mang lại lợi ích gì cả. Chúng ta sẽ thường dùng Box trong các trường hợp sau:
- Khi bạn có một type mà không biết trước size ở compile time, và bạn cần sử dụng type đó trong một số ngữ cảnh cần biết trước chính xác data size (ví dụ như recursive type).
- Bạn cần xử lý các kiểu dữ liệu nhưng chỉ muốn quan tâm đến type đó được implement trait nào.
- Khi bạn có một lượng lớn data cần transfer ownership nhưng muốn chắc là data sẽ không bị copy, sẽ ảnh hưởng đến hiệu năng và làm tăng bộ nhớ.
Chúng ta sẽ làm rõ ngay sau đây.
1. Recursive types với Box
Tại compile time, Rust cần biết cần phải biết cần bao nhiêu bộ nhớ. Một trong những kiểu dữ liệu mà Rust không biết trước được size là recursive type. Giá trị có thể là một phần của giá trị khác có cùng một kiểu. Bởi vì nesting of values theo lý thuyết có thể kéo dài đến vô hạn. Trong trường hợp này ta có thể dùng Box.
Cons list là một kiểu dữ liệu phổ biến trong các ngôn ngữ functional programming, là một ví dụ của recursive type. Cons là viết tắt của “construct function”. Mỗi item trong cons list có 2 thành phần: giá trị của item hiện tại và next item. Item cuối cùng có giá trị Nil và không có next item.
#![allow(unused)]
fn main() {
enum List {
Cons(i32, List),
Nil,
}
}Bây giờ hãy sử dụng List type để lưu list 1, 2, 3 như sau
enum List {
Cons(i32, List),
Nil,
}
use List::{Cons, Nil};
fn main() {
let list = Cons(1, Cons(2, Cons(3, Nil)));
}Nếu chúng ta compile đoạn code trên, compiler sẽ báo như sau:
$ cargo run
Compiling cons-list v0.1.0 (file:///duyet/cons-list)
error[E0072]: recursive type `List` has infinite size
--> src/main.rs:1:1
|
1 | enum List {
| ^^^^^^^^^ recursive type has infinite size
2 | Cons(i32, List),
| ---- recursive without indirection
|
help: insert some indirection (e.g., a `Box`, `Rc`, or `&`) to make `List` representable
|
2 | Cons(i32, Box<List>),
| ++++ +
error[E0391]: cycle detected when computing drop-check constraints for `List`
--> src/main.rs:1:1
|
1 | enum List {
| ^^^^^^^^^
|
= note: ...which immediately requires computing drop-check constraints for `List` again
= note: cycle used when computing dropck types for `Canonical { max_universe: U0, variables: [], value: ParamEnvAnd { param_env: ParamEnv { caller_bounds: [], reveal: UserFacing }, value: List } }`
Some errors have detailed explanations: E0072, E0391.
For more information about an error, try `rustc --explain E0072`.
error: could not compile `cons-list` due to 2 previous errors
Compiler nói rằng kiểu dữ liệu này has infinite size. Bởi vì List có variant là List::Cons chứa trực tiếp một List khác trong chính nó. Do đó Rust sẽ không biết được sẽ cần bao nhiêu bộ nhớ để lưu giá trị của List.
Dừng lại một chút để xem Rust tính toán bộ nhớ của một kiểu dữ liệu bình thường như thế nào:
#![allow(unused)]
fn main() {
enum Message {
Quit,
Move { x: i32, y: i32 },
Write(String),
ChangeColor(i32, i32, i32),
}
}Để xác định bao nhiêu bộ nhớ cần để allocate cho Message, Rust sẽ kiểm tra từng variant (biến thể của enum) để xem variant nào cần bộ nhớ nhiều nhất. Rust thấy rằng Message::Quit không cần, Message::Move phải cần ít nhất bộ nhớ để lưu hai giá trị i32. Tương tự với các variant còn lại. Bởi vì một thời điểm cho có một variant được sử dụng, do đó bộ nhớ tối đa mà Message cần sẽ là một nhớ cần để lưu trữ variant lớn nhất.
Quay lại với Cons List, bộ nhớ mà Rust tính toán được có thể đến vô tận.

Theo như gợi ý của compiler, chúng ta có thể sử dụng Box<T> để có một Recursive Type với một kích thước bộ nhớ xác định:
help: insert some indirection (e.g., a `Box`, `Rc`, or `&`) to make `List` representable
|
2 | Cons(i32, Box<List>),
| ++++ +
Bởi vì Box<T> là một pointer, Rust luôn biết chính xác bao nhiêu bộ nhớ mà một Box<T> pointer cần.
Chương trình của chúng ta lúc này sẽ là:
enum List {
Cons(i32, Box<List>),
Nil,
}
use List::{Cons, Nil};
fn main() {
let list = Cons(1, Box::new(Cons(2, Box::new(Cons(3, Box::new(Nil))))));
}2. Sử dụng trait objects cho phép sử dụng giá trị từ nhiều kiểu dữ liệu khác nhau
Một giới hạn của Vec là chỉ có thể lưu trữ các thành phần có kiểu dữ liệu giống nhau mà thôi. Ta có thể lách luật trong một số trường hợp bằng cách sử dụng enum có nhiều variant giữ nhiều kiểu dữ liệu khác nhau
#![allow(unused)]
fn main() {
enum Cell {
Int(i32),
Float(f64),
Text(String),
}
let row = vec![
Cell::Int(3),
Cell::Text(String::from("blue")),
Cell::Float(10.12),
];
}Tuy nhiên, trong một số trường hợp mong muốn thư viện của chúng ta có thể dễ dàng được mở rộng một số trường hợp khác. Chúng ta đã biết được định nghĩa Trait cho các Common Behavior. Trong Rust, trait định nghĩa các hành vi, và các hành vi này có thể được impl cho struct hoặc enum, để giúp một struct hoặc enum mang đặc tính các hành vi đó.
#![allow(unused)]
fn main() {
pub trait Draw {
fn draw(&self);
}
pub struct Screen {
pub components: Vec<Box<dyn Draw>>,
}
impl Screen {
pub fn run(&self) {
for component in self.components.iter() {
component.draw();
}
}
}
}Hãy xem ví dụ trên, ta có components có kiểu dữ liệu là Vec<T> với <T> là một Box<dyn Draw>. Chúng ta đã định nghĩa một vector chứa kiểu dữ liệu là một trait object.
Một trait object được định nghĩa bằng cách định nghĩa pointer, ví dụ như &dyn T hoặc Box<dyn T> smart pointer.
Một trait object sẽ trỏ đến:
- một instance của một kiểu dữ liệu có implement trait của chúng ta
- và một bảng ghi look up đến các trait methods lúc runtime.
Sử dụng trait object, Rust type system sẽ chắc chắn là tại thời điểm compile, tất cả các giá trị sử dụng tại ngữ cảnh đó đều phải được implement trai của trait object đó. Nói tóm lại, chúng ta sẽ không cần quan tâm đó là kiểu dữ liệu gì, chỉ cần biết kiểu dữ liệu đó phải được implement trait chúng ta cần là được.
Lý do cần sử dụng pointer reference & hoặc smart pointer Box<T> bởi vì compiler không biết chính xác về kiểu dữ liệu, Rust sẽ dùng pointer của trait object để biết được method nào để cần được gọi. Xem thêm về Trait Objects Perform Dynamic Dispatch.
References
- Using Box
to Point to Data on the Heap - Box, stack and heap - Rust By Example
- Using Trait Objects That Allow for Values of Different Types
- Advanced Types - The Rust Programming Language
- The Stack and the Heap
Rc<T>, Reference Counted
Rc<T> cung cấp giá trị shared ownership của một giá trị kiểu T, được cấp phát trên heap. Nếu ta gọi .clone() trên Rc tạo ra một con trỏ mới đến cùng một phần cấp phát trên heap.
Về lý thuyết Rc<T> cho phép chúng ta có nhiều “owner” pointer cho cùng một giá trị, thường là giá trị có kích thước lớn.
Về kỹ thuật, Rc<T> chứa một bộ counter, tự động tăng mỗi khi Rc được clone và giảm khi giá trị giữ con bỏ bị huỷ hoặc out of scope. Khi con trỏ Rc cuối cùng đến allocation thì con trỏ tự động bị huỷ (destroyed), giá trị được lưu trữ trong phần cấp phát đó (thường được gọi là “inner value”) cũng sẽ bị hủy.
#![allow(unused)]
fn main() {
use std::rc::Rc;
let rc = Rc::new(vec![1.0, 2.0, 3.0]);
// Method-call syntax
let rc2 = rc.clone();
}Shared references trong Rust mặc định không cho phép mutation, Rc cũng thế. Nếu muốn chúng ta phải đặt Cell hoặc RefCell bên trong Rc, xem ví dụ.
use std::rc::Rc;
struct Data {
name: String,
// ...other fields
}
fn main() {
// Create a reference-counted `Owner`.
let p1: Rc<Data> = Rc::new(
Data {
name: "Duyet".to_string(),
}
);
let p2 = p1.clone();
let p3 = p1.clone();
// Drop p1
drop(p1);
// Mặc dù đã drop p1 nhưng chúng ta vẫn có thể truy cập đến
// các giá trị của p2 và p3. Bởi p1 là Rc<Data> tức chỉ chứa
// con trỏ đến Data. Data sẽ chỉ bị drop sau khi không còn con
// trỏ nào đến nó nữa.
println!("p2 {}", p2.name);
println!("p3 {}", p3.name);
}Cow - clone-on-write smart pointer
Cow là một smart pointer enum cực kỳ tiện dụng, được định nghĩa là “clone on write”.
Nó sẽ trả về &str nếu bạn không cần một String, hoặc trả về một
String nếu bạn cần String. Tương tự với array &[] và Vec, v.v.
Đây là định nghĩa của Cow:
#![allow(unused)]
fn main() {
pub enum Cow<'a, B>
where
B: 'a + ToOwned + ?Sized,
{
Borrowed(&'a B),
Owned(<B as ToOwned>::Owned),
}
}Hãy phân tích B:
'a có nghĩa là Cow làm việc được với references.
Trait ToOwned có nghĩa type này có thể convert thành owned type.
Ví dụ, str thường là một reference (&str) hoặc bạn có thể convert nó thành owned String.
?Sized, có nghĩa là có thể có Sized hoặc là không.
Hầu hết mọi type trong Rust đều là Sized, nhưng type như là str thì không.
Vì thế chúng ta cần & cho str, bởi vì compiler không biết kích thước của str.
Nếu bạn cần một trait có thể sử dụng giá trị nào tương tư như str, bạn thêm ?Sized.
Tiếp theo là enum variant: một giá trị Cow có thể là Borrowed hoặc Owned.
Ví dụ bạn có một function trả về giá trị Cow<'static, str>.
#![allow(unused)]
fn main() {
fn cow_function() -> Cow<'static, str> {
// ...
}
}Nếu bạn yêu cầu function đó trả về "My message".into(),
nó sẽ xem "My message" là một str. Đây là một Borrowed type,
do đó variant sẽ là Cow::Borrowed(&'static str).
#![allow(unused)]
fn main() {
fn cow_function() -> Cow<'static, str> {
"My message".into()
}
}Còn nếu bạn trả về
#![allow(unused)]
fn main() {
fn cow_function() -> Cow<'static, str> {
format!("{}", "My message").into()
}
}lúc này kết quả trả về sẽ là String, bởi vì format!() trả về String.
Variant sẽ là Cow::Owned.
Lợi ích của Cow
Copy on write là một kỹ thuật giúp tối ưu hoá, nhất là trong các trường hợp reading nhiều hơn writing. Ý tưởng chính là không copy object ngay lập tức, mà chỉ reference (borrow) đến object gốc, khi cần một lượng lớn tác vụ reading. Và chỉ khi cần đến tác vụ writing (ít xảy ra hơn), object mới được copy và thay đổi. Tác vụ để thay đổi giá trị object sẽ copy, di chuyển object trong bộ nhớ là một tác vụ nặng, tốn kém. Do đó, ưu điểm của kỹ thuật này là các tác vụ reading object rất nhanh do chỉ sử dụng reference (borrow) đến giá trị gốc.
References
Ref<T>
#![allow(unused)]
fn main() {
use std::cell::{RefCell, Ref};
let c = RefCell::new((5, 'b'));
let b1: Ref<'_, (u32, char)> = c.borrow();
let b2: Ref<'_, u32> = Ref::map(b1, |t| &t.0);
assert_eq!(*b2, 5)
}https://doc.rust-lang.org/std/cell/struct.Ref.html
RefMut<T>
#![allow(unused)]
fn main() {
use std::cell::{RefCell, RefMut};
let c = RefCell::new((5, 'b'));
{
let b1: RefMut<'_, (u32, char)> = c.borrow_mut();
let mut b2: RefMut<'_, u32> = RefMut::map(b1, |t| &mut t.0);
assert_eq!(*b2, 5);
*b2 = 42;
}
assert_eq!(*c.borrow(), (42, 'b'));
}https://doc.rust-lang.org/std/cell/struct.RefMut.html
Async/Await - Lập trình Bất đồng bộ
Async/await là một trong những tính năng mạnh mẽ nhất của Rust, cho phép viết code bất đồng bộ (asynchronous) một cách dễ đọc và maintainable như code đồng bộ (synchronous) truyền thống.
Tại sao cần Async Programming?
Vấn đề với Synchronous Code
use std::thread;
use std::time::Duration;
fn download_file(url: &str) -> String {
println!("Đang tải {}...", url);
// Giả lập download mất 2 giây
thread::sleep(Duration::from_secs(2));
format!("Dữ liệu từ {}", url)
}
fn main() {
let start = std::time::Instant::now();
// Download tuần tự - mỗi file phải đợi file trước xong
let file1 = download_file("https://example.com/file1");
let file2 = download_file("https://example.com/file2");
let file3 = download_file("https://example.com/file3");
println!("Tổng thời gian: {:?}", start.elapsed());
// Kết quả: ~6 giây (2s × 3 files)
}Vấn đề: Khi download file1, CPU chỉ ngồi chờ đợi network I/O. Lãng phí tài nguyên!
Giải pháp với Async
// Với async/await, ba downloads chạy đồng thời
async fn download_file_async(url: &str) -> String {
println!("Đang tải {}...", url);
// Trong khi chờ network I/O, CPU có thể làm việc khác
tokio::time::sleep(tokio::time::Duration::from_secs(2)).await;
format!("Dữ liệu từ {}", url)
}
#[tokio::main]
async fn main() {
let start = std::time::Instant::now();
// Download song song - không phải đợi nhau
let (file1, file2, file3) = tokio::join!(
download_file_async("https://example.com/file1"),
download_file_async("https://example.com/file2"),
download_file_async("https://example.com/file3"),
);
println!("Tổng thời gian: {:?}", start.elapsed());
// Kết quả: ~2 giây (chạy song song!)
}Lợi ích: Tiết kiệm 4 giây! Từ 6s xuống 2s.
Khái niệm Cơ bản
Future là gì?
Future là một giá trị đại diện cho một computation có thể chưa hoàn thành. Khi bạn .await một Future, bạn đang nói: “Hãy đợi computation này hoàn thành”.
#![allow(unused)]
fn main() {
use std::future::Future;
// Mỗi async function trả về một Future
async fn get_number() -> i32 {
42
}
// Tương đương với:
fn get_number_manual() -> impl Future<Output = i32> {
async { 42 }
}
}async Keyword
Biến một function thành async function:
// Sync function - chạy ngay lập tức
fn compute_sync() -> i32 {
println!("Computing...");
1 + 1
}
// Async function - trả về Future, chưa chạy
async fn compute_async() -> i32 {
println!("Computing async...");
1 + 1
}
fn main() {
// Sync: in ra ngay
let result = compute_sync();
println!("Sync result: {}", result);
// Async: KHÔNG in ra gì!
let future = compute_async();
// future chưa được execute
// Cần `.await` hoặc runtime để chạy
// println!("Async result: {}", future.await); // Lỗi: không thể await ở đây
}Lưu ý quan trọng: Async function KHÔNG tự động chạy. Chúng lazy và chỉ chạy khi được .await.
.await Keyword
Chờ đợi một Future hoàn thành:
async fn fetch_data() -> String {
// Giả lập network request
tokio::time::sleep(tokio::time::Duration::from_secs(1)).await;
"Data".to_string()
}
#[tokio::main]
async fn main() {
// .await đợi future hoàn thành
let data = fetch_data().await;
println!("Received: {}", data);
}Điều kiện: Chỉ có thể .await bên trong async function hoặc async block.
Async Runtime
Rust không có built-in async runtime. Bạn cần chọn một runtime như Tokio, async-std, hoặc smol.
Tokio - Runtime phổ biến nhất
[dependencies]
tokio = { version = "1", features = ["full"] }
// Attribute macro biến main() thành async
#[tokio::main]
async fn main() {
println!("Hello from async!");
}
// Tương đương với:
fn main() {
tokio::runtime::Runtime::new()
.unwrap()
.block_on(async {
println!("Hello from async!");
})
}Async Blocks
Tạo Future inline:
#[tokio::main]
async fn main() {
// Async block
let future = async {
println!("Inside async block");
42
};
let result = future.await;
println!("Result: {}", result);
}Xem thêm
- Async Functions - Chi tiết về async functions
- Futures và Polling - Cách Future hoạt động bên trong
- Tokio Runtime - Sử dụng Tokio chi tiết
- Error Handling - Xử lý lỗi trong async code
- Concurrency Patterns - Patterns async phổ biến
- Performance - Tối ưu async code
Khi nào nên dùng Async?
✅ Nên dùng cho:
- I/O-bound tasks: Network requests, file I/O, database queries
- Web servers: Xử lý nhiều requests đồng thời
- Concurrent operations: Download nhiều files, call nhiều APIs
❌ Không nên dùng cho:
- CPU-bound tasks: Tính toán nặng (dùng threads thay vì)
- Simple scripts: Overhead không cần thiết
- Code đơn giản: Sync code dễ đọc hơn
Tham khảo
Unsafe Rust
Unsafe Rust cho phép bạn bỏ qua một số kiểm tra an toàn của compiler để đạt được hiệu suất cao hơn hoặc tương tác với code bên ngoài Rust. Tuy nhiên, bạn cần chịu trách nhiệm đảm bảo tính đúng đắn của code.
Tại sao cần Unsafe?
Rust’s safety guarantees có một số giới hạn:
- Performance: Đôi khi cần tối ưu bỏ qua bounds checking
- FFI: Gọi C libraries không an toàn theo định nghĩa
- Low-level operations: Thao tác trực tiếp với memory
- Hardware interaction: Embedded programming, kernel development
Năm Unsafe Superpowers
Unsafe Rust cho phép bạn làm 5 điều mà safe Rust không cho phép:
1. Dereferencing Raw Pointers
fn main() {
let mut num = 5;
// Tạo raw pointers (an toàn)
let r1 = &num as *const i32; // immutable raw pointer
let r2 = &mut num as *mut i32; // mutable raw pointer
// Dereferencing raw pointer (KHÔNG an toàn)
unsafe {
println!("r1 points to: {}", *r1);
*r2 = 10;
println!("r2 changed value to: {}", *r2);
}
}Nguy hiểm: Raw pointers có thể null, dangling, hoặc unaligned!
2. Gọi Unsafe Functions
// Khai báo unsafe function
unsafe fn dangerous() {
println!("Doing something dangerous!");
}
fn main() {
// Phải gọi trong unsafe block
unsafe {
dangerous();
}
}3. Truy cập/Modify Mutable Static Variables
static mut COUNTER: u32 = 0;
fn add_to_counter(inc: u32) {
unsafe {
COUNTER += inc; // Có thể gây data race!
}
}
fn main() {
add_to_counter(3);
unsafe {
println!("COUNTER: {}", COUNTER);
}
}Cảnh báo: Mutable static có thể gây data races trong multi-threaded code!
4. Implementing Unsafe Traits
// Unsafe trait
unsafe trait Foo {
fn foo(&self);
}
struct MyType;
// Implement unsafe trait
unsafe impl Foo for MyType {
fn foo(&self) {
println!("Foo!");
}
}
fn main() {
let my = MyType;
my.foo(); // Gọi method không cần unsafe
}5. Accessing Fields of Unions
union MyUnion {
f1: u32,
f2: f32,
}
fn main() {
let u = MyUnion { f1: 1 };
unsafe {
// Không biết field nào valid
println!("u.f1: {}", u.f1);
// println!("u.f2: {}", u.f2); // Có thể in giá trị garbage
}
}Best Practices
1. Minimize Unsafe Scope
#![allow(unused)]
fn main() {
// ❌ Tránh: Unsafe block lớn
unsafe {
// 100 lines of code
}
// ✅ Tốt hơn: Unsafe block nhỏ nhất có thể
let result = unsafe {
*raw_pointer
};
// Xử lý result ở safe code
}2. Abstraction Pattern
Wrap unsafe code trong safe API:
pub struct SafeVec<T> {
ptr: *mut T,
len: usize,
capacity: usize,
}
impl<T> SafeVec<T> {
// Safe API
pub fn push(&mut self, value: T) {
if self.len == self.capacity {
self.grow();
}
unsafe {
// Unsafe implementation ẩn bên trong
std::ptr::write(self.ptr.add(self.len), value);
}
self.len += 1;
}
fn grow(&mut self) {
// Implementation with unsafe code...
}
}3. Document Safety Invariants
#![allow(unused)]
fn main() {
/// # Safety
///
/// `ptr` must be valid for reads of `len` elements of type `T`.
/// `ptr` must be properly aligned.
/// `len` must not exceed the allocation size.
unsafe fn read_slice<T>(ptr: *const T, len: usize) -> Vec<T> {
let mut vec = Vec::with_capacity(len);
std::ptr::copy_nonoverlapping(ptr, vec.as_mut_ptr(), len);
vec.set_len(len);
vec
}
}Common Patterns
Transmute - Chuyển đổi Type
use std::mem;
fn main() {
// Chuyển f32 thành u32 bit pattern
let f: f32 = 3.14;
let bits: u32 = unsafe {
mem::transmute(f)
};
println!("f32 {:.2} as u32 bits: 0x{:08x}", f, bits);
}Nguy hiểm: Transmute không kiểm tra gì cả. Rất dễ gây UB (Undefined Behavior)!
Raw Pointer Arithmetic
fn main() {
let arr = [1, 2, 3, 4, 5];
let ptr = arr.as_ptr();
unsafe {
// Pointer arithmetic
for i in 0..5 {
let elem = ptr.add(i);
println!("Element {}: {}", i, *elem);
}
}
}Undefined Behavior (UB)
Actions gây UB trong unsafe code:
- ❌ Dereferencing null/dangling pointers
- ❌ Data races
- ❌ Breaking pointer aliasing rules
- ❌ Using uninitialized memory
- ❌ Invalid values (e.g.,
boolkhông phải 0 hoặc 1) - ❌ Calling foreign functions không đúng cách
UB = Game Over: Compiler có thể assume UB never happens và optimize sai!
Tools để Debug Unsafe Code
1. Miri
Interpreter phát hiện UB:
cargo install miri
cargo +nightly miri test
2. AddressSanitizer
Phát hiện memory errors:
RUSTFLAGS="-Z sanitizer=address" cargo +nightly build
3. ThreadSanitizer
Phát hiện data races:
RUSTFLAGS="-Z sanitizer=thread" cargo +nightly build
Khi nào dùng Unsafe?
✅ Hợp lý:
- Implement low-level data structures (Vec, HashMap)
- FFI bindings
- Optimize performance critical code
- Interact với hardware
❌ Tránh:
- Shortcuts vì lười implement trait bounds
- “Compiler bắt bẻ quá” - suy nghĩ lại design!
- Chưa hiểu rõ tại sao cần
Nguyên tắc Vàng
“Unsafe không có nghĩa là unreviewed”
Mọi unsafe block cần:
- Comment giải thích TẠI SAO cần unsafe
- Document safety invariants
- Code review kỹ càng
- Test coverage cao
Tham khảo
- The Rustonomicon - The Dark Arts of Unsafe Rust
- Rust Reference - Unsafe
- Miri Documentation
Saturating<T>
Khi nhìn vào ví dụ này, khi cộng (+) hoặc trừ (-) hai số unsigned u8 có thể dẫn đến tràn số (overflow) (playground):
fn main() {
println!("{:?}", 10_u8 - 20_u8);
}--> src/main.rs:2:22
|
2 | println!("{:?}", 10_u8 - 20_u8);
| ^^^^^^^^^^^^^ attempt to compute `10_u8 - 20_u8`, which would overflow
Tương tự, nếu ta cố gắng cộng hai int, điều này cũng có thể gây ra lỗi tương tự. Ví dụ (playground):
fn main() {
println!("{:?}", i32::MAX + 1);
}--> src/main.rs:2:22
|
2 | println!("{:?}", i32::MAX + 1);
| ^^^^^^^^^^^^ attempt to compute `i32::MAX + 1_i32`, which would overflow
Saturating<T> là một bọc toán học với chức năng bão hòa. Các phép toán như + trên các giá trị u32 được thiết kế để không bao giờ tràn số, và trong một số cấu hình debug, tràn số được phát hiện và dẫn đến một sự cố. Trong khi hầu hết các phép toán thuộc loại này, một số mã cụ thể mong muốn và phụ thuộc vào toán học bão hòa.
use std::num::Saturating;
fn main() {
let a = Saturating(10_u8);
let b = Saturating(20_u8);
println!("{:?}", a - b); // 0
// Giá trịgốc có thể được truy xuất thông qua `.0`
let res = (a - b).0; // 0
}Một ví dụ khác là cố gắng + gây tràn số khi giá trị kết quả lớn hơn giá trị tối đa của kiểu dữ liệu số đó (playground):
use std::num::Saturating;
fn main() {
let max = Saturating(u32::MAX);
let one = Saturating(1u32);
assert_eq!(u32::MAX, (max + one).0);
}Một số methods hữu ích khác
Saturating<T>::MIN và Saturating<T>::MAX trả về giá trị nhỏ nhất và lớn nhất có thể được biểu diễn bởi kiểu số nguyên này:
#![allow(unused)]
fn main() {
use std::num::Saturating;
assert_eq!(<Saturating<usize>>::MIN, Saturating(usize::MIN));
assert_eq!(<Saturating<usize>>::MAX, Saturating(usize::MAX));
}pow:
#![allow(unused)]
fn main() {
use std::num::Saturating;
assert_eq!(Saturating(3usize).pow(4), Saturating(81));
assert_eq!(Saturating(3i8).pow(5), Saturating(127));
}Tối ưu Hiệu suất (Performance)
Hiệu suất là một trong những lý do chính mà nhiều developer chọn Rust. Ngôn ngữ này cung cấp khả năng kiểm soát low-level như C/C++ nhưng với sự an toàn về memory và thread. Tuy nhiên, để tận dụng tối đa sức mạnh của Rust, bạn cần hiểu cách đo lường và tối ưu hóa hiệu suất.
Tại sao Hiệu suất Quan trọng?
Trong thế giới phần mềm hiện đại, hiệu suất ảnh hưởng trực tiếp đến:
- Trải nghiệm người dùng: Ứng dụng phản hồi nhanh = người dùng hài lòng
- Chi phí vận hành: Code chạy nhanh hơn = ít server hơn = tiết kiệm tiền
- Khả năng mở rộng: Xử lý được nhiều requests hơn với cùng tài nguyên
- Tác động môi trường: Tiêu thụ ít năng lượng hơn
Triết lý Tối ưu hóa
“Premature optimization is the root of all evil.” - Donald Knuth
Nhưng:
“Mediocre benchmarking is far better than no benchmarking.”
Nguyên tắc vàng:
- Đo lường trước khi tối ưu - Đừng đoán, hãy dùng data
- Tối ưu điểm nghẽn (bottlenecks) - 20% code chiếm 80% runtime
- Benchmark sau mỗi thay đổi - Xác nhận cải thiện thực sự
- Giữ cân bằng - Đừng hy sinh maintainability cho 1% performance
Nội dung Chương này
Chương này bao gồm các chủ đề sau:
1. Đo lường Hiệu suất (Benchmarking)
Học cách đo lường hiệu suất chính xác với các công cụ:
- Criterion: Benchmarking framework mạnh mẽ nhất
- Divan: Công cụ hiện đại, đơn giản và nhanh
- Hyperfine: So sánh command-line programs
- Built-in benchmarks: Rust nightly benchmarks
Bạn sẽ học:
- Cách thiết lập benchmark đúng cách
- Chọn metrics phù hợp (wall-time, CPU cycles, memory)
- Tránh những lỗi thường gặp
- Continuous benchmarking trong CI/CD
2. Cấu hình Build để Tối ưu
Tối ưu hiệu suất mà không cần thay đổi code thông qua Cargo configuration:
- Tăng tốc độ runtime: LTO, codegen-units, PGO
- Giảm kích thước binary: opt-level, strip symbols
- Tăng tốc compile time: Fast linkers (mold, lld)
- Alternative allocators: jemalloc, mimalloc
Đây là những cải thiện dễ dàng nhất và hiệu quả nhất để bắt đầu!
Lộ trình Học tập
Nếu bạn mới bắt đầu với performance optimization trong Rust, đây là lộ trình đề xuất:
-
Bắt đầu với Build Configuration (dễ nhất, không cần code)
- Thêm LTO và codegen-units vào release profile
- Thử alternative allocators
- Cài đặt fast linker
-
Học Benchmarking (kỹ năng cốt lõi)
- Thiết lập Criterion hoặc Divan
- Tạo benchmark cho hot paths
- So sánh trước và sau optimization
-
Áp dụng vào Dự án Thực tế
- Profile code với các công cụ profiling
- Tìm bottlenecks
- Tối ưu từng phần một
- Benchmark để xác nhận cải thiện
Công cụ Hỗ trợ
Benchmarking
- Criterion - Feature-rich benchmarking
- Divan - Modern và đơn giản
- Hyperfine - Command-line benchmarking
- Bencher - Continuous benchmarking service
Profiling
- flamegraph - Visualize performance
- cargo-flamegraph - Easy profiling
- perf - Linux profiler
- Instruments - macOS profiler
Analysis
- cargo-bloat - Binary size analysis
- cargo-llvm-lines - LLVM IR analysis
- cargo-expand - Macro expansion
Tài nguyên Thêm
Documentation
- The Rust Performance Book - Tài liệu gốc đầy đủ
- Rust Compiler Performance
- Cargo Book - Profiles
Cộng đồng
- Rust Performance Discord
- r/rust - Subreddit với nhiều discussion về performance
- Rust Internals Forum
Case Studies
Các ví dụ thực tế về performance optimization trong Rust:
- ripgrep: Grep tool nhanh hơn grep/ag nhiều lần
- fd: Find replacement nhanh gấp nhiều lần
- tokio: Async runtime với performance cao
- rustc: Rust compiler liên tục được tối ưu
Bắt đầu Ngay
Nếu bạn muốn tăng performance ngay lập tức mà không cần tìm hiểu sâu:
- Thêm vào
Cargo.toml:
[profile.release]
lto = "thin"
codegen-units = 1
- Cài đặt fast linker:
# Linux
sudo apt install mold
# Add to .cargo/config.toml
[target.x86_64-unknown-linux-gnu]
linker = "clang"
rustflags = ["-C", "link-arg=-fuse-ld=mold"]
- Benchmark để đo lường:
cargo install hyperfine
hyperfine './target/release/myapp'
Đơn giản vậy thôi! Bây giờ hãy đi sâu vào từng chủ đề để hiểu rõ hơn.
Ghi chú: Nội dung trong chương này được tổng hợp và dịch từ The Rust Performance Book của Nicholas Nethercote, với các ví dụ và giải thích được Việt hóa để phù hợp với độc giả Việt Nam.
Đo lường Hiệu suất (Benchmarking)
Benchmarking là quá trình so sánh hiệu suất của hai hoặc nhiều chương trình thực hiện cùng một công việc. Nó giúp chúng ta trả lời câu hỏi quan trọng: “Thay đổi này có làm chương trình chạy nhanh hơn không?”
Tại sao cần Benchmarking?
Khi tối ưu hóa code, chúng ta thường dựa vào cảm giác hoặc giả định rằng một đoạn code “có vẻ nhanh hơn”. Tuy nhiên, hiệu suất thực tế có thể khác xa với dự đoán của chúng ta. Benchmarking cung cấp dữ liệu cụ thể để đưa ra quyết định chính xác.
“Mediocre benchmarking is far better than no benchmarking.” Đo lường tầm thường vẫn tốt hơn nhiều so với không đo lường gì cả.
Các yếu tố cần chuẩn bị
1. Workloads (Khối lượng công việc)
Bạn cần có nhiều loại workload đại diện cho cách sử dụng thực tế của chương trình. Tốt nhất là sử dụng dữ liệu đầu vào từ thực tế (real-world inputs).
Các loại workload:
- Real-world inputs: Dữ liệu thực từ người dùng - đây là loại quan trọng nhất
- Microbenchmarks: Đo lường từng phần nhỏ của code
- Stress tests: Kiểm tra với tải nặng hoặc điều kiện cực đoan
2. Chọn Metrics (Chỉ số đo)
Tùy thuộc vào loại chương trình, bạn cần chọn metrics phù hợp:
- Wall-time (thời gian thực tế): Dễ hiểu và gần gũi với trải nghiệm người dùng, nhưng có thể biến động cao
- CPU cycles: Ổn định hơn, phù hợp cho việc so sánh chi tiết
- Instruction count: Variance thấp, tốt cho việc phát hiện những thay đổi nhỏ
- Memory usage: Quan trọng cho các ứng dụng xử lý dữ liệu lớn
Công cụ Benchmarking trong Rust
1. Criterion - Công cụ phổ biến nhất
Criterion là thư viện benchmarking tiêu chuẩn trong Rust với nhiều tính năng hữu ích.
Cài đặt:
[dev-dependencies]
criterion = "0.5"
[[bench]]
name = "my_benchmark"
harness = false
Ví dụ cơ bản:
#![allow(unused)]
fn main() {
use criterion::{black_box, criterion_group, criterion_main, Criterion};
fn fibonacci(n: u64) -> u64 {
match n {
0 => 1,
1 => 1,
n => fibonacci(n-1) + fibonacci(n-2),
}
}
fn criterion_benchmark(c: &mut Criterion) {
c.bench_function("fib 20", |b| b.iter(|| fibonacci(black_box(20))));
}
criterion_group!(benches, criterion_benchmark);
criterion_main!(benches);
}Chạy benchmark:
cargo bench
Giải thích:
black_box(): Ngăn compiler tối ưu hóa quá mức, đảm bảo code thực sự chạycriterion_group!vàcriterion_main!: Macro để thiết lập test suite
2. Divan - Công cụ hiện đại và đơn giản
Divan là một lựa chọn mới, nhanh và đơn giản hơn Criterion.
Cài đặt:
[dev-dependencies]
divan = "0.1"
[[bench]]
name = "example"
harness = false
Ví dụ:
fn main() {
// Run registered benchmarks.
divan::main();
}
#[divan::bench]
fn parse_num() {
let input = "42";
let output: i32 = input.parse().unwrap();
assert_eq!(output, 42);
}
#[divan::bench]
fn parse_bytes() {
let input = b"42";
let output: i32 = std::str::from_utf8(input)
.unwrap()
.parse()
.unwrap();
assert_eq!(output, 42);
}Ưu điểm của Divan:
- Cú pháp đơn giản với attribute
#[divan::bench]giống#[test] - Hỗ trợ generic types và const generics
- Hiển thị kết quả rõ ràng và trực quan
3. Hyperfine - Benchmark cho command-line
Hyperfine là công cụ tuyệt vời để đo lường wall-time của toàn bộ chương trình từ command line.
Cài đặt:
cargo install hyperfine
Sử dụng:
# So sánh hai phiên bản của chương trình
hyperfine './target/release/myapp-v1' './target/release/myapp-v2'
# Với warmup runs
hyperfine --warmup 3 './target/release/myapp'
# So sánh với tham số khác nhau
hyperfine --prepare 'cargo build --release' 'cargo run --release'
Kết quả mẫu:
Benchmark 1: ./target/release/myapp-v1
Time (mean ± σ): 142.3 ms ± 2.1 ms [User: 98.2 ms, System: 43.5 ms]
Range (min … max): 139.8 ms … 147.2 ms 20 runs
Benchmark 2: ./target/release/myapp-v2
Time (mean ± σ): 89.7 ms ± 1.8 ms [User: 62.1 ms, System: 27.2 ms]
Range (min … max): 87.4 ms … 93.5 ms 32 runs
Summary
'./target/release/myapp-v2' ran
1.59 ± 0.04 times faster than './target/release/myapp-v1'
4. Built-in Benchmarks (Nightly-only)
Rust có sẵn framework benchmarking, nhưng chỉ hoạt động trên nightly compiler.
#![allow(unused)]
#![feature(test)]
fn main() {
extern crate test;
#[cfg(test)]
mod tests {
use super::*;
use test::Bencher;
#[bench]
fn bench_add_two(b: &mut Bencher) {
b.iter(|| add_two(2));
}
}
}Best Practices (Thực hành tốt nhất)
1. Benchmark từng thay đổi riêng lẻ
Đừng thay đổi nhiều thứ cùng lúc. Benchmark từng thay đổi một để biết chính xác cái gì tạo ra sự khác biệt.
2. Sử dụng release mode
Luôn chạy benchmark với release build:
cargo bench # Tự động dùng release mode
# hoặc
cargo run --release
3. Giữ hệ thống ổn định
- Đóng các ứng dụng không cần thiết
- Không chạy benchmark trong khi làm việc khác
- Chú ý đến CPU throttling (điều chỉnh tốc độ CPU)
- Chạy nhiều lần để có kết quả trung bình đáng tin cậy
4. Theo dõi xu hướng, không chỉ số liệu tuyệt đối
Quan trọng hơn việc “chương trình chạy trong 100ms” là “phiên bản mới nhanh hơn 20%”.
5. Benchmark trên nhiều workload
Tối ưu hóa có thể cải thiện một trường hợp nhưng làm chậm trường hợp khác. Luôn kiểm tra nhiều loại input.
Ví dụ thực tế: So sánh hai cách implement
Giả sử chúng ta muốn so sánh hai cách tính tổng các số chẵn trong một vector:
#![allow(unused)]
fn main() {
use criterion::{black_box, criterion_group, criterion_main, Criterion};
fn sum_even_iter(numbers: &[i32]) -> i32 {
numbers.iter()
.filter(|&&x| x % 2 == 0)
.sum()
}
fn sum_even_loop(numbers: &[i32]) -> i32 {
let mut sum = 0;
for &num in numbers {
if num % 2 == 0 {
sum += num;
}
}
sum
}
fn benchmark_sum_even(c: &mut Criterion) {
let numbers: Vec<i32> = (0..10000).collect();
c.bench_function("sum_even_iter", |b| {
b.iter(|| sum_even_iter(black_box(&numbers)))
});
c.bench_function("sum_even_loop", |b| {
b.iter(|| sum_even_loop(black_box(&numbers)))
});
}
criterion_group!(benches, benchmark_sum_even);
criterion_main!(benches);
}Continuous Benchmarking (Benchmark liên tục)
Để theo dõi hiệu suất qua thời gian, xem xét sử dụng các dịch vụ như:
- Bencher: Continuous benchmarking service
- CodSpeed: Hỗ trợ cả Criterion và Divan
- GitHub Actions: Tự động chạy benchmark trên mỗi commit
Kết luận
Benchmarking là kỹ năng quan trọng trong việc tối ưu hóa hiệu suất. Hãy nhớ rằng:
- Đo lường trước khi tối ưu hóa - Đừng đoán mò
- Chọn công cụ phù hợp - Criterion/Divan cho chi tiết, Hyperfine cho tổng quan
- Benchmark thường xuyên - Theo dõi hiệu suất qua thời gian
- Giữ kết quả để so sánh - Xu hướng quan trọng hơn con số tuyệt đối
“Good benchmarking is hard, but mediocre benchmarking is far better than no benchmarking.”
Hãy bắt đầu với những benchmark đơn giản, và dần dần cải thiện khi bạn hiểu rõ hơn về đặc điểm hiệu suất của chương trình.
Tài liệu tham khảo:
- The Rust Performance Book - Benchmarking
- Criterion.rs Documentation
- Divan Documentation
- Hyperfine Repository
Cấu hình Build để Tối ưu Hiệu suất
Một trong những cách mạnh mẽ nhất để cải thiện hiệu suất Rust là thông qua cấu hình build - và điểm tuyệt vời là bạn không cần thay đổi code! Bài viết này sẽ hướng dẫn các cách cấu hình Cargo để tối ưu hóa tốc độ chạy, kích thước binary, và thời gian compile.
Hiểu về Profile
Rust có hai profile mặc định:
dev(development): Tối ưu cho tốc độ compile, không tối ưu coderelease: Tối ưu cho hiệu suất runtime, compile chậm hơn
cargo build # Sử dụng dev profile
cargo build --release # Sử dụng release profile
Sự khác biệt có thể lên đến 10-100x về tốc độ chạy!
Trade-offs (Đánh đổi)
“Most configuration choices will improve one or more characteristics while worsening one or more others.”
Hầu hết các lựa chọn cấu hình đều có sự đánh đổi:
- Tăng tốc độ runtime ↔ Tăng thời gian compile
- Giảm kích thước binary ↔ Giảm tốc độ runtime
- Debug dễ hơn ↔ Binary lớn hơn
Hãy đo lường (benchmark) từng thay đổi để đảm bảo nó mang lại hiệu quả như mong đợi!
1. Tối ưu Tốc độ Runtime
1.1. Codegen Units
Theo mặc định, Rust chia code thành nhiều “codegen units” để compile song song nhanh hơn. Nhưng điều này giảm khả năng tối ưu hóa cross-crate.
[profile.release]
codegen-units = 1
Hiệu quả:
- ✅ Tăng tốc độ runtime (thường 5-15%)
- ✅ Giảm kích thước binary
- ❌ Tăng thời gian compile
Khi nào dùng: Production builds, khi hiệu suất quan trọng hơn thời gian compile.
1.2. Link-Time Optimization (LTO)
LTO cho phép compiler tối ưu hóa xuyên suốt các crate dependencies.
[profile.release]
lto = true # hoặc "fat" - LTO đầy đủ
# lto = "thin" # Cân bằng giữa tốc độ compile và tối ưu
Ba loại LTO:
- Thin local LTO (mặc định): Chỉ tối ưu trong từng crate
- Thin LTO (
lto = "thin"): Tối ưu cross-crate, cân bằng - Fat LTO (
lto = truehoặc"fat"): Tối ưu mạnh nhất
Hiệu quả:
- ✅ Cải thiện tốc độ 10-20% hoặc hơn
- ✅ Giảm kích thước binary
- ❌ Tăng thời gian compile đáng kể (có thể gấp đôi)
Ví dụ cấu hình cân bằng:
[profile.release]
lto = "thin"
codegen-units = 1
1.3. Alternative Allocators (Bộ cấp phát bộ nhớ)
Rust mặc định dùng system allocator, nhưng các allocator khác có thể nhanh hơn.
jemalloc
[dependencies]
tikv-jemallocator = "0.6"
#![allow(unused)]
fn main() {
use tikv_jemallocator::Jemalloc;
#[global_allocator]
static GLOBAL: Jemalloc = Jemalloc;
}mimalloc
[dependencies]
mimalloc = "0.1"
#![allow(unused)]
fn main() {
use mimalloc::MiMalloc;
#[global_allocator]
static GLOBAL: MiMalloc = MiMalloc;
}Hiệu quả:
- Có thể tăng tốc độ 5-20% tùy workload
- Giảm memory usage trong một số trường hợp
- Đặc biệt hiệu quả với multi-threaded applications
Transparent Huge Pages (THP):
Với jemalloc, bạn có thể sử dụng huge pages:
MALLOC_CONF=thp:always ./myapp
1.4. CPU-Specific Instructions
Cho phép compiler sử dụng các instruction đặc thù của CPU (như AVX, AVX2, AVX-512).
[profile.release]
[target.'cfg(target_arch = "x86_64")']
rustflags = ["-C", "target-cpu=native"]
Hoặc build với:
RUSTFLAGS="-C target-cpu=native" cargo build --release
⚠️ Lưu ý: Binary chỉ chạy được trên CPU tương tự. Không phù hợp cho distribution.
Hiệu quả:
- Cải thiện 10-30% với workload intensive (SIMD operations)
- Không tốn thời gian compile thêm
1.5. Profile-Guided Optimization (PGO)
PGO là kỹ thuật nâng cao: compile, chạy với workload thực tế, rồi compile lại với thông tin profiling.
Bước 1: Build với instrumentation
RUSTFLAGS="-Cprofile-generate=/tmp/pgo-data" \
cargo build --release
Bước 2: Chạy chương trình với workload đại diện
./target/release/myapp <typical-workload>
Bước 3: Rebuild với profile data
rustup run stable bash -c \
'RUSTFLAGS="-Cprofile-use=/tmp/pgo-data/merged.profdata" \
cargo build --release'
Hiệu quả:
- Cải thiện 10-20% hoặc hơn
- Đặc biệt tốt cho hot paths và branch prediction
- Phức tạp để setup
2. Tối ưu Kích thước Binary
2.1. Optimization Level cho Size
[profile.release]
opt-level = "z" # Tối ưu kích thước mạnh nhất
# opt-level = "s" # Tối ưu kích thước ít mạnh hơn
Các level:
0: Không tối ưu1: Tối ưu cơ bản2: Tối ưu vừa phải3: Tối ưu mạnh (mặc định cho release)"s": Tối ưu cho size"z": Tối ưu cho size mạnh nhất
Hiệu quả:
- Giảm 10-30% kích thước binary
- ❌ Có thể giảm tốc độ runtime 5-15%
2.2. Panic Strategy
[profile.release]
panic = "abort"
Thay vì unwinding stack khi panic, chương trình sẽ abort ngay lập tức.
Hiệu quả:
- Giảm đáng kể kích thước binary
- ❌ Không thể catch panic
- ❌ Không chạy destructors khi panic
2.3. Strip Debug Symbols
[profile.release]
strip = true # hoặc "symbols" hoặc "debuginfo"
Hiệu quả:
- Giảm kích thước binary đáng kể
- ❌ Khó debug khi có vấn đề production
2.4. Config cho Binary nhỏ nhất
Kết hợp tất cả:
[profile.release]
opt-level = "z"
lto = true
codegen-units = 1
panic = "abort"
strip = true
Thêm nữa với Cargo.toml:
[profile.release]
opt-level = "z"
lto = true
codegen-units = 1
panic = "abort"
strip = true
[dependencies]
# Sử dụng features minimal khi có thể
serde = { version = "1.0", default-features = false }
3. Tối ưu Thời gian Compile
3.1. Sử dụng Linker nhanh hơn
Linker mặc định (ld) khá chậm. Các alternative:
mold (Nhanh nhất, Linux)
# .cargo/config.toml
[target.x86_64-unknown-linux-gnu]
linker = "clang"
rustflags = ["-C", "link-arg=-fuse-ld=mold"]
lld (Cross-platform)
# .cargo/config.toml
[target.x86_64-unknown-linux-gnu]
rustflags = ["-C", "link-arg=-fuse-ld=lld"]
Cài đặt:
# Linux
sudo apt install mold lld
# macOS
brew install llvm
Hiệu quả:
- Giảm thời gian linking 50-80%
- Không ảnh hưởng đến runtime performance
3.2. Tăng Codegen Units (Dev)
[profile.dev]
codegen-units = 256 # Mặc định là 256
Nhiều codegen units = compile song song nhiều hơn.
3.3. Tắt Debug Info trong Dev
[profile.dev]
debug = 0 # Tắt hoàn toàn
# debug = 1 # Debug info cơ bản
Hiệu quả:
- Giảm thời gian compile 20-40%
- Giảm disk usage
- ❌ Khó debug hơn với debugger
3.4. Incremental Compilation
[profile.dev]
incremental = true # Mặc định đã bật
Cargo lưu trữ kết quả compile và chỉ compile lại phần thay đổi.
3.5. Sử dụng Workspace Dependencies
Nếu có nhiều crates, sử dụng workspace để tránh compile trùng lặp:
# Workspace Cargo.toml
[workspace]
members = ["crate1", "crate2", "crate3"]
[workspace.dependencies]
serde = "1.0"
tokio = "1.0"
4. Config Tổng hợp theo Mục đích
Config cho Production (Tốc độ tối đa)
[profile.release]
opt-level = 3
lto = "thin"
codegen-units = 1
panic = "abort"
[target.x86_64-unknown-linux-gnu]
rustflags = ["-C", "target-cpu=native"]
Config cho Development (Compile nhanh)
[profile.dev]
opt-level = 0
debug = 1
incremental = true
# .cargo/config.toml
[target.x86_64-unknown-linux-gnu]
linker = "clang"
rustflags = ["-C", "link-arg=-fuse-ld=mold"]
Config cho Distribution Binary (Size nhỏ)
[profile.release]
opt-level = "z"
lto = true
codegen-units = 1
panic = "abort"
strip = true
5. Công cụ Kiểm tra
Kiểm tra kích thước binary
# Xem tổng kích thước
ls -lh target/release/myapp
# Phân tích chi tiết
cargo bloat --release
So sánh hiệu quả LTO
# Không LTO
cargo build --release
hyperfine './target/release/myapp'
# Với LTO
# Thêm lto = true vào Cargo.toml
cargo build --release
hyperfine './target/release/myapp'
Đo thời gian compile
cargo clean
time cargo build --release
Best Practices
- Benchmark mọi thay đổi - Đừng giả định, hãy đo lường
- Bắt đầu với config đơn giản - Từng bước một
- Khác nhau giữa dev và release - Dev cần compile nhanh, release cần chạy nhanh
- Document config của bạn - Giải thích tại sao chọn từng option
- Kiểm tra trên target platform -
target-cpu=nativechỉ tốt cho local
Ví dụ Thực tế: API Server
# Cargo.toml
[package]
name = "api-server"
version = "0.1.0"
edition = "2021"
[profile.release]
opt-level = 3 # Tối ưu tốc độ
lto = "thin" # Cân bằng compile time và performance
codegen-units = 1 # Tối ưu tốt hơn
strip = true # Binary nhỏ hơn
panic = "abort" # Không cần unwinding
[profile.dev]
opt-level = 0
debug = 1 # Debug info cơ bản
incremental = true
[dependencies]
tokio = { version = "1", features = ["full"] }
axum = "0.7"
# .cargo/config.toml
[target.x86_64-unknown-linux-gnu]
linker = "clang"
rustflags = ["-C", "link-arg=-fuse-ld=mold"]
[target.x86_64-apple-darwin]
rustflags = ["-C", "link-arg=-fuse-ld=/opt/homebrew/opt/llvm/bin/ld64.lld"]
Tài liệu và Thử nghiệm
Thử nghiệm các config
Tạo script để test nhiều config:
#!/bin/bash
# benchmark-configs.sh
configs=(
"default"
"lto-thin"
"lto-fat"
"opt-size"
)
for config in "${configs[@]}"; do
echo "Testing $config..."
cp "configs/$config.toml" Cargo.toml
cargo build --release
hyperfine --warmup 3 './target/release/myapp'
done
Kết luận
Cấu hình build là một công cụ mạnh mẽ để cải thiện hiệu suất Rust mà không cần thay đổi code. Những điểm chính cần nhớ:
- Release mode là bắt buộc cho production
- LTO và codegen-units=1 là những cải thiện dễ dàng nhất
- Alternative linkers giảm đáng kể compile time
- Luôn benchmark để xác nhận cải thiện
- Khác nhau giữa dev và release profiles
Mỗi dự án có nhu cầu khác nhau - hãy thử nghiệm và tìm ra config phù hợp nhất cho use case của bạn!
Tài liệu tham khảo:
- The Rust Performance Book - Build Configuration
- Cargo Book - Profiles
- rustc Book - Codegen Options
- Profile-Guided Optimization
Behavioural Patterns
Theo Wikipedia:
Behavioural Patterns: Design patterns that identify common communication patterns among objects. By doing so, these patterns increase flexibility in carrying out communication.
Một số Behavioural Patterns trong Rust
Strategy Pattern
Strategy design pattern là một technique nhằm mục đích phân tách nhiều vấn đề, tách software modules thông qua Dependency Inversion.
Ý tưởng cơ bản của Strategy pattern là chỉ cần define skeleton ở abstract level, chúng ta tách biệt phần implementation của logic thành nhiều phần. Client sử dụng có thể tự implement 1 số method theo cách riêng của nó nhưng vẫn giữ được cấu trúc của logic workflow gốc.
Abstract class không không phụ thuộc vào implementation của lớp dẫn xuất (derived class), nhưng implementation của lớp dẫn xuất phải tuân thủ theo đặc tả của lớp abstract. Cho nên chúng có tên gọi là Dependency Inversion.
Một thứ mình thấy rõ là các project Rust rất hay sử dụng Strategy Design Pattern này.
Ví dụ, chúng ta có 1 struct Data và implement một số phương thức để generate ra
nhiều dạng format khác nhau (ví dụ JSON, YAML, Plain Text, …).
Ta gọi mỗi format ở đây là một strategy.
use std::collections::HashMap;
type Data = HashMap<String, u32>;
impl Data {
fn generate(&self, format: &str) {
match format {
"json" => { ... }
"yaml" => { ... }
"text" => { ... }
_ => { ... }
}
}
}Mọi thứ thay đổi theo thời gian, và khó đoán được trong tương lai chương trình
của chúng ta có thể sửa đổi hoặc bổ sung thêm các loại format nào nữa
trong tương lai hay không (ví dụ JSONLine, CSV, Parquet, …)
Nếu thiết kế sử dụng Strategy Pattern:
use std::collections::HashMap;
// Data
type Data = HashMap<String, u32>;
impl Data {
// f: T chap nhan moi struct co impl Formatter
fn generate<T: Formatter>(f: T) -> String {
f.format(&self)
}
}
// Formatter
trait Formatter {
fn format(&self, data: &Data) -> String;
}
// Formatter -> Json
struct Json;
impl Formatter for Json {
fn format(&self, data: &Data) -> String {
// res = { "a": 1, "b": 2. /// }
res
}
}
// Formatter -> Text
struct Text;
impl Formatter for Text {
fn format(&self, data: &Data) -> String {
// res = "a = 1, b = 2, ..."
res
}
}
fn main() {
let mut data = Data::new();
data.insert("a".to_string(), 1);
data.insert("b".to_string(), 2);
let s = data.generate(Text);
assert!(s.contains("a = b, b = 2"));
let s = data.generate(Json);
assert!(s.contains(r#"{"a":1, "b":2}"#));
}Theo chúng ta có thể thấy, Data::generate có thể không cần quan tâm implementation
của f: T. Chỉ cần biết nó là một dẫn xuất của trait Formatter và có method format.
Nhược điểm là mỗi strategy cần được implement ít nhất một module, vì thế số lượng module có thể tăng cùng với số lượng strategy. Có quá nhiều strategy đòi hỏi user phải biết sự khác nhau giữa các strategy để sử dụng.
Ưu điểm là chúng ta có thể tách việc xử lý Json, Text, … ra thành nhiều bài toán (strategy) nhỏ hơn theo như ví dụ trên.
Ở ví dụ trên các strategy được đặt chung ở một file,
thực tế người ta thưởng đặt ở nhiều module khác nhau hoặc mỗi strategy một file
(formatter::json, formatter::csv, …). Việc tách này còn cho phép sử dụng compiler feature flags.
Còn nếu chúng ta đang implement một crate, thì crate ở ví dụ trên user có thể dễ dàng custom một Formatter mới:
use crate::example::{Data, Formatter};
struct CustomFormatter;
impl Formatter for CustomFormatter {
fn format(&self, data: &Data) -> String {
...
}
}serde là một ví dụ hay của Strategy pattern, serde cho phép
full customization serialization
behavior bằng cách implement Serialize và Deserialize traits cho kiểu dữ liệu riêng của chúng ta.
Command Pattern
Ý tưởng cơ bản của Command Pattern là tách các actions thành các object riêng và gọi chúng thông qua parameters.
Khi nào dùng
Giả sử ta có một chuỗi các actions hoặc transactions. Chúng ta muốn các actions hoặc commands được thực thi theo thứ tự khác nhau. Các commands có thể được trigger bởi kết quả của một event nào đó. Ví dụ, khi user nhấn 1 nút, hoặc khi nhận được 1 data event nào đó. Ngoài ra thì các commands này có thể khôi phục (undo). Ví dụ như ta store các chuỗi thực thi (executed) của các commands, khi hệ thống gặp vấn đề ta có thể phục hồi lại bằng cách chạy lại từng commands một.
Ví dụ
Ta define hai database operations create table và add field.
Mỗi operation là một command. Các command này có thể undo được, ví dụ drop table, drop field.
Khi user invoke database migration, mỗi command được thực thi theo thứ tự, khi user muốn rollback, tất cả command được undo theo thứ tự ngược lại.
Cách 1: sử dụng trait objects
Chúng ta định nghĩa một common trait cho command
với hai operation là exec và rollback.
Các struct command phải được implement trait này.
pub trait Migration {
fn execute(&self) -> &str;
fn rollback(&self) -> &str;
}
pub struct CreateTable;
impl Migration for CreateTable {
fn execute(&self) -> &str {
"create table"
}
fn rollback(&self) -> &str {
"drop table"
}
}
pub struct AddField;
impl Migration for AddField {
fn execute(&self) -> &str {
"add field"
}
fn rollback(&self) -> &str {
"remove field"
}
}
struct Schema {
commands: Vec<Box<dyn Migration>>,
}
impl Schema {
fn new() -> Self {
Self { commands: vec![] }
}
fn add_migration(&mut self, cmd: Box<dyn Migration>) {
self.commands.push(cmd);
}
fn execute(&self) -> Vec<&str> {
self.commands.iter().map(|cmd| cmd.execute()).collect()
}
fn rollback(&self) -> Vec<&str> {
self.commands
.iter()
.rev() // reverse iterator's direction
.map(|cmd| cmd.rollback())
.collect()
}
}
fn main() {
let mut schema = Schema::new();
let cmd = Box::new(CreateTable);
schema.add_migration(cmd);
let cmd = Box::new(AddField);
schema.add_migration(cmd);
assert_eq!(vec!["create table", "add field"], schema.execute());
assert_eq!(vec!["remove field", "drop table"], schema.rollback());
}Cách 2: sử dụng function pointers
Chúng ta có thể thực hiện theo một cách khác là tách mỗi command thành một function và lưu lại function pointer để thực thi sau.
type FnPtr = fn() -> String;
struct Command {
execute: FnPtr,
rollback: FnPtr,
}
struct Schema {
commands: Vec<Command>,
}
impl Schema {
fn new() -> Self {
Self { commands: vec![] }
}
fn add_migration(&mut self, execute: FnPtr, rollback: FnPtr) {
self.commands.push(Command { execute, rollback });
}
fn execute(&self) -> Vec<String> {
self.commands.iter().map(|cmd| (cmd.execute)()).collect()
}
fn rollback(&self) -> Vec<String> {
self.commands
.iter()
.rev()
.map(|cmd| (cmd.rollback)())
.collect()
}
}
fn add_field() -> String {
"add field".to_string()
}
fn remove_field() -> String {
"remove field".to_string()
}
fn main() {
let mut schema = Schema::new();
schema.add_migration(|| "create table".to_string(), || "drop table".to_string());
schema.add_migration(add_field, remove_field);
assert_eq!(vec!["create table", "add field"], schema.execute());
assert_eq!(vec!["remove field", "drop table"], schema.rollback());
}Cách 3: sử dụng Fn trait objects
Thay vì định nghĩa một command trait theo cách 1,
ta có thể lưu tất cả command được implement trait Fn trong một vector.
type Migration<'a> = Box<dyn Fn() -> &'a str>;
struct Schema<'a> {
executes: Vec<Migration<'a>>,
rollbacks: Vec<Migration<'a>>,
}
impl<'a> Schema<'a> {
fn new() -> Self {
Self {
executes: vec![],
rollbacks: vec![],
}
}
fn add_migration<E, R>(&mut self, execute: E, rollback: R)
where
E: Fn() -> &'a str + 'static,
R: Fn() -> &'a str + 'static,
{
self.executes.push(Box::new(execute));
self.rollbacks.push(Box::new(rollback));
}
fn execute(&self) -> Vec<&str> {
self.executes.iter().map(|cmd| cmd()).collect()
}
fn rollback(&self) -> Vec<&str> {
self.rollbacks.iter().rev().map(|cmd| cmd()).collect()
}
}
fn add_field() -> &'static str {
"add field"
}
fn remove_field() -> &'static str {
"remove field"
}
fn main() {
let mut schema = Schema::new();
schema.add_migration(|| "create table", || "drop table");
schema.add_migration(add_field, remove_field);
assert_eq!(vec!["create table", "add field"], schema.execute());
assert_eq!(vec!["remove field", "drop table"], schema.rollback());
}Thảo luận
Trong các ví dụ trên thì command của chúng ta khá nhỏ,
nên thường được define dưới dạng function hoặc closure
rồi bỏ thẳng function pointer vào Vec, rồi thực thi theo thứ tự.
Trong thực tế các command có thể phức tạp hơn,
có thể là một struct với hàng loạt các function và variable
trong các module khác nhau, việc sử dụng trait và Box ở cách 1 sẽ hiệu quả hơn.
References
- https://en.wikipedia.org/wiki/Command_pattern
- https://web.archive.org/web/20210223131236/https://chercher.tech/rust/command-design-pattern-rust
Creational Patterns
Theo Wikipedia:
Creational Patterns: Design patterns that deal with object creation mechanisms, trying to create objects in a manner suitable to the situation. The basic form of object creation could result in design problems or in added complexity to the design. Creational design patterns solve this problem by somehow controlling this object creation.
Một số Creational Patterns trong Rust
Rust Builder Design Pattern
Rust không có overloading, do đó bạn cần phải viết nhiều construct cho tất cả các trường hợp có thể có, với các method name khác nhau. Việc này sẽ cực kỳ mất thời gian nếu struct có quá nhiều fields hoặc constructor phức tạp.
impl Foo {
pub fn new(a: String) -> Self {}
pub fn new(a: String, b: String) -> Self {} // <-- không thể
pub fn new(a: i32) -> Self {} // <-- không thể
}
// Thay vào đó
impl Foo {
pub fn new(a: String) -> Self {}
pub fn new_from_two(a: String, b: String) -> Self {}
pub fn new_from_int(a: i32) -> Self {}
}Do đó, builder được sử dụng cực kỳ phổ biến trong Rust so với các ngôn ngữ khác.
Builder cho phép construct một object bằng cách gọi build().
Ví dụ
#[derive(Debug, PartialEq)]
pub struct Foo {
// Lots of complicated fields.
bar: String,
}
impl Foo {
// This method will help users to discover the builder
pub fn builder() -> FooBuilder {
FooBuilder::default()
}
}
#[derive(Default)]
pub struct FooBuilder {
// Probably lots of optional fields.
bar: String,
}
impl FooBuilder {
pub fn new(/* ... */) -> FooBuilder {
// Set the minimally required fields of Foo.
FooBuilder {
bar: "x".to_string(),
}
}
pub fn name(mut self, bar: String) -> FooBuilder {
// Set the name on the builder itself, and return the builder by value.
self.bar = bar;
self
}
// If we can get away with not consuming the Builder here, that is an
// advantage. It means we can use the FooBuilder as a template for constructing
// many Foos.
pub fn build(self) -> Foo {
// Create a Foo from the FooBuilder, applying all settings in FooBuilder
// to Foo.
Foo { bar: self.bar }
}
}
#[test]
fn builder_test() {
let foo = Foo { bar: "y".to_string() };
let foo_from_builder = FooBuilder::new().name("y".to_string()).build();
assert_eq!(foo, foo_from_builder);
}Khi nào dùng
Hữu ích khi bạn muốn có nhiều loại constructors khác nhau hoặc khi constructor có side effects.
Ưu điểm
- Tách biệt các methods của builder và các method khác của object.
- Không cần phải viết quá nhiều constructor nếu struct có quá nhiều fields hoặc quá nhiều cách để khởi tạo một object.
- One-liner initialization:
FooBuilder::new().a().b().c().build()
Nhược điểm
Phức tạp hơn so với việc init object trực tiếp, hoặc so với object có constructor đơn giản.
References
- https://doc.rust-lang.org/1.0.0/style/ownership/builders.html
- derive_builder, một crate cho phép tự động tạo builder.
- Builder pattern (wikipedia)
Structural Patterns
Theo Wikipedia:
Structual Patterns: Design patterns that ease the design by identifying a simple way to realize relationships among entities.
Một số Structural Patterns trong Rust
Prefer Small Crates
Không hẳn là một Design pattern, mình thấy đây là một tư tưởng khi viết các project bằng Rust.
Cargo và crates.io giúp quản lý crate cực kỳ dễ dàng. Hơn nữa, crate trên crates.io không thể sửa hoặc xóa được sau khi publish, bất kỳ bản build nào đang hoạt động chắc chắn sẽ hoạt động được tiếp trong tương lai. Điều này bắt buộc để có được sự hiệu quả, mọi crate phải được thiết kế tốt, lựa chọn dependencies kỹ càng và càng nhỏ càng tốt.
Prefer small crates that do one thing well.
Ưu điểm
- Small crate sẽ giúp ta dễ hiểu và dễ sử dụng hơn, code dễ module hóa hơn.
- Đơn vị compilation nhỏ nhất của Rust là crate, tách nhỏ project thành nhiều crate giúp code build parallel.
- Crate giúp tái sử dụng giữa nhiều project khác nhau.
- Ví dụ, crate
urllà một phần của Servo browser engine, nhưng được sử dụng cực kỳ rộng rãi ở các project khác, do nó độc lập và giải quyết một vấn đề cụ thể. - Ví dụ, AWS SDK Rust được tách thành rất nhiều crate nhỏ, và các crate nhỏ này được sử dụng ở khắp nơi không chỉ ở AWS SDK Rust.
aws-sdk-*aws-configaws_smithy_clientaws_types
- Ví dụ, crate
- Tách nhỏ crate độc lập giúp việc chia tasks trong một project lớn của team hiệu quả hơn.
Nhược điểm
- Có dễ dẫn đến “dependency hell”, một project depends vào cùng 1 crate nhưng version khác nhau cùng một lúc. Và các versions này xung đột nhau.
- Hai crate quá nhỏ có thể kém hiệu quả hơn một crate lớn, bởi vì compiler mặc định không thực hiện link-time optimization (LTO).
Một số small crates điển hình
- url: crate xử lý url.
- ref_slice: crate giúp convert từ
&Tsang&[T]. Crate này từng nằm trong standard library nhưng đã tách ra. - num_cpus: trả về số lượng cpu trên máy hiện tại.
- rand: random number generators.
regex
Regular expressions cho Rust.
Cài đặt
cargo add regex
Hoặc
# File: Cargo.toml
[dependencies]
regex = "1"
Sử dụng
use regex::Regex;
fn main() {
let re = Regex::new(r"(\d{4})-(\d{2})-(\d{2})").unwrap();
let hay = "On 2010-03-14, foo happened. On 2014-10-14, bar happened.";
let mut dates = vec![];
for (_, [year, month, day]) in re.captures_iter(hay).map(|c| c.extract()) {
dates.push((year, month, day));
}
assert_eq!(dates, vec![
("2010", "03", "14"),
("2014", "10", "14"),
]);
}References
- https://docs.rs/regex
- https://crates.io/crates/regex
chrono
chrono có hầu hết mọi thứ giúp bạn xử lý dates và times. chrono_tz không được ship bên trong chrono vì lý do binary size nên chúng ta có thể cài đặt riêng nếu cần thiết.
File: Cargo.toml
[dependencies]
chrono = "*"
chrono-tz = "*"
Ví dụ:
#![allow(unused)]
fn main() {
use chrono::prelude::*;
let utc: DateTime<Utc> = Utc::now();
println!("{}", utc);
}Ví dụ:
#![allow(unused)]
fn main() {
use chrono::prelude::*;
let dt: DateTime<Local> = Local::now();
println!("{}", dt);
// 2024-06-20 09:05:39.051849711 +00:00
println!("{}", dt.format("%A, %B %e, %Y %r"));
// Thursday, June 20, 2024 09:06:36 AM
println!("year = {}", dt.year());
// year = 2024
}Khởi tạo naive datetime và convert thành timezone-aware datetime
#![allow(unused)]
fn main() {
use chrono::{TimeZone, NaiveDate};
use chrono_tz::Asia::Ho_Chi_Minh;
let naive_dt = NaiveDate::from_ymd(2038, 1, 19).and_hms(3, 14, 08);
let tz_aware = Ho_Chi_Minh.from_local_datetime(&naive_dt).unwrap();
println!("{}", tz_aware.to_string());
}Parse datetime
#![allow(unused)]
fn main() {
use chrono::prelude::*;
// method 1
let dt = "2014-11-28T12:00:09Z".parse::<DateTime<Utc>>();
println!("{:?}", dt);
}DateTime::parse_from_str:
#![allow(unused)]
fn main() {
use chrono::prelude::*;
let dt = DateTime::parse_from_str("2014-11-28 21:00:09 +09:00", "%Y-%m-%d %H:%M:%S %z");
println!("{:?}", dt);
}DateTime::parse_from_rfc2822, DateTime::parse_from_rfc3339, etc:
#![allow(unused)]
fn main() {
use chrono::prelude::*;
let dt = DateTime::parse_from_rfc2822("Tue, 1 Jul 2003 10:52:37 +0200");
println!("{:?}", dt);
}Documentation
Xem docs.rs nhiều ví dụ hơn và API reference.
async_trait
Rust chưa hỗ trợ async cho trait. Trait dưới đây sẽ báo lỗi:
#![allow(unused)]
fn main() {
trait MyTrait {
async fn f() {}
}
}error[E0706]: trait fns cannot be declared `async`
--> src/main.rs:4:5
|
4 | async fn f() {}
| ^^^^^^^^^^^^^^^
async_trait cung cấp attribute macro để giúp async có thể hoạt động với trait.
File: Cargo.toml
[dependencies]
async_trait = "0.1"
Ví dụ:
#![allow(unused)]
fn main() {
use async_trait::async_trait;
#[async_trait]
trait Advertisement {
async fn run(&self);
}
struct Modal;
#[async_trait]
impl Advertisement for Modal {
async fn run(&self) {
self.render_fullscreen().await;
for _ in 0..4u16 {
remind_user_to_join_mailing_list().await;
}
self.hide_for_now().await;
}
}
struct AutoplayingVideo {
media_url: String,
}
#[async_trait]
impl Advertisement for AutoplayingVideo {
async fn run(&self) {
let stream = connect(&self.media_url).await;
stream.play().await;
// Video probably persuaded user to join our mailing list!
Modal.run().await;
}
}
}References
- Doc: https://docs.rs/anyhow
- Github: https://github.com/dtolnay/anyhow
- why async fn in traits are hard
lazy_static
lazy_static là một macro cho phép khởi tạo biến static nhưng chứa giá trị
được thực thi lúc runtime. Các giá trị này có thể là bất kỳ cái gì cần heap allocations,
ví dụ như Vec, HashMap hoặc function call.
Cài đặt
cargo add lazy_static
Hoặc
# File: Cargo.toml
[dependencies]
lazy_static = "1"
Ví dụ
use lazy_static::lazy_static;
use std::collections::HashMap;
lazy_static! {
static ref HASHMAP: HashMap<u32, &'static str> = {
let mut m = HashMap::new();
m.insert(0, "foo");
m.insert(1, "bar");
m.insert(2, "baz");
m
};
static ref COUNT: usize = HASHMAP.len();
static ref NUMBER: u32 = times_two(21);
}
fn times_two(n: u32) -> u32 { n * 2 }
fn main() {
println!("The map has {} entries.", *COUNT);
println!("The entry for `0` is \"{}\".", HASHMAP.get(&0).unwrap());
println!("A expensive calculation on a static results in: {}.", *NUMBER);
}References
serde
A generic serialization/deserialization framework
Cài đặt
cargo add serde
Hoặc
# File: Cargo.toml
[dependencies]
serde = "*"
Sử dụng
use serde::{Deserialize, Serialize};
#[derive(Serialize, Deserialize, Debug)]
struct Point {
x: i32,
y: i32,
}
fn main() {
let point = Point { x: 1, y: 2 };
// Convert the Point to a JSON string.
let serialized = serde_json::to_string(&point).unwrap();
// Prints serialized = {"x":1,"y":2}
println!("serialized = {}", serialized);
// Convert the JSON string back to a Point.
let deserialized: Point = serde_json::from_str(&serialized).unwrap();
// Prints deserialized = Point { x: 1, y: 2 }
println!("deserialized = {:?}", deserialized);
}Data formats
References
- http://serde.rs
serde_json
JSON đã trở thành một trong những định dạng trao đổi dữ liệu phổ biến, đa số các ngữ lập trình server-side đều có thể xử lý chúng. Nhờ vào serde và serde_json việc xử lý JSON cũng vô cùng dễ dàng với Rust. Các crate này cũng đã được test một cách kỹ càng và nhiều examples vô cùng phong phú dễ sử dụng.
[dependencies]
serde = "1"
serde_json = "1"
Parse chuỗi JSON thành Rust
Giả sử chúng ta có đoạn JSON như sau:
{
"name": "Duyet Le",
"age": 27,
"phones": [
"+60 1234567",
"+84 2345678"
]
}
Chúng ta sẽ parse thành một giá trị trong Rust:
#![allow(unused)]
fn main() {
use serde_json::{Result, Value};
fn untyped_example() -> Result<()> {
// Some JSON input data as a &str. Maybe this comes from the user.
let data = r#"
{
"name": "Duyet Le",
"age": 27,
"phones": [
"+60 1234567",
"+84 2345678"
]
}"#;
// Parse the string of data into serde_json::Value.
let v: Value = serde_json::from_str(data)?;
// Access parts of the data by indexing with square brackets.
println!("Please call {} at the number {}", v["name"], v["phones"][0]);
Ok(())
}
}v được parse từ JSON là một enum serde_json::Value cho phép biểu diễn mọi thuộc tính của JSON.
#![allow(unused)]
fn main() {
enum Value {
Null,
Bool(bool),
Number(Number),
String(String),
Array(Vec<Value>),
Object(Map<String, Value>),
}
}Để truy xuất đến từng thuộc tính:
#![allow(unused)]
fn main() {
v["name"]
v["phones"]
v["phones"][0 ]
}Parse JSON into Strongly Typed
Serde cho phép chúng ta map một JSON data vào một kiểu dữ liệu của Rust và có thể do chúng ta tự định nghĩa, một cách tự động:
#![allow(unused)]
fn main() {
use serde::{Deserialize, Serialize};
use serde_json::Result;
#[derive(Serialize, Deserialize)]
struct Person {
name: String,
age: u8,
phones: Vec<String>,
}
fn typed_example() -> Result<()> {
let data = r#"
{
"name": "Duyet Le",
"age": 27,
"phones": [
"+60 1234567",
"+84 2345678"
]
}"#;
// Parse the string of data into a Person object. This is exactly the
// same function as the one that produced serde_json::Value above, but
// now we are asking it for a Person as output.
let p: Person = serde_json::from_str(data)?;
// Do things just like with any other Rust data structure.
println!("Please call {} at the number {}", p.name, p.phones[0]);
Ok(())
}
}Constructing JSON values
json! macro giúp chúng ta khởi tạo serde_json::Value objects với cú pháp giống hệt JSON string:
use serde_json::json;
fn main() {
// The type of `john` is `serde_json::Value`
let duyet = json!({
"name": "Duyet Le",
"age": 27,
"phones": [
"+60 1234567",
"+84 2345678"
]
});
println!("first phone number: {}", duyet["phones"][0]);
// Convert to a string of JSON and print it out
println!("{}", duyet.to_string());
}Convert a Struct to JSON
Một kiểu dữ liệu có thể được convert thành JSON string bởi serde_json::to_string. Kiểu dữ liệu này có thể là Struct hoặc Enum có có implement #[derive(Serialize)]:
#![allow(unused)]
fn main() {
use serde::{Deserialize, Serialize};
use serde_json::Result;
#[derive(Serialize, Deserialize)]
struct Address {
street: String,
city: String,
}
fn print_an_address() -> Result<()> {
// Some data structure.
let address = Address {
street: "Dist 1 Street".to_owned(),
city: "Ho Chi Minh".to_owned(),
};
// Serialize it to a JSON string.
let j = serde_json::to_string(&address)?;
// Print, write to a file, or send to an HTTP server.
println!("{}", j);
Ok(())
}
}References
serde- JSON API documentation
- Serde API documentation
- Detailed documentation about Serde
- Setting up
#[derive(Serialize, Deserialize)]
serde_toml
serde đọc và xử lý TOML file.
File: Cargo.toml
[dependencies]
serde = "1"
toml = "1"
Ví dụ deserialize từ TOML file:
#![allow(unused)]
fn main() {
use serde::Deserialize;
#[derive(Deserialize)]
struct Config {
ip: String,
port: Option<u16>,
keys: Keys,
}
#[derive(Deserialize)]
struct Keys {
github: String,
travis: Option<String>,
}
let config: Config = toml::from_str(r#"
ip = '127.0.0.1'
[keys]
github = 'xxxxxxxxxxxxxxxxx'
travis = 'yyyyyyyyyyyyyyyyy'
"#).unwrap();
assert_eq!(config.ip, "127.0.0.1");
assert_eq!(config.port, None);
assert_eq!(config.keys.github, "xxxxxxxxxxxxxxxxx");
assert_eq!(config.keys.travis.as_ref().unwrap(), "yyyyyyyyyyyyyyyyy");
}Ví dụ serialize sang TOML file:
#![allow(unused)]
fn main() {
use serde::Serialize;
#[derive(Serialize)]
struct Config {
ip: String,
port: Option<u16>,
keys: Keys,
}
#[derive(Serialize)]
struct Keys {
github: String,
travis: Option<String>,
}
let config = Config {
ip: "127.0.0.1".to_string(),
port: None,
keys: Keys {
github: "xxxxxxxxxxxxxxxxx".to_string(),
travis: Some("yyyyyyyyyyyyyyyyy".to_string()),
},
};
let toml = toml::to_string(&config).unwrap();
println!("{}", toml);
}Reference
serde_toml
serde đọc và xử lý CSV file.
File: Cargo.toml
[dependencies]
serde = "1"
csv = "1"
Ví dụ parse file CSV:
#![allow(unused)]
fn main() {
use std::io;
let mut rdr = csv::Reader::from_reader(io::stdin());
for result in rdr.records() {
// An error may occur, so abort the program in an unfriendly way.
// We will make this more friendly later!
let record = result.expect("a CSV record");
// Print a debug version of the record.
println!("{:?}", record);
}
}Ví dụ:
use std::{error::Error, io, process};
#[derive(Debug, serde::Deserialize)]
struct Record {
city: String,
region: String,
country: String,
population: Option<u64>,
}
fn example() -> Result<(), Box<dyn Error>> {
let mut rdr = csv::Reader::from_reader(io::stdin());
for result in rdr.deserialize() {
// Notice that we need to provide a type hint for automatic
// deserialization.
let record: Record = result?;
println!("{:?}", record);
}
Ok(())
}
fn main() {
if let Err(err) = example() {
println!("error running example: {}", err);
process::exit(1);
}
}Reference
serde_yaml
serde đọc và xử lý file YAML.
File: Cargo.toml
[dependencies]
serde = { version = "1", features = ["derive"] }
serde_yaml = "*"
Ví dụ
use std::collections::BTreeMap;
fn main() -> Result<(), serde_yaml::Error> {
// You have some type.
let mut map = BTreeMap::new();
map.insert("x".to_string(), 1.0);
map.insert("y".to_string(), 2.0);
// Serialize it to a YAML string.
let yaml = serde_yaml::to_string(&map)?;
assert_eq!(yaml, "x: 1.0\ny: 2.0\n");
// Deserialize it back to a Rust type.
let deserialized_map: BTreeMap<String, f64> = serde_yaml::from_str(&yaml)?;
assert_eq!(map, deserialized_map);
println!("BTreeMap:\n{}", yaml);
Ok(())
}Structs serialize in the obvious way:
use serde::{Serialize, Deserialize};
#[derive(Debug, PartialEq, Serialize, Deserialize)]
struct Point {
x: f64,
y: f64,
}
fn main() -> Result<(), serde_yaml::Error> {
let point = Point { x: 1.0, y: 2.0 };
let yaml = serde_yaml::to_string(&point)?;
assert_eq!(yaml, "x: 1.0\ny: 2.0\n");
let deserialized_point: Point = serde_yaml::from_str(&yaml)?;
assert_eq!(point, deserialized_point);
Ok(())
}tokio
tokio là một asynchronous runtime, giúp viết ứng dụng async trong Rust.
Cài đặt
cargo add tokio --features full
Hoặc
# File: Cargo.toml
[dependencies]
tokio = { version = "1", features = ["full"] }
Ví dụ
#[tokio::main]
async fn main() {
// This is running on a core thread.
let blocking_task = tokio::task::spawn_blocking(|| {
// This is running on a blocking thread.
// Blocking here is ok.
});
// We can wait for the blocking task like this:
// If the blocking task panics, the unwrap below will propagate the
// panic.
blocking_task.await.unwrap();
}Ví dụ: Socket server
Ví dụ sau lấy từ document của tokio, một server đơn giản nhận kết nối từ client và trả về một thông báo.
use tokio::net::{TcpListener, TcpStream};
use mini_redis::{Connection, Frame};
#[tokio::main]
async fn main() {
// Bind the listener to the address
let listener = TcpListener::bind("127.0.0.1:6379").await.unwrap();
loop {
// The second item contains the IP and port of the new connection.
let (socket, _) = listener.accept().await.unwrap();
process(socket).await;
}
}
async fn process(socket: TcpStream) {
// The `Connection` lets us read/write redis **frames** instead of
// byte streams. The `Connection` type is defined by mini-redis.
let mut connection = Connection::new(socket);
if let Some(frame) = connection.read_frame().await.unwrap() {
println!("GOT: {:?}", frame);
// Respond with an error
let response = Frame::Error("unimplemented".to_string());
connection.write_frame(&response).await.unwrap();
}
}Trên terminal:
cargo run
Trên một terminal khác:
(printf "PING\r\n";) | nc localhost 6379
References
actix-web
actix-web là một powerful, pragmatic và extremely fast web framework cho Rust. Được xây dựng trên nền tảng actix actor framework, actix-web là một trong những web framework nhanh nhất theo benchmark.
Đặc điểm
- ⚡ Cực kỳ nhanh - Thường xuyên top đầu các benchmark web frameworks
- 🔒 Type-safe - Tận dụng type system của Rust
- 🚀 Async/await - Built-in async support
- 🔧 Flexible - Middleware, extractors, routing mạnh mẽ
- 🛠️ Batteries included - WebSocket, HTTP/2, TLS, compression…
Cài đặt
[dependencies]
actix-web = "4"
tokio = { version = "1", features = ["full"] }
Hoặc:
cargo add actix-web
cargo add tokio --features full
Ví dụ cơ bản: Hello World
use actix_web::{get, web, App, HttpResponse, HttpServer, Responder};
#[get("/")]
async fn hello() -> impl Responder {
HttpResponse::Ok().body("Hello World!")
}
#[get("/hello/{name}")]
async fn greet(name: web::Path<String>) -> impl Responder {
HttpResponse::Ok().body(format!("Hello {}!", name))
}
#[actix_web::main]
async fn main() -> std::io::Result<()> {
println!("🚀 Server chạy tại http://localhost:8080");
HttpServer::new(|| {
App::new()
.service(hello)
.service(greet)
})
.bind(("127.0.0.1", 8080))?
.run()
.await
}Chạy và test:
cargo run
# Terminal khác:
curl http://localhost:8080/
# Hello World!
curl http://localhost:8080/hello/Rust
# Hello Rust!
Routing
Route với nhiều HTTP methods
#![allow(unused)]
fn main() {
use actix_web::{get, post, put, delete, web, HttpResponse};
#[get("/users")]
async fn get_users() -> HttpResponse {
HttpResponse::Ok().json(vec!["user1", "user2"])
}
#[post("/users")]
async fn create_user() -> HttpResponse {
HttpResponse::Created().json("User created")
}
#[put("/users/{id}")]
async fn update_user(id: web::Path<u32>) -> HttpResponse {
HttpResponse::Ok().json(format!("Updated user {}", id))
}
#[delete("/users/{id}")]
async fn delete_user(id: web::Path<u32>) -> HttpResponse {
HttpResponse::Ok().json(format!("Deleted user {}", id))
}
}Route parameters
#![allow(unused)]
fn main() {
use actix_web::{get, web, HttpResponse};
use serde::Deserialize;
// Path parameters
#[get("/posts/{id}")]
async fn get_post(id: web::Path<u32>) -> HttpResponse {
HttpResponse::Ok().json(format!("Post ID: {}", id))
}
// Multiple path parameters
#[get("/posts/{id}/comments/{comment_id}")]
async fn get_comment(path: web::Path<(u32, u32)>) -> HttpResponse {
let (post_id, comment_id) = path.into_inner();
HttpResponse::Ok().json(format!("Post {}, Comment {}", post_id, comment_id))
}
// Query parameters
#[derive(Deserialize)]
struct Pagination {
page: Option<u32>,
limit: Option<u32>,
}
#[get("/posts")]
async fn list_posts(query: web::Query<Pagination>) -> HttpResponse {
let page = query.page.unwrap_or(1);
let limit = query.limit.unwrap_or(10);
HttpResponse::Ok().json(format!("Page {}, Limit {}", page, limit))
}
}JSON và Request/Response
#![allow(unused)]
fn main() {
use actix_web::{post, web, HttpResponse};
use serde::{Deserialize, Serialize};
#[derive(Deserialize)]
struct CreateUserRequest {
username: String,
email: String,
}
#[derive(Serialize)]
struct UserResponse {
id: u32,
username: String,
email: String,
}
#[post("/users")]
async fn create_user(user: web::Json<CreateUserRequest>) -> HttpResponse {
// Process user data
let response = UserResponse {
id: 1,
username: user.username.clone(),
email: user.email.clone(),
};
HttpResponse::Created().json(response)
}
}Test với curl:
curl -X POST http://localhost:8080/users \
-H "Content-Type: application/json" \
-d '{"username":"duyet","email":"me@duyet.net"}'
State Management
Shared application state:
use actix_web::{get, web, App, HttpResponse, HttpServer};
use std::sync::Mutex;
struct AppState {
counter: Mutex<i32>,
}
#[get("/count")]
async fn get_count(data: web::Data<AppState>) -> HttpResponse {
let count = data.counter.lock().unwrap();
HttpResponse::Ok().json(*count)
}
#[get("/increment")]
async fn increment(data: web::Data<AppState>) -> HttpResponse {
let mut count = data.counter.lock().unwrap();
*count += 1;
HttpResponse::Ok().json(*count)
}
#[actix_web::main]
async fn main() -> std::io::Result<()> {
let app_state = web::Data::new(AppState {
counter: Mutex::new(0),
});
HttpServer::new(move || {
App::new()
.app_data(app_state.clone())
.service(get_count)
.service(increment)
})
.bind(("127.0.0.1", 8080))?
.run()
.await
}Middleware
Custom Middleware
use actix_web::{dev::ServiceRequest, Error, HttpMessage};
use actix_web::middleware::Logger;
#[actix_web::main]
async fn main() -> std::io::Result<()> {
env_logger::init_from_env(env_logger::Env::new().default_filter_or("info"));
HttpServer::new(|| {
App::new()
// Logger middleware
.wrap(Logger::default())
// CORS
.wrap(
actix_cors::Cors::default()
.allow_any_origin()
.allow_any_method()
.allow_any_header()
)
.service(hello)
})
.bind(("127.0.0.1", 8080))?
.run()
.await
}Error Handling
#![allow(unused)]
fn main() {
use actix_web::{get, web, HttpResponse, ResponseError};
use std::fmt;
#[derive(Debug)]
enum MyError {
NotFound,
InternalError,
}
impl fmt::Display for MyError {
fn fmt(&self, f: &mut fmt::Formatter<'_>) -> fmt::Result {
match self {
MyError::NotFound => write!(f, "Resource not found"),
MyError::InternalError => write!(f, "Internal server error"),
}
}
}
impl ResponseError for MyError {
fn status_code(&self) -> actix_web::http::StatusCode {
match self {
MyError::NotFound => actix_web::http::StatusCode::NOT_FOUND,
MyError::InternalError => actix_web::http::StatusCode::INTERNAL_SERVER_ERROR,
}
}
}
#[get("/users/{id}")]
async fn get_user(id: web::Path<u32>) -> Result<HttpResponse, MyError> {
if *id == 0 {
return Err(MyError::NotFound);
}
Ok(HttpResponse::Ok().json(format!("User {}", id)))
}
}Database Integration (với sqlx)
[dependencies]
actix-web = "4"
sqlx = { version = "0.7", features = ["runtime-tokio-native-tls", "postgres"] }
serde = { version = "1.0", features = ["derive"] }
use actix_web::{get, web, App, HttpResponse, HttpServer};
use sqlx::{PgPool, postgres::PgPoolOptions};
use serde::Serialize;
#[derive(Serialize, sqlx::FromRow)]
struct User {
id: i32,
username: String,
}
#[get("/users")]
async fn get_users(pool: web::Data<PgPool>) -> HttpResponse {
let users = sqlx::query_as::<_, User>("SELECT id, username FROM users")
.fetch_all(pool.get_ref())
.await;
match users {
Ok(users) => HttpResponse::Ok().json(users),
Err(_) => HttpResponse::InternalServerError().finish(),
}
}
#[actix_web::main]
async fn main() -> std::io::Result<()> {
let pool = PgPoolOptions::new()
.max_connections(5)
.connect("postgres://user:password@localhost/db")
.await
.expect("Failed to create pool");
let pool_data = web::Data::new(pool);
HttpServer::new(move || {
App::new()
.app_data(pool_data.clone())
.service(get_users)
})
.bind(("127.0.0.1", 8080))?
.run()
.await
}WebSocket
use actix_web::{web, App, HttpRequest, HttpResponse, HttpServer};
use actix_web_actors::ws;
struct MyWebSocket;
impl actix::Actor for MyWebSocket {
type Context = ws::WebsocketContext<Self>;
}
impl actix::StreamHandler<Result<ws::Message, ws::ProtocolError>> for MyWebSocket {
fn handle(&mut self, msg: Result<ws::Message, ws::ProtocolError>, ctx: &mut Self::Context) {
match msg {
Ok(ws::Message::Ping(msg)) => ctx.pong(&msg),
Ok(ws::Message::Text(text)) => ctx.text(format!("Echo: {}", text)),
Ok(ws::Message::Binary(bin)) => ctx.binary(bin),
_ => (),
}
}
}
async fn ws_index(req: HttpRequest, stream: web::Payload) -> Result<HttpResponse, actix_web::Error> {
ws::start(MyWebSocket {}, &req, stream)
}
#[actix_web::main]
async fn main() -> std::io::Result<()> {
HttpServer::new(|| {
App::new().route("/ws/", web::get().to(ws_index))
})
.bind(("127.0.0.1", 8080))?
.run()
.await
}Testing
#![allow(unused)]
fn main() {
#[cfg(test)]
mod tests {
use super::*;
use actix_web::{test, App};
#[actix_web::test]
async fn test_hello() {
let app = test::init_service(App::new().service(hello)).await;
let req = test::TestRequest::get().uri("/").to_request();
let resp = test::call_service(&app, req).await;
assert!(resp.status().is_success());
}
#[actix_web::test]
async fn test_greet() {
let app = test::init_service(App::new().service(greet)).await;
let req = test::TestRequest::get().uri("/hello/Rust").to_request();
let resp: String = test::read_body_json(test::call_service(&app, req).await).await;
assert_eq!(resp, "Hello Rust!");
}
}
}So sánh với framework khác
Python (FastAPI)
from fastapi import FastAPI
app = FastAPI()
@app.get("/")
def hello():
return {"message": "Hello World"}
@app.get("/hello/{name}")
def greet(name: str):
return {"message": f"Hello {name}"}
Node.js (Express)
const express = require('express');
const app = express();
app.get('/', (req, res) => {
res.send('Hello World!');
});
app.get('/hello/:name', (req, res) => {
res.send(`Hello ${req.params.name}!`);
});
app.listen(8080);
Ưu điểm của actix-web:
- Nhanh hơn 5-10x so với FastAPI/Express
- Type safety tại compile time
- Memory safe (no null pointer, data races)
- Low resource usage
Performance Tips
- Sử dụng connection pooling cho database
- Enable compression middleware
- Configure worker threads:
#![allow(unused)]
fn main() {
HttpServer::new(|| App::new())
.workers(4) // Số lượng workers
.bind(("127.0.0.1", 8080))?
.run()
.await
}- Use
web::Datathay vìArctrực tiếp
Tổng kết
actix-web là lựa chọn tuyệt vời cho:
- ✅ High-performance APIs
- ✅ Real-time applications (WebSocket)
- ✅ Microservices
- ✅ RESTful APIs
- ✅ Production-ready web services
Ecosystem phong phú:
actix-web- Web frameworkactix-cors- CORS middlewareactix-session- Session managementactix-files- Static file servingactix-web-actors- WebSocket support
References
anyhow
anyhow là thư viện giúp đơn giản hóa việc handle lỗi trong Rust application.
File: Cargo.toml
[dependencies]
anyhow = "1"
Cách sử dụng
-
Sử dụng
anyhow::Result<T>thay choResultcủastd. Ta không cần định nghĩa Error trả về. Trong function sử dụng?để trả mọi error đã được implstd::error::Errorlên level cao hơn.#![allow(unused)] fn main() { use anyhow::Result; fn get_cluster_info() -> Result<ClusterMap> { let config = std::fs::read_to_string("cluster.json")?; let map: ClusterMap = serde_json::from_str(&config)?; Ok(map) } } -
Thêm context để debug dễ hơn:
use anyhow::{Context, Result}; fn main() -> Result<()> { ... it.detach().context("Failed to detach the important thing")?; let content = std::fs::read(path) .with_context(|| format!("Failed to read instrs from {}", path))?; ... }Error: Failed to read instrs from ./path/to/instrs.json Caused by: No such file or directory (os error 2) -
Return lỗi nhanh hơn với macros
anyhow!,bail!,ensure!#![allow(unused)] fn main() { return Err(anyhow!("Missing attribute: {}", missing)); }#![allow(unused)] fn main() { bail!("Missing attribute: {}", missing); }#![allow(unused)] fn main() { ensure!(user == 0, "only user 0 is allowed"); }
References
- Doc: https://docs.rs/anyhow
- Github: https://github.com/dtolnay/anyhow
clap
clap (Command Line Argument Parser) là một trong những library phổ biến nhất để xây dựng command-line interfaces (CLI) trong Rust. Clap giúp parse arguments, generate help messages, và validate input một cách dễ dàng.
Đặc điểm
- 🎯 Dễ sử dụng - Derive macros cho simple APIs
- ✅ Type-safe - Compile-time validation
- 📝 Auto-generated help - Beautiful help messages
- 🔧 Flexible - Builder pattern hoặc derive macros
- 🚀 Feature-rich - Subcommands, validation, custom types…
Cài đặt
[dependencies]
clap = { version = "4.5", features = ["derive"] }
Hoặc:
cargo add clap --features derive
Ví dụ cơ bản: Derive API
use clap::Parser;
/// Simple program to greet a person
#[derive(Parser, Debug)]
#[command(author, version, about, long_about = None)]
struct Args {
/// Name of the person to greet
#[arg(short, long)]
name: String,
/// Number of times to greet
#[arg(short, long, default_value_t = 1)]
count: u8,
}
fn main() {
let args = Args::parse();
for _ in 0..args.count {
println!("Hello {}!", args.name);
}
}Sử dụng:
$ cargo run -- --help
Simple program to greet a person
Usage: myapp [OPTIONS] --name <NAME>
Options:
-n, --name <NAME> Name of the person to greet
-c, --count <COUNT> Number of times to greet [default: 1]
-h, --help Print help
-V, --version Print version
$ cargo run -- --name Rust
Hello Rust!
$ cargo run -- --name Rust --count 3
Hello Rust!
Hello Rust!
Hello Rust!
Arguments Types
Required Arguments
#![allow(unused)]
fn main() {
use clap::Parser;
#[derive(Parser)]
struct Args {
/// Required argument
name: String,
}
}Optional Arguments
use clap::Parser;
#[derive(Parser)]
struct Args {
/// Optional argument
#[arg(short, long)]
name: Option<String>,
}
fn main() {
let args = Args::parse();
match args.name {
Some(name) => println!("Hello {}", name),
None => println!("Hello stranger!"),
}
}Flags (Boolean)
use clap::Parser;
#[derive(Parser)]
struct Args {
/// Enable verbose mode
#[arg(short, long)]
verbose: bool,
/// Enable debug mode
#[arg(short, long)]
debug: bool,
}
fn main() {
let args = Args::parse();
if args.verbose {
println!("Verbose mode enabled");
}
if args.debug {
println!("Debug mode enabled");
}
}Multiple Values
use clap::Parser;
#[derive(Parser)]
struct Args {
/// Input files
#[arg(short, long, num_args = 1..)]
files: Vec<String>,
}
fn main() {
let args = Args::parse();
for file in args.files {
println!("Processing: {}", file);
}
}Sử dụng:
$ cargo run -- --files file1.txt file2.txt file3.txt
Processing: file1.txt
Processing: file2.txt
Processing: file3.txt
Subcommands
use clap::{Parser, Subcommand};
#[derive(Parser)]
#[command(author, version, about)]
struct Cli {
#[command(subcommand)]
command: Commands,
}
#[derive(Subcommand)]
enum Commands {
/// Add a new item
Add {
/// Name of the item
name: String,
},
/// List all items
List,
/// Remove an item
Remove {
/// ID of the item to remove
id: u32,
},
}
fn main() {
let cli = Cli::parse();
match cli.command {
Commands::Add { name } => {
println!("Adding: {}", name);
}
Commands::List => {
println!("Listing all items...");
}
Commands::Remove { id } => {
println!("Removing item with ID: {}", id);
}
}
}Sử dụng:
$ cargo run -- add --help
Add a new item
Usage: myapp add <NAME>
Arguments:
<NAME> Name of the item
$ cargo run -- add "New Item"
Adding: New Item
$ cargo run -- list
Listing all items...
$ cargo run -- remove 123
Removing item with ID: 123
Value Validation
Possible Values
#![allow(unused)]
fn main() {
use clap::Parser;
#[derive(Parser)]
struct Args {
/// Log level
#[arg(short, long, value_parser = ["debug", "info", "warn", "error"])]
level: String,
}
}Custom Validation
#![allow(unused)]
fn main() {
use clap::Parser;
fn validate_port(s: &str) -> Result<u16, String> {
let port: u16 = s.parse()
.map_err(|_| format!("`{}` isn't a valid port number", s))?;
if port < 1024 {
return Err("Port must be >= 1024".to_string());
}
Ok(port)
}
#[derive(Parser)]
struct Args {
/// Port number (must be >= 1024)
#[arg(short, long, value_parser = validate_port)]
port: u16,
}
}Range Validation
#![allow(unused)]
fn main() {
use clap::Parser;
#[derive(Parser)]
struct Args {
/// Number of threads (1-16)
#[arg(short, long, value_parser = clap::value_parser!(u8).range(1..=16))]
threads: u8,
}
}Enum Arguments
use clap::{Parser, ValueEnum};
#[derive(Copy, Clone, PartialEq, Eq, PartialOrd, Ord, ValueEnum)]
enum Mode {
/// Fast mode
Fast,
/// Normal mode
Normal,
/// Slow but accurate mode
Accurate,
}
#[derive(Parser)]
struct Args {
/// Processing mode
#[arg(short, long, value_enum)]
mode: Mode,
}
fn main() {
let args = Args::parse();
match args.mode {
Mode::Fast => println!("Running in fast mode"),
Mode::Normal => println!("Running in normal mode"),
Mode::Accurate => println!("Running in accurate mode"),
}
}Environment Variables
#![allow(unused)]
fn main() {
use clap::Parser;
#[derive(Parser)]
struct Args {
/// API token
#[arg(short, long, env = "API_TOKEN")]
token: String,
}
}Sử dụng:
$ export API_TOKEN=abc123
$ cargo run
# Hoặc
$ cargo run -- --token abc123
Configuration Files
Kết hợp clap với config crate:
use clap::Parser;
use serde::Deserialize;
#[derive(Parser)]
struct Args {
/// Config file path
#[arg(short, long, default_value = "config.toml")]
config: String,
/// Override host from config
#[arg(long)]
host: Option<String>,
}
#[derive(Deserialize)]
struct Config {
host: String,
port: u16,
}
fn main() -> Result<(), Box<dyn std::error::Error>> {
let args = Args::parse();
// Load config file
let config_content = std::fs::read_to_string(&args.config)?;
let mut config: Config = toml::from_str(&config_content)?;
// Override with CLI args if provided
if let Some(host) = args.host {
config.host = host;
}
println!("Host: {}", config.host);
println!("Port: {}", config.port);
Ok(())
}Ví dụ thực tế: File processor
use clap::{Parser, Subcommand};
use std::path::PathBuf;
#[derive(Parser)]
#[command(name = "fileproc")]
#[command(about = "A file processing tool", long_about = None)]
struct Cli {
/// Enable verbose output
#[arg(short, long, global = true)]
verbose: bool,
#[command(subcommand)]
command: Commands,
}
#[derive(Subcommand)]
enum Commands {
/// Convert file format
Convert {
/// Input file
#[arg(short, long, value_name = "FILE")]
input: PathBuf,
/// Output file
#[arg(short, long, value_name = "FILE")]
output: PathBuf,
/// Output format
#[arg(short, long, value_parser = ["json", "yaml", "toml"])]
format: String,
},
/// Validate file
Validate {
/// File to validate
file: PathBuf,
},
}
fn main() {
let cli = Cli::parse();
match &cli.command {
Commands::Convert { input, output, format } => {
if cli.verbose {
println!("Converting {} to {}", input.display(), output.display());
println!("Format: {}", format);
}
// Conversion logic here
}
Commands::Validate { file } => {
if cli.verbose {
println!("Validating {}", file.display());
}
// Validation logic here
}
}
}So sánh với các ngôn ngữ khác
Python (argparse)
import argparse
parser = argparse.ArgumentParser(description='Simple program to greet')
parser.add_argument('--name', type=str, required=True, help='Name to greet')
parser.add_argument('--count', type=int, default=1, help='Number of times')
args = parser.parse_args()
for _ in range(args.count):
print(f"Hello {args.name}!")
Node.js (commander)
const { program } = require('commander');
program
.option('--name <name>', 'Name to greet')
.option('--count <number>', 'Number of times', 1)
.parse();
const options = program.opts();
for (let i = 0; i < options.count; i++) {
console.log(`Hello ${options.name}!`);
}
Ưu điểm của clap:
- Type-safe at compile time
- Auto-generated help messages
- Better error messages
- No runtime type checking needed
Best Practices
1. Sử dụng derive API cho simple cases
#![allow(unused)]
fn main() {
// ✅ Tốt - simple và clear
#[derive(Parser)]
struct Args {
#[arg(short, long)]
name: String,
}
}2. Group related options
#![allow(unused)]
fn main() {
#[derive(Parser)]
struct Args {
#[command(flatten)]
database: DatabaseArgs,
#[command(flatten)]
server: ServerArgs,
}
#[derive(Args)]
struct DatabaseArgs {
#[arg(long)]
db_host: String,
#[arg(long)]
db_port: u16,
}
#[derive(Args)]
struct ServerArgs {
#[arg(long)]
server_port: u16,
}
}3. Provide good help text
#![allow(unused)]
fn main() {
#[derive(Parser)]
#[command(about = "A comprehensive description of your tool")]
struct Args {
/// Name of the user (used for personalization)
#[arg(short, long, help = "Your full name")]
name: String,
}
}4. Use enums for fixed choices
#![allow(unused)]
fn main() {
// ✅ Tốt - type safe
#[derive(ValueEnum)]
enum LogLevel {
Debug,
Info,
Warn,
Error,
}
// ❌ Tránh - string validation at runtime
// level: String
}Advanced Features
Custom Help Template
#![allow(unused)]
fn main() {
use clap::Parser;
#[derive(Parser)]
#[command(help_template = "\
{before-help}{name} {version}
{author-with-newline}{about-with-newline}
{usage-heading} {usage}
{all-args}{after-help}
")]
struct Args {
name: String,
}
}Argument Groups
#![allow(unused)]
fn main() {
use clap::{ArgGroup, Parser};
#[derive(Parser)]
#[command(group(
ArgGroup::new("output")
.required(true)
.args(["json", "yaml"]),
))]
struct Args {
#[arg(long)]
json: bool,
#[arg(long)]
yaml: bool,
}
}Tổng kết
clap là lựa chọn tốt nhất cho CLI development trong Rust:
- ✅ Type-safe và compile-time validation
- ✅ Auto-generated help messages
- ✅ Flexible (derive hoặc builder API)
- ✅ Rich feature set
- ✅ Great error messages
Ecosystem:
clap- Core libraryclap_complete- Shell completion generationclap_mangen- Man page generation
References
log
log là thư viện logging lightweight cho Rust application.
File: Cargo.toml
[dependencies]
log = "0.4"
Cách sử dụng
#![allow(unused)]
fn main() {
use log::{info, trace, warn};
pub fn shave_the_yak(yak: &mut Yak) {
trace!("Commencing yak shaving");
loop {
match find_a_razor() {
Ok(razor) => {
info!("Razor located: {}", razor);
yak.shave(razor);
break;
}
Err(err) => {
warn!("Unable to locate a razor: {}, retrying", err);
}
}
}
}
}env_logger
log thường được sử dụng với env_logger để cấu hình logging
thông qua biến môi trường.
Mặc định, env_logger ghi log ra stderr.
File: Cargo.toml
[dependencies]
log = "0.4.0"
env_logger = "0.8.4"
Ví dụ:
File: src/main.rs
fn main() {
env_logger::init();
info!("starting up");
error!("this is error!");
debug!("this is debug {}!", "message");
}$ RUST_LOG=error cargo run
[2022-07-11T02:12:24Z ERROR main] this is error
$ RUST_LOG=info cargo run
[2022-07-11T02:12:24Z INFO main] starting up
[2022-07-11T02:12:24Z ERROR main] this is error
$ RUST_LOG=debug cargo run
[2022-07-11T02:12:24Z INFO main] starting up
[2022-07-11T02:12:24Z ERROR main] this is error
[2022-07-11T02:12:24Z DEBUG main] this is debug message!
Filter log theo module name:
$ RUST_LOG=main=info cargo run
[2022-07-11T02:12:24Z INFO main] starting up
[2022-07-11T02:12:24Z ERROR main] this is error
Hiện mọi log level cho module main:
$ RUST_LOG=main cargo run
[2022-07-11T02:12:24Z INFO main] starting up
[2022-07-11T02:12:24Z ERROR main] this is error
[2022-07-11T02:12:24Z DEBUG main] this is debug message!
References
- Doc: https://docs.rs/env_logger
- Github: https://github.com/env-logger-rs/env_logger/
- https://docs.rs/env_logger/
References
- Doc: https://docs.rs/log
- Github: https://github.com/rust-lang/log
env_logger
env_logger
log thường được sử dụng với env_logger để cấu hình logging
thông qua biến môi trường.
Mặc định, env_logger ghi log ra stderr.
File: Cargo.toml
[dependencies]
log = "0.4.0"
env_logger = "0.8.4"
Ví dụ:
File: src/main.rs
fn main() {
env_logger::init();
info!("starting up");
error!("this is error!");
debug!("this is debug {}!", "message");
}$ RUST_LOG=error cargo run
[2022-07-11T02:12:24Z ERROR main] this is error
$ RUST_LOG=info cargo run
[2022-07-11T02:12:24Z INFO main] starting up
[2022-07-11T02:12:24Z ERROR main] this is error
$ RUST_LOG=debug cargo run
[2022-07-11T02:12:24Z INFO main] starting up
[2022-07-11T02:12:24Z ERROR main] this is error
[2022-07-11T02:12:24Z DEBUG main] this is debug message!
Filter log theo module name:
$ RUST_LOG=main=info cargo run
[2022-07-11T02:12:24Z INFO main] starting up
[2022-07-11T02:12:24Z ERROR main] this is error
Hiện mọi log level cho module main:
$ RUST_LOG=main cargo run
[2022-07-11T02:12:24Z INFO main] starting up
[2022-07-11T02:12:24Z ERROR main] this is error
[2022-07-11T02:12:24Z DEBUG main] this is debug message!
References
- Doc: https://docs.rs/env_logger
- Github: https://github.com/env-logger-rs/env_logger/
- https://docs.rs/env_logger/
config
config là một library mạnh mẽ để quản lý configuration trong Rust applications. Nó hỗ trợ đọc config từ nhiều nguồn khác nhau (files, environment variables, command line) và merge chúng lại theo thứ tự ưu tiên.
Đặc điểm
- 📁 Multi-format - JSON, TOML, YAML, INI, RON, JSON5
- 🔄 Layered configs - Merge từ nhiều nguồn
- 🌍 Environment variables - Override config với env vars
- 🎯 Type-safe - Deserialize vào Rust structs
- ⚙️ Flexible - Custom sources và formats
Cài đặt
[dependencies]
config = "0.14"
serde = { version = "1.0", features = ["derive"] }
Hoặc:
cargo add config
cargo add serde --features derive
Ví dụ cơ bản
File config: config.toml
[database]
host = "localhost"
port = 5432
username = "admin"
password = "secret"
[server]
host = "0.0.0.0"
port = 8080
workers = 4
[logging]
level = "info"
Code
use config::{Config, ConfigError, File};
use serde::Deserialize;
#[derive(Debug, Deserialize)]
struct Database {
host: String,
port: u16,
username: String,
password: String,
}
#[derive(Debug, Deserialize)]
struct Server {
host: String,
port: u16,
workers: u8,
}
#[derive(Debug, Deserialize)]
struct Logging {
level: String,
}
#[derive(Debug, Deserialize)]
struct Settings {
database: Database,
server: Server,
logging: Logging,
}
fn main() -> Result<(), ConfigError> {
let settings = Config::builder()
.add_source(File::with_name("config"))
.build()?;
let settings: Settings = settings.try_deserialize()?;
println!("{:#?}", settings);
Ok(())
}Nhiều file config (Environments)
use config::{Config, ConfigError, File, Environment};
use serde::Deserialize;
#[derive(Debug, Deserialize)]
struct Settings {
debug: bool,
database: DatabaseSettings,
}
#[derive(Debug, Deserialize)]
struct DatabaseSettings {
url: String,
}
fn main() -> Result<(), ConfigError> {
let run_mode = std::env::var("RUN_MODE").unwrap_or_else(|_| "development".into());
let settings = Config::builder()
// Start with default config
.add_source(File::with_name("config/default"))
// Layer on environment-specific values
.add_source(File::with_name(&format!("config/{}", run_mode)).required(false))
// Layer on local config (ignored by git)
.add_source(File::with_name("config/local").required(false))
// Add environment variables (with a prefix of APP and separator of __)
.add_source(Environment::with_prefix("APP").separator("__"))
.build()?;
let settings: Settings = settings.try_deserialize()?;
println!("{:#?}", settings);
Ok(())
}File structure:
config/
├── default.toml # Base config
├── development.toml # Development overrides
├── production.toml # Production overrides
└── local.toml # Local overrides (gitignored)
config/default.toml:
debug = false
[database]
url = "postgres://localhost/myapp"
config/development.toml:
debug = true
[database]
url = "postgres://localhost/myapp_dev"
config/production.toml:
[database]
url = "postgres://prod-server/myapp"
Environment Variables Override
# Override config với environment variables
export APP__DEBUG=true
export APP__DATABASE__URL="postgres://custom-host/db"
cargo run
Pattern: PREFIX__SECTION__KEY
Nhiều format config
JSON
{
"server": {
"port": 8080,
"host": "localhost"
}
}
#![allow(unused)]
fn main() {
let settings = Config::builder()
.add_source(File::with_name("config.json"))
.build()?;
}YAML
server:
port: 8080
host: localhost
#![allow(unused)]
fn main() {
let settings = Config::builder()
.add_source(File::with_name("config.yaml"))
.build()?;
}Hoặc auto-detect format:
#![allow(unused)]
fn main() {
// Sẽ tự động detect .json, .yaml, .toml, etc.
let settings = Config::builder()
.add_source(File::with_name("config"))
.build()?;
}Set default values
use config::{Config, ConfigError};
fn main() -> Result<(), ConfigError> {
let settings = Config::builder()
.set_default("server.port", 8080)?
.set_default("server.host", "127.0.0.1")?
.set_default("debug", false)?
.add_source(File::with_name("config").required(false))
.build()?;
Ok(())
}Nested configuration
#![allow(unused)]
fn main() {
use serde::Deserialize;
#[derive(Debug, Deserialize)]
struct Settings {
database: DatabaseSettings,
cache: CacheSettings,
api: ApiSettings,
}
#[derive(Debug, Deserialize)]
struct DatabaseSettings {
primary: ConnectionSettings,
replica: Option<ConnectionSettings>,
}
#[derive(Debug, Deserialize)]
struct ConnectionSettings {
host: String,
port: u16,
pool_size: u32,
}
#[derive(Debug, Deserialize)]
struct CacheSettings {
redis_url: String,
ttl: u64,
}
#[derive(Debug, Deserialize)]
struct ApiSettings {
key: String,
timeout: u64,
}
}config.toml:
[database.primary]
host = "db-primary.example.com"
port = 5432
pool_size = 20
[database.replica]
host = "db-replica.example.com"
port = 5432
pool_size = 10
[cache]
redis_url = "redis://localhost:6379"
ttl = 3600
[api]
key = "your-api-key"
timeout = 30
Validation
use config::{Config, ConfigError};
use serde::Deserialize;
#[derive(Debug, Deserialize)]
struct Settings {
port: u16,
workers: u8,
}
impl Settings {
pub fn new() -> Result<Self, ConfigError> {
let settings = Config::builder()
.add_source(File::with_name("config"))
.build()?;
let mut settings: Settings = settings.try_deserialize()?;
// Validate
if settings.workers == 0 {
return Err(ConfigError::Message("workers must be > 0".into()));
}
if settings.port < 1024 {
return Err(ConfigError::Message("port must be >= 1024".into()));
}
Ok(settings)
}
}
fn main() -> Result<(), ConfigError> {
let settings = Settings::new()?;
println!("{:#?}", settings);
Ok(())
}Ví dụ thực tế: Web application config
use config::{Config, ConfigError, File, Environment};
use serde::Deserialize;
#[derive(Debug, Deserialize)]
pub struct Settings {
pub server: ServerSettings,
pub database: DatabaseSettings,
pub redis: RedisSettings,
pub logging: LoggingSettings,
}
#[derive(Debug, Deserialize)]
pub struct ServerSettings {
pub host: String,
pub port: u16,
pub workers: usize,
pub keep_alive: u64,
}
#[derive(Debug, Deserialize)]
pub struct DatabaseSettings {
pub url: String,
pub max_connections: u32,
pub min_connections: u32,
pub connect_timeout: u64,
}
#[derive(Debug, Deserialize)]
pub struct RedisSettings {
pub url: String,
pub pool_size: u32,
}
#[derive(Debug, Deserialize)]
pub struct LoggingSettings {
pub level: String,
pub format: String,
}
impl Settings {
pub fn new() -> Result<Self, ConfigError> {
let env = std::env::var("APP_ENV").unwrap_or_else(|_| "development".into());
let config = Config::builder()
// Defaults
.set_default("server.host", "127.0.0.1")?
.set_default("server.port", 8080)?
.set_default("server.workers", 4)?
.set_default("server.keep_alive", 75)?
.set_default("logging.level", "info")?
.set_default("logging.format", "json")?
// Base config
.add_source(File::with_name("config/default"))
// Environment-specific
.add_source(File::with_name(&format!("config/{}", env)).required(false))
// Local overrides
.add_source(File::with_name("config/local").required(false))
// Environment variables
.add_source(Environment::with_prefix("APP").separator("__"))
.build()?;
config.try_deserialize()
}
}
fn main() -> Result<(), ConfigError> {
let settings = Settings::new()?;
println!("Server: {}:{}", settings.server.host, settings.server.port);
println!("Database: {}", settings.database.url);
println!("Redis: {}", settings.redis.url);
println!("Logging: {} ({})", settings.logging.level, settings.logging.format);
Ok(())
}config/default.toml:
[database]
max_connections = 100
min_connections = 10
connect_timeout = 30
[redis]
url = "redis://127.0.0.1:6379"
pool_size = 10
config/production.toml:
[server]
host = "0.0.0.0"
workers = 8
[database]
url = "postgres://prod-db:5432/myapp"
max_connections = 200
[logging]
level = "warn"
Integration với web frameworks
Actix-web
use actix_web::{web, App, HttpServer};
use config::{Config, ConfigError};
use serde::Deserialize;
#[derive(Debug, Deserialize, Clone)]
struct Settings {
server: ServerConfig,
}
#[derive(Debug, Deserialize, Clone)]
struct ServerConfig {
host: String,
port: u16,
}
#[actix_web::main]
async fn main() -> std::io::Result<()> {
let config = Config::builder()
.add_source(config::File::with_name("config"))
.build()
.unwrap();
let settings: Settings = config.try_deserialize().unwrap();
let server_config = settings.server.clone();
HttpServer::new(move || {
App::new()
.app_data(web::Data::new(settings.clone()))
})
.bind((server_config.host, server_config.port))?
.run()
.await
}Best Practices
1. Separate configs by environment
config/
├── default.toml # Shared defaults
├── development.toml # Dev settings
├── production.toml # Prod settings
└── local.toml # Local overrides (gitignore)
2. Use environment variables for secrets
#![allow(unused)]
fn main() {
// ❌ Không lưu secrets trong file
[database]
password = "secret123"
// ✅ Dùng environment variable
export APP__DATABASE__PASSWORD="secret123"
}3. Validate config at startup
#![allow(unused)]
fn main() {
impl Settings {
pub fn new() -> Result<Self, ConfigError> {
let settings = /* load config */;
// Validate early
settings.validate()?;
Ok(settings)
}
fn validate(&self) -> Result<(), ConfigError> {
if self.server.workers == 0 {
return Err(ConfigError::Message("workers must be > 0".into()));
}
Ok(())
}
}
}4. Document your config
#![allow(unused)]
fn main() {
/// Application settings
#[derive(Debug, Deserialize)]
pub struct Settings {
/// Server configuration
pub server: ServerSettings,
/// Database configuration
pub database: DatabaseSettings,
}
/// Server settings
#[derive(Debug, Deserialize)]
pub struct ServerSettings {
/// Bind address (default: 127.0.0.1)
pub host: String,
/// Bind port (default: 8080)
pub port: u16,
}
}Tổng kết
config-rs là lựa chọn tốt cho configuration management:
- ✅ Multi-format support (JSON, TOML, YAML…)
- ✅ Layered configuration (defaults → files → env vars)
- ✅ Type-safe với serde
- ✅ Environment-specific configs
- ✅ Easy to test
Best practices:
- Separate by environment
- Use env vars for secrets
- Validate early
- Provide sensible defaults
- Document your config structure
References
indoc
indoc là một crate nhỏ nhưng hữu ích giúp canh lề (indented documents).
indoc!() macro nhận multiline string và un-indents lúc compile time,
xoá tất cả khoảng trắng đầu tiên trên cách dòng dựa theo dòng đầu tiên.
Cài đặt
cargo add indoc
Hoặc
# File: Cargo.toml
[dependencies]
indoc = "1"
Ví dụ
use indoc::indoc;
fn main() {
let testing = indoc! {"
def hello():
print('Hello, world!')
hello()
"};
let expected = "def hello():\n print('Hello, world!')\n\nhello()\n";
assert_eq!(testing, expected);
}indoc cũng hoạt động với raw string r# ... # và byte string b" ... ".
References
rayon
rayon là thư viện data-parallelism cho Rust, gọn nhẹ và dễ dàng convert từ
code tính toán tuần tự sang song song mà vẫn đảm bảo không lỗi data-race.
Cài đặt
cargo add rayon
Hoặc
# File: Cargo.toml
[dependencies]
rayon = "1.5"
Ví dụ
#![allow(unused)]
fn main() {
use rayon::prelude::*;
fn sum_of_squares(input: &[i32]) -> i32 {
input.par_iter() // <-- chỉ cần sử dụng `par_iter()` thay vì `iter()`!
.map(|&i| i * i)
.sum()
}
}Parallel iterators
sẽ phụ trách việc chia data thành nhiều tasks nhỏ như thế nào và sẽ
đáp ứng linh hoạt để đạt maximum performance.
Ngoài ra, Rayon cũng cung cấp 2 function join và scope để bạn
có thể chủ động điều khiển việc parallel tasks.
Để tìm hiểu thêm về cách rayon hoạt động bạn có thể đọc thêm bài blog từ tác giả:
https://smallcultfollowing.com/babysteps/blog/2015/12/18/rayon-data-parallelism-in-rust/
demo & bench
Trong repo của rayon có rất nhiều demo và bench, để xem danh sách demo hoặc bench:
$ git clone https://github.com/rayon-rs/rayon && cd rayon/rayon-demo
$ cargo run --release -- --help
Usage: rayon-demo bench
rayon-demo <demo-name> [ options ]
rayon-demo --help
A collection of different benchmarks of Rayon. You can run the full
benchmark suite by executing `cargo bench` or `rayon-demo bench`.
Alternatively, you can run individual benchmarks by running
`rayon-demo foo`, where `foo` is the name of a benchmark. Each
benchmark has its own options and modes, so try `rayon-demo foo
--help`.
Benchmarks:
- life : Conway's Game of Life.
- nbody: A physics simulation of multiple bodies attracting and repelling
one another.
- sieve: Finding primes using a Sieve of Eratosthenes.
- matmul: Parallel matrix multiplication.
- mergesort: Parallel mergesort.
- noop: Launch empty tasks to measure CPU usage.
- quicksort: Parallel quicksort.
- tsp: Traveling salesman problem solver (sample data sets in `data/tsp`).
Quicksort benchmark:
$ cargo run --release quicksort bench
seq: sorted 250000000 ints: 22.268583 s
par: sorted 250000000 ints: 4.172599 s
speedup: 5.34x
Demo nbody visualize: gõ s để chạy tuần tự và p để parallel
cargo run --release -- nbody visualize

References
- Rayon: data parallelism in Rust
- https://www.youtube.com/watch?v=gof_OEv71Aw
- https://github.com/rayon-rs/rayon
polars
Xử lý DataFrame lớn, dễ sử dụng, hiệu năng cao và có nhiều ưu điểm giống với Pandas nổi tiếng. Polars cũng được hỗ trợ trên Python.

Cài đặt
cargo add polars
Hoặc
# File: Cargo.toml
[dependencies]
polars = { version = "x", features = ["lazy", ...]}
Ví dụ
#![allow(unused)]
fn main() {
use std::fs::File;
use chrono::prelude::*;
use polars::prelude::*;
let mut df: DataFrame = df!(
"integer" => &[1, 2, 3],
"date" => &[
NaiveDate::from_ymd_opt(2025, 1, 1).unwrap().and_hms_opt(0, 0, 0).unwrap(),
NaiveDate::from_ymd_opt(2025, 1, 2).unwrap().and_hms_opt(0, 0, 0).unwrap(),
NaiveDate::from_ymd_opt(2025, 1, 3).unwrap().and_hms_opt(0, 0, 0).unwrap(),
],
"float" => &[4.0, 5.0, 6.0],
"string" => &["a", "b", "c"],
)
.unwrap();
println!("{}", df);
}References
- https://pola.rs
Using Rust for efficient data processing and analysis
Data format
- arrow: Native Rust implementation of Apache Arrow and Apache Parquet
Data Processing
- polars: xử lý Dataframe với hiệu năng cao, khá tương đồng và có thể thay thế Pandas.
- serde: Serializing và Deserializing nhiều loại data (JSON, CSV, …) thành các kiểu dữ liệu trong Rust.
- rayon: Framework xử lý dữ liệu parallel.
- datafusion: query execution framework, sử dụng Apache Arrow.
- ballista: Distributed SQL Query Engine, sử dụng Apache Arrow
Data Ingestion
- reqwest: Rust HTTP client.
- vector.dev: ultra-fast tool for building observability pipelines.
References
- https://blog.duyet.net/2023/01/data-engineering-rust-tools.html
- https://arewedatayet.com
First high-performance data pipelines in Rust
Xây dựng data pipeline hiệu năng cao là một trong những use case phổ biến của Rust trong lĩnh vực data engineering. Với tốc độ gần như C/C++, memory safety, và hệ sinh thái phong phú, Rust là lựa chọn tuyệt vời để xây dựng các data pipeline xử lý lượng lớn dữ liệu.
Trong bài này, chúng ta sẽ xây dựng một data pipeline đơn giản nhưng mạnh mẽ để:
- Đọc dữ liệu từ CSV file
- Xử lý và transform dữ liệu
- Ghi kết quả ra Parquet format (columnar storage hiệu năng cao)
Cài đặt dependencies
Tạo project mới:
cargo new data-pipeline
cd data-pipeline
Thêm dependencies vào Cargo.toml:
[dependencies]
polars = { version = "0.43", features = ["lazy", "parquet", "csv"] }
anyhow = "1.0"
polars: DataFrame library hiệu năng cao, tương tự như Pandasanyhow: Error handling đơn giản và tiện lợi
Ví dụ 1: Pipeline cơ bản
Tạo file src/main.rs:
use polars::prelude::*;
use anyhow::Result;
fn main() -> Result<()> {
// Đọc CSV file
let df = CsvReader::from_path("sales_data.csv")?
.has_header(true)
.finish()?;
println!("Dữ liệu gốc:");
println!("{:?}", df);
// Transform: tính tổng revenue theo category
let result = df
.lazy()
.group_by([col("category")])
.agg([
col("revenue").sum().alias("total_revenue"),
col("quantity").sum().alias("total_quantity"),
col("revenue").mean().alias("avg_revenue"),
])
.sort("total_revenue", Default::default())
.collect()?;
println!("\nKết quả sau khi xử lý:");
println!("{:?}", result);
// Ghi ra Parquet file
let mut file = std::fs::File::create("output.parquet")?;
ParquetWriter::new(&mut file).finish(&mut result.clone())?;
println!("\n✅ Đã ghi kết quả vào output.parquet");
Ok(())
}Tạo file dữ liệu mẫu sales_data.csv:
category,product,revenue,quantity
Electronics,Laptop,1200,2
Electronics,Mouse,25,10
Books,Novel,15,5
Books,Textbook,80,3
Electronics,Keyboard,75,4
Books,Magazine,5,20
Chạy pipeline:
cargo run
Ví dụ 2: Pipeline với Lazy Evaluation
Lazy evaluation giúp tối ưu performance bằng cách chỉ thực hiện computation khi cần thiết:
use polars::prelude::*;
use anyhow::Result;
fn process_large_dataset() -> Result<()> {
let lazy_df = LazyCsvReader::new("large_dataset.csv")
.has_header(true)
.finish()?;
// Định nghĩa pipeline (chưa thực thi)
let result = lazy_df
.filter(col("revenue").gt(100)) // Lọc revenue > 100
.select([
col("date"),
col("category"),
col("revenue"),
(col("revenue") * lit(0.1)).alias("tax"), // Tính 10% tax
(col("revenue") * lit(0.9)).alias("net_revenue"),
])
.group_by([col("category")])
.agg([
col("net_revenue").sum().alias("total_net_revenue"),
col("revenue").count().alias("transaction_count"),
])
.sort("total_net_revenue", SortOptions::default().with_order_descending(true))
.collect()?; // Thực thi tại đây
println!("{:?}", result);
Ok(())
}
fn main() -> Result<()> {
process_large_dataset()?;
Ok(())
}Ưu điểm của lazy evaluation:
- Polars tự động tối ưu query plan
- Chỉ đọc columns cần thiết
- Có thể parallel processing tự động
- Giảm memory usage
Ví dụ 3: Pipeline với Error Handling
Trong production, error handling rất quan trọng:
use polars::prelude::*;
use anyhow::{Context, Result};
fn read_and_validate_data(path: &str) -> Result<DataFrame> {
let df = CsvReader::from_path(path)
.context(format!("Không thể đọc file: {}", path))?
.has_header(true)
.finish()
.context("Lỗi parse CSV")?;
// Validate schema
if !df.get_column_names().contains(&"revenue") {
anyhow::bail!("Thiếu column 'revenue'");
}
Ok(df)
}
fn transform_data(df: DataFrame) -> Result<DataFrame> {
df.lazy()
.select([
col("category"),
col("revenue"),
col("quantity"),
])
.filter(col("revenue").gt(0)) // Lọc bỏ invalid data
.filter(col("quantity").gt(0))
.collect()
.context("Lỗi transform data")
}
fn save_to_parquet(df: &mut DataFrame, path: &str) -> Result<()> {
let file = std::fs::File::create(path)
.context(format!("Không thể tạo file: {}", path))?;
ParquetWriter::new(&file)
.finish(df)
.context("Lỗi ghi Parquet file")?;
Ok(())
}
fn main() -> Result<()> {
println!("🚀 Bắt đầu data pipeline...");
let df = read_and_validate_data("sales_data.csv")?;
println!("✅ Đọc dữ liệu thành công: {} rows", df.height());
let mut result = transform_data(df)?;
println!("✅ Transform thành công: {} rows", result.height());
save_to_parquet(&mut result, "output.parquet")?;
println!("✅ Đã lưu vào output.parquet");
Ok(())
}Ví dụ 4: Parallel Processing với Rayon
Xử lý nhiều files cùng lúc:
use polars::prelude::*;
use rayon::prelude::*;
use anyhow::Result;
use std::path::PathBuf;
fn process_file(path: PathBuf) -> Result<DataFrame> {
let df = CsvReader::from_path(&path)?
.has_header(true)
.finish()?;
let result = df
.lazy()
.group_by([col("category")])
.agg([col("revenue").sum()])
.collect()?;
Ok(result)
}
fn main() -> Result<()> {
let files = vec![
PathBuf::from("data1.csv"),
PathBuf::from("data2.csv"),
PathBuf::from("data3.csv"),
];
// Xử lý parallel
let results: Vec<Result<DataFrame>> = files
.into_par_iter()
.map(process_file)
.collect();
// Kết hợp kết quả
let mut combined = DataFrame::default();
for result in results {
match result {
Ok(df) => {
if combined.is_empty() {
combined = df;
} else {
combined = combined.vstack(&df)?;
}
}
Err(e) => eprintln!("Lỗi xử lý file: {}", e),
}
}
println!("Tổng hợp: {:?}", combined);
Ok(())
}So sánh với Python
Pipeline tương tự trong Python với Pandas:
import pandas as pd
# Đọc CSV
df = pd.read_csv('sales_data.csv')
# Transform
result = df.groupby('category').agg({
'revenue': ['sum', 'mean'],
'quantity': 'sum'
}).reset_index()
# Ghi Parquet
result.to_parquet('output.parquet')
Ưu điểm của Rust + Polars:
- Nhanh hơn 5-10x so với Pandas
- Memory efficient hơn nhiều
- Type safety tại compile time
- Không cần GIL (Global Interpreter Lock) như Python
- Binary nhỏ gọn, dễ deploy
Nhược điểm:
- Compile time lâu hơn
- Ecosystem nhỏ hơn Python (nhưng đang phát triển nhanh)
- Learning curve cao hơn
Best Practices
-
Sử dụng Lazy Evaluation khi làm việc với large datasets:
#![allow(unused)] fn main() { let result = LazyCsvReader::new("large.csv") .finish()? .filter(...) .select(...) .collect()?; } -
Streaming cho data quá lớn:
#![allow(unused)] fn main() { let reader = CsvReader::from_path("huge.csv")? .has_header(true) .with_chunk_size(10_000); // Đọc từng chunk } -
Sử dụng Parquet thay vì CSV cho storage:
- Nhanh hơn nhiều khi đọc
- Tiết kiệm storage (compressed)
- Preserve data types
-
Error handling với
anyhowhoặcthiserror:#![allow(unused)] fn main() { fn process() -> Result<()> { let df = read_csv("data.csv") .context("Failed to read CSV")?; Ok(()) } }
Monitoring và Logging
Thêm logging để theo dõi pipeline:
use polars::prelude::*;
use anyhow::Result;
fn main() -> Result<()> {
let start = std::time::Instant::now();
let df = CsvReader::from_path("data.csv")?
.has_header(true)
.finish()?;
println!("⏱️ Đọc CSV: {:?}", start.elapsed());
let transform_start = std::time::Instant::now();
let result = df.lazy()
.group_by([col("category")])
.agg([col("revenue").sum()])
.collect()?;
println!("⏱️ Transform: {:?}", transform_start.elapsed());
println!("📊 Số rows: {}", result.height());
Ok(())
}Tổng kết
Rust + Polars là một stack mạnh mẽ để xây dựng data pipeline:
- ✅ Performance cao
- ✅ Memory safe
- ✅ Dễ deploy (single binary)
- ✅ Ecosystem đang phát triển mạnh
Bắt đầu với các pipeline đơn giản, sau đó mở rộng với streaming, parallel processing, và distributed computing với các tools như DataFusion và Ballista.
References
Building scalable data-driven applications using Rust
Data-driven applications cần xử lý, phân tích và serve dữ liệu một cách nhanh chóng và đáng tin cậy. Rust với performance cao, memory safety và concurrency mạnh mẽ là lựa chọn tuyệt vời để xây dựng các ứng dụng data-driven có khả năng scale.
Trong bài này, chúng ta sẽ tìm hiểu cách xây dựng một ứng dụng data-driven hoàn chỉnh với các thành phần:
- Data ingestion và processing
- Storage và indexing
- Query engine
- API để serve data
Kiến trúc ứng dụng Data-Driven
┌─────────────┐
│ Data Sources│ (CSV, JSON, API, Database)
└──────┬──────┘
│
▼
┌─────────────┐
│ Ingestion │ (tokio, reqwest, async-std)
└──────┬──────┘
│
▼
┌─────────────┐
│ Processing │ (polars, arrow, datafusion)
└──────┬──────┘
│
▼
┌─────────────┐
│ Storage │ (parquet, sled, rocksdb)
└──────┬──────┘
│
▼
┌─────────────┐
│ Query Engine│ (datafusion, tantivy)
└──────┬──────┘
│
▼
┌─────────────┐
│ API Server │ (actix-web, axum, rocket)
└─────────────┘
Ví dụ 1: Data Ingestion với Tokio
Xây dựng service để ingest data từ nhiều nguồn:
use tokio::fs::File;
use tokio::io::AsyncReadExt;
use reqwest;
use anyhow::Result;
/// Đọc data từ file
async fn ingest_from_file(path: &str) -> Result<Vec<u8>> {
let mut file = File::open(path).await?;
let mut contents = Vec::new();
file.read_to_end(&mut contents).await?;
Ok(contents)
}
/// Fetch data từ HTTP API
async fn ingest_from_api(url: &str) -> Result<String> {
let response = reqwest::get(url).await?;
let body = response.text().await?;
Ok(body)
}
/// Ingest data từ nhiều nguồn đồng thời
async fn ingest_all() -> Result<()> {
// Chạy parallel
let (file_data, api_data) = tokio::join!(
ingest_from_file("data.csv"),
ingest_from_api("https://api.example.com/data")
);
println!("File data size: {}", file_data?.len());
println!("API data: {}", api_data?);
Ok(())
}
#[tokio::main]
async fn main() -> Result<()> {
ingest_all().await?;
Ok(())
}Ví dụ 2: Processing với DataFusion
DataFusion là SQL query engine sử dụng Apache Arrow, cực kỳ nhanh:
[dependencies]
datafusion = "43.0"
tokio = { version = "1.48", features = ["full"] }
use datafusion::prelude::*;
use anyhow::Result;
#[tokio::main]
async fn main() -> Result<()> {
// Tạo SessionContext
let ctx = SessionContext::new();
// Đăng ký Parquet file như một table
ctx.register_parquet("sales", "sales_data.parquet", ParquetReadOptions::default())
.await?;
// Chạy SQL query
let df = ctx.sql(
"SELECT
category,
SUM(revenue) as total_revenue,
AVG(revenue) as avg_revenue,
COUNT(*) as num_transactions
FROM sales
WHERE revenue > 100
GROUP BY category
ORDER BY total_revenue DESC"
).await?;
// Hiển thị kết quả
df.show().await?;
// Hoặc lưu lại thành Parquet
df.write_parquet("output.parquet", None, None).await?;
Ok(())
}Ưu điểm của DataFusion:
- Tốc độ cực nhanh (columnar processing)
- Hỗ trợ SQL standard
- Có thể scale đến hàng TB dữ liệu
- Zero-copy reads với Arrow
Ví dụ 3: Storage với Parquet
Parquet là format columnar storage rất hiệu quả:
use polars::prelude::*;
use anyhow::Result;
fn save_to_parquet(df: &mut DataFrame, path: &str) -> Result<()> {
let file = std::fs::File::create(path)?;
ParquetWriter::new(&file)
.with_compression(ParquetCompression::Snappy) // Nén data
.finish(df)?;
Ok(())
}
fn read_from_parquet(path: &str) -> Result<DataFrame> {
let df = ParquetReader::new(std::fs::File::open(path)?)
.finish()?;
Ok(df)
}
fn main() -> Result<()> {
// Tạo sample data
let mut df = df! {
"id" => &[1, 2, 3, 4, 5],
"name" => &["Alice", "Bob", "Charlie", "David", "Eve"],
"revenue" => &[1200.50, 800.30, 1500.75, 950.20, 1100.00],
}?;
// Lưu
save_to_parquet(&mut df, "users.parquet")?;
println!("✅ Đã lưu data");
// Đọc lại
let loaded = read_from_parquet("users.parquet")?;
println!("{:?}", loaded);
Ok(())
}Ví dụ 4: Full-text Search với Tantivy
Tantivy là full-text search engine tương tự Lucene/Elasticsearch:
[dependencies]
tantivy = "0.22"
use tantivy::schema::*;
use tantivy::{doc, Index, IndexWriter, ReloadPolicy};
use tantivy::collector::TopDocs;
use tantivy::query::QueryParser;
use anyhow::Result;
fn main() -> Result<()> {
// Định nghĩa schema
let mut schema_builder = Schema::builder();
schema_builder.add_text_field("title", TEXT | STORED);
schema_builder.add_text_field("body", TEXT);
let schema = schema_builder.build();
// Tạo index
let index = Index::create_in_ram(schema.clone());
let mut index_writer: IndexWriter = index.writer(50_000_000)?;
// Index documents
let title = schema.get_field("title").unwrap();
let body = schema.get_field("body").unwrap();
index_writer.add_document(doc!(
title => "Rust Programming",
body => "Rust is a systems programming language that runs blazingly fast"
))?;
index_writer.add_document(doc!(
title => "Data Engineering",
body => "Building scalable data pipelines with Rust and Polars"
))?;
index_writer.commit()?;
// Search
let reader = index
.reader_builder()
.reload_policy(ReloadPolicy::OnCommitWithDelay)
.try_into()?;
let searcher = reader.searcher();
let query_parser = QueryParser::for_index(&index, vec![title, body]);
let query = query_parser.parse_query("Rust")?;
let top_docs = searcher.search(&query, &TopDocs::with_limit(10))?;
println!("Tìm thấy {} kết quả:", top_docs.len());
for (_score, doc_address) in top_docs {
let retrieved_doc = searcher.doc(doc_address)?;
println!("{}", schema.to_json(&retrieved_doc));
}
Ok(())
}Ví dụ 5: API Server với Axum
Xây dựng REST API để serve data:
[dependencies]
axum = "0.7"
tokio = { version = "1.48", features = ["full"] }
serde = { version = "1.0", features = ["derive"] }
serde_json = "1.0"
datafusion = "43.0"
use axum::{
extract::{Query, State},
http::StatusCode,
routing::get,
Json, Router,
};
use datafusion::prelude::*;
use serde::{Deserialize, Serialize};
use std::sync::Arc;
use anyhow::Result;
#[derive(Clone)]
struct AppState {
ctx: Arc<SessionContext>,
}
#[derive(Deserialize)]
struct QueryParams {
category: Option<String>,
min_revenue: Option<f64>,
}
#[derive(Serialize)]
struct SalesRecord {
category: String,
total_revenue: f64,
num_transactions: i64,
}
async fn query_sales(
State(state): State<AppState>,
Query(params): Query<QueryParams>,
) -> Result<Json<Vec<SalesRecord>>, StatusCode> {
// Build SQL query dựa trên params
let mut sql = String::from(
"SELECT category,
SUM(revenue) as total_revenue,
COUNT(*) as num_transactions
FROM sales WHERE 1=1"
);
if let Some(cat) = params.category {
sql.push_str(&format!(" AND category = '{}'", cat));
}
if let Some(min_rev) = params.min_revenue {
sql.push_str(&format!(" AND revenue >= {}", min_rev));
}
sql.push_str(" GROUP BY category");
// Execute query
let df = state.ctx.sql(&sql)
.await
.map_err(|_| StatusCode::INTERNAL_SERVER_ERROR)?;
// Convert to JSON (simplified)
let records = vec![
SalesRecord {
category: "Electronics".to_string(),
total_revenue: 5000.0,
num_transactions: 100,
}
];
Ok(Json(records))
}
async fn health_check() -> &'static str {
"OK"
}
#[tokio::main]
async fn main() -> Result<()> {
// Setup DataFusion
let ctx = SessionContext::new();
ctx.register_parquet("sales", "sales_data.parquet", ParquetReadOptions::default())
.await?;
let state = AppState {
ctx: Arc::new(ctx),
};
// Build router
let app = Router::new()
.route("/health", get(health_check))
.route("/api/sales", get(query_sales))
.with_state(state);
// Run server
println!("🚀 Server chạy tại http://localhost:3000");
let listener = tokio::net::TcpListener::bind("0.0.0.0:3000").await?;
axum::serve(listener, app).await?;
Ok(())
}Test API:
# Health check
curl http://localhost:3000/health
# Query với params
curl "http://localhost:3000/api/sales?category=Electronics&min_revenue=100"
Ví dụ 6: Real-time Processing với Channels
Xử lý data streaming real-time:
use tokio::sync::mpsc;
use tokio::time::{Duration, sleep};
use anyhow::Result;
#[derive(Debug, Clone)]
struct DataPoint {
timestamp: i64,
value: f64,
}
async fn producer(tx: mpsc::Sender<DataPoint>) {
let mut counter = 0;
loop {
let data = DataPoint {
timestamp: counter,
value: (counter as f64) * 1.5,
};
if tx.send(data).await.is_err() {
println!("Receiver dropped");
break;
}
counter += 1;
sleep(Duration::from_millis(100)).await;
}
}
async fn processor(mut rx: mpsc::Receiver<DataPoint>) {
let mut buffer = Vec::new();
let batch_size = 10;
while let Some(data) = rx.recv().await {
buffer.push(data);
if buffer.len() >= batch_size {
// Process batch
let sum: f64 = buffer.iter().map(|d| d.value).sum();
let avg = sum / buffer.len() as f64;
println!("📊 Batch processed: {} records, avg = {:.2}", buffer.len(), avg);
buffer.clear();
}
}
}
#[tokio::main]
async fn main() -> Result<()> {
let (tx, rx) = mpsc::channel(100);
// Spawn producer và processor
let producer_handle = tokio::spawn(producer(tx));
let processor_handle = tokio::spawn(processor(rx));
// Chạy 5 giây
sleep(Duration::from_secs(5)).await;
producer_handle.abort();
processor_handle.await?;
Ok(())
}Best Practices
1. Sử dụng Columnar Format
#![allow(unused)]
fn main() {
// ✅ Tốt: Parquet (columnar)
ParquetWriter::new(&file).finish(&mut df)?;
// ❌ Tránh: CSV cho large datasets
// CSV rất chậm và tốn memory
}2. Lazy Evaluation
#![allow(unused)]
fn main() {
// ✅ Tốt: Lazy evaluation
let result = df.lazy()
.filter(...)
.select(...)
.collect()?; // Chỉ execute 1 lần
// ❌ Tránh: Eager evaluation
let df = df.filter(...)?; // Execute ngay
let df = df.select(...)?; // Execute lại
}3. Batch Processing
#![allow(unused)]
fn main() {
// ✅ Tốt: Process theo batch
for chunk in data.chunks(10_000) {
process_chunk(chunk);
}
// ❌ Tránh: Process từng item
for item in data {
process_item(item); // Chậm!
}
}4. Connection Pooling
#![allow(unused)]
fn main() {
use deadpool_postgres::{Config, Pool};
// ✅ Tốt: Dùng connection pool
let pool = config.create_pool(None, NoTls)?;
let client = pool.get().await?;
// ❌ Tránh: Tạo connection mỗi lần query
}Monitoring và Observability
use std::time::Instant;
fn main() -> Result<()> {
let start = Instant::now();
// Process data
let df = process_data()?;
println!("⏱️ Processing time: {:?}", start.elapsed());
println!("📊 Records processed: {}", df.height());
println!("💾 Memory used: {} MB", df.estimated_size() / 1_000_000);
Ok(())
}So sánh Performance
| Operation | Python/Pandas | Rust/Polars | Speedup |
|---|---|---|---|
| Read CSV (1GB) | 5.2s | 0.8s | 6.5x |
| GroupBy + Agg | 3.1s | 0.4s | 7.8x |
| Join (10M rows) | 12.5s | 1.2s | 10.4x |
| Write Parquet | 2.8s | 0.5s | 5.6x |
Tổng kết
Rust cung cấp ecosystem mạnh mẽ để xây dựng data-driven applications:
- ✅ DataFusion: SQL query engine cực nhanh
- ✅ Polars: DataFrame library như Pandas nhưng nhanh hơn nhiều
- ✅ Tantivy: Full-text search engine
- ✅ Arrow: Columnar format chuẩn công nghiệp
- ✅ Tokio: Async runtime cho concurrent processing
- ✅ Axum/Actix: Web frameworks để serve data
Với Rust, bạn có thể xây dựng ứng dụng vừa nhanh, vừa safe, vừa dễ maintain và scale.
References
Rust as an alternative to Python for data engineering tasks
Python đã thống trị lĩnh vực data engineering trong nhiều năm với các tools như Pandas, Spark, và Airflow. Tuy nhiên, Rust đang nổi lên như một lựa chọn thay thế hấp dẫn với performance vượt trội, memory safety, và khả năng concurrent processing mạnh mẽ.
Bài này sẽ so sánh chi tiết giữa Python và Rust trong các use case phổ biến của data engineering, giúp bạn quyết định khi nào nên dùng Rust thay vì Python.
So sánh tổng quan
| Tiêu chí | Python | Rust |
|---|---|---|
| Performance | Chậm (interpreted) | Rất nhanh (compiled, gần C++) |
| Memory Usage | Cao (GIL, GC overhead) | Thấp (no GC, zero-cost abstractions) |
| Type Safety | Dynamic typing (runtime errors) | Static typing (compile-time checks) |
| Concurrency | Hạn chế (GIL) | Excellent (no GIL, fearless concurrency) |
| Ecosystem | Rất lớn (mature) | Đang phát triển nhanh |
| Learning Curve | Dễ học | Khó hơn (ownership, lifetimes) |
| Development Speed | Nhanh (scripting) | Chậm hơn (compile time) |
1. DataFusion vs Apache Spark
Apache Spark (Python/Scala)
from pyspark.sql import SparkSession
spark = SparkSession.builder.appName("example").getOrCreate()
# Đọc data
df = spark.read.parquet("sales.parquet")
# Transform
result = df.groupBy("category") \
.agg({"revenue": "sum", "quantity": "count"}) \
.orderBy("sum(revenue)", ascending=False)
result.show()
Nhược điểm:
- Overhead của JVM
- GC pauses
- Slow startup time
- Resource hungry (cần nhiều RAM)
DataFusion (Rust)
use datafusion::prelude::*;
#[tokio::main]
async fn main() -> Result<()> {
let ctx = SessionContext::new();
// Đọc data
ctx.register_parquet("sales", "sales.parquet", ParquetReadOptions::default())
.await?;
// Transform với SQL
let df = ctx.sql(
"SELECT category,
SUM(revenue) as total_revenue,
COUNT(quantity) as num_transactions
FROM sales
GROUP BY category
ORDER BY total_revenue DESC"
).await?;
df.show().await?;
Ok(())
}Ưu điểm:
- Nhanh hơn Spark 2-10x (tùy workload)
- Memory efficient hơn nhiều
- Không cần JVM
- Startup gần như instant
- Single binary, dễ deploy
Benchmark:
- Query 1GB Parquet: DataFusion ~0.8s vs Spark ~5s
- GroupBy + Aggregation: DataFusion ~0.4s vs Spark ~3s
2. Polars vs Pandas
Pandas (Python)
import pandas as pd
# Đọc CSV
df = pd.read_csv('sales.csv')
# Transform
result = df.groupby('category').agg({
'revenue': ['sum', 'mean', 'count'],
'quantity': 'sum'
})
# Filter
filtered = df[df['revenue'] > 100]
# Save
result.to_parquet('output.parquet')
Vấn đề của Pandas:
- Chậm với large datasets (>1GB)
- Single-threaded (không tận dụng multi-core)
- High memory usage
- Chained operations không được optimize
Polars (Rust)
use polars::prelude::*;
fn main() -> Result<()> {
// Đọc CSV với lazy evaluation
let df = LazyCsvReader::new("sales.csv")
.has_header(true)
.finish()?
.filter(col("revenue").gt(100))
.group_by([col("category")])
.agg([
col("revenue").sum().alias("sum_revenue"),
col("revenue").mean().alias("avg_revenue"),
col("revenue").count().alias("count"),
col("quantity").sum().alias("sum_quantity"),
])
.collect()?;
// Save
let mut file = std::fs::File::create("output.parquet")?;
ParquetWriter::new(&mut file).finish(&mut df.clone())?;
Ok(())
}Ưu điểm Polars:
- Nhanh hơn Pandas 5-15x
- Multi-threaded by default
- Lazy evaluation (query optimization)
- Memory efficient (zero-copy operations)
- Syntax gần giống Pandas
Benchmark (1GB CSV):
Read CSV: Pandas 5.2s | Polars 0.8s (6.5x faster)
GroupBy + Agg: Pandas 3.1s | Polars 0.4s (7.8x faster)
Filter + Sort: Pandas 2.5s | Polars 0.3s (8.3x faster)
Write Parquet: Pandas 2.8s | Polars 0.5s (5.6x faster)
3. Search: Meilisearch vs Elasticsearch
Elasticsearch (Java/Python client)
from elasticsearch import Elasticsearch
es = Elasticsearch(['localhost:9200'])
# Index document
es.index(index='products', body={
'name': 'Laptop',
'category': 'Electronics',
'price': 1200
})
# Search
results = es.search(index='products', body={
'query': {
'match': {'category': 'Electronics'}
}
})
Nhược điểm:
- Heavy (JVM, nhiều memory)
- Complex configuration
- Slow startup
- Resource intensive
Meilisearch (Rust)
Meilisearch là full-text search engine viết bằng Rust, cực kỳ nhanh và dễ sử dụng:
# Cài đặt và chạy
curl -L https://install.meilisearch.com | sh
./meilisearch
# Hoặc dùng Docker
docker run -p 7700:7700 getmeili/meilisearch
use meilisearch_sdk::client::*;
use serde::{Deserialize, Serialize};
#[derive(Serialize, Deserialize, Debug)]
struct Product {
id: usize,
name: String,
category: String,
price: f64,
}
#[tokio::main]
async fn main() {
let client = Client::new("http://localhost:7700", Some("masterKey"));
// Index documents
let products = vec![
Product { id: 1, name: "Laptop".to_string(), category: "Electronics".to_string(), price: 1200.0 },
Product { id: 2, name: "Mouse".to_string(), category: "Electronics".to_string(), price: 25.0 },
];
let index = client.index("products");
index.add_documents(&products, Some("id")).await.unwrap();
// Search
let results = index.search()
.with_query("Electronics")
.execute::<Product>()
.await
.unwrap();
println!("Found: {:?}", results.hits);
}Ưu điểm Meilisearch:
- Cực nhanh (search <50ms)
- Low memory footprint
- Instant startup
- Typo-tolerant search
- API đơn giản
- Single binary
4. ETL Pipelines
Python với Airflow
from airflow import DAG
from airflow.operators.python import PythonOperator
from datetime import datetime
import pandas as pd
def extract():
df = pd.read_csv('source.csv')
df.to_pickle('/tmp/data.pkl')
def transform():
df = pd.read_pickle('/tmp/data.pkl')
result = df.groupby('category').sum()
result.to_pickle('/tmp/transformed.pkl')
def load():
df = pd.read_pickle('/tmp/transformed.pkl')
df.to_parquet('output.parquet')
dag = DAG('etl_pipeline', start_date=datetime(2024, 1, 1))
extract_task = PythonOperator(task_id='extract', python_callable=extract, dag=dag)
transform_task = PythonOperator(task_id='transform', python_callable=transform, dag=dag)
load_task = PythonOperator(task_id='load', python_callable=load, dag=dag)
extract_task >> transform_task >> load_task
Rust với Custom Pipeline
use polars::prelude::*;
use anyhow::Result;
struct Pipeline;
impl Pipeline {
fn extract() -> Result<DataFrame> {
let df = CsvReader::from_path("source.csv")?
.has_header(true)
.finish()?;
Ok(df)
}
fn transform(df: DataFrame) -> Result<DataFrame> {
let result = df.lazy()
.group_by([col("category")])
.agg([col("revenue").sum()])
.collect()?;
Ok(result)
}
fn load(df: &mut DataFrame) -> Result<()> {
let file = std::fs::File::create("output.parquet")?;
ParquetWriter::new(&file).finish(df)?;
Ok(())
}
fn run() -> Result<()> {
println!("🚀 Starting ETL pipeline...");
let df = Self::extract()?;
println!("✅ Extract: {} rows", df.height());
let mut result = Self::transform(df)?;
println!("✅ Transform: {} rows", result.height());
Self::load(&mut result)?;
println!("✅ Load complete");
Ok(())
}
}
fn main() -> Result<()> {
Pipeline::run()
}Ưu điểm Rust ETL:
- Nhanh hơn nhiều (5-10x)
- Type-safe (catch errors at compile time)
- Low resource usage
- Dễ deploy (single binary)
- No runtime dependencies
Khi nào dùng Rust thay vì Airflow:
- Simple pipelines không cần UI
- Performance critical
- Resource constraints
- Need for type safety
5. Data Validation
Pandera (Python)
import pandas as pd
import pandera as pa
schema = pa.DataFrameSchema({
"id": pa.Column(int, pa.Check.greater_than(0)),
"revenue": pa.Column(float, pa.Check.in_range(0, 1000000)),
"category": pa.Column(str, pa.Check.isin(["Electronics", "Books"]))
})
df = pd.read_csv("data.csv")
validated = schema.validate(df) # Runtime check
Rust với Type System
use serde::Deserialize;
#[derive(Deserialize, Debug)]
struct SalesRecord {
id: u32, // Always positive
revenue: f64,
category: Category, // Only valid categories
}
#[derive(Deserialize, Debug)]
enum Category {
Electronics,
Books,
}
fn main() -> Result<()> {
let mut reader = csv::Reader::from_path("data.csv")?;
for result in reader.deserialize() {
let record: SalesRecord = result?; // Compile-time + parse-time validation
println!("{:?}", record);
}
Ok(())
}Ưu điểm Rust:
- Validation at compile time
- Zero runtime overhead
- Impossible to have invalid data
- Better IDE support (autocomplete, type hints)
Khi nào nên dùng Rust?
✅ Rust phù hợp khi:
-
Performance critical:
- Xử lý hàng TB data
- Real-time processing
- Low latency requirements
-
Long-running services:
- Stream processing
- Data ingestion services
- API servers serving data
-
Resource constraints:
- Limited memory
- Cost optimization (cloud)
- Edge computing
-
Type safety quan trọng:
- Financial data
- Healthcare data
- Critical infrastructure
-
Deployment đơn giản:
- Cần single binary
- No Python runtime dependency
- Container size nhỏ
❌ Python vẫn tốt hơn khi:
-
Rapid prototyping:
- POC, experiments
- One-off scripts
-
Team không biết Rust:
- Learning curve cao
- Hiring khó hơn
-
Rich ecosystem needed:
- Specialized ML libraries
- Legacy integrations
-
Notebook-based workflows:
- Jupyter notebooks
- Interactive analysis
Migration Strategy
Không cần migrate toàn bộ sang Rust cùng lúc:
Phase 1: Hot paths
- Identify performance bottlenecks
- Rewrite critical paths in Rust
- Call from Python via PyO3
#![allow(unused)]
fn main() {
use pyo3::prelude::*;
#[pyfunction]
fn process_large_dataset(data: Vec<f64>) -> PyResult<f64> {
// Rust implementation
Ok(data.iter().sum())
}
#[pymodule]
fn my_module(_py: Python, m: &PyModule) -> PyResult<()> {
m.add_function(wrap_pyfunction!(process_large_dataset, m)?)?;
Ok(())
}
}# Python code
import my_module
result = my_module.process_large_dataset(large_array)
Phase 2: New services
- Xây dựng services mới bằng Rust
- Integrate với existing Python code
Phase 3: Full rewrite
- Khi team đã quen với Rust
- Khi performance gain rõ ràng
Ecosystem so sánh
| Category | Python | Rust |
|---|---|---|
| DataFrame | Pandas | Polars |
| SQL Engine | DuckDB | DataFusion |
| Distributed Computing | Spark | Ballista |
| Search | Elasticsearch | Meilisearch, Tantivy |
| Serialization | pickle, json | Serde |
| Async I/O | asyncio | Tokio |
| Workflow | Airflow | Custom (tokio tasks) |
| Web Framework | Flask, FastAPI | Axum, Actix-web |
Tổng kết
Rust không phải để thay thế hoàn toàn Python, mà là công cụ bổ sung:
Python: Rapid development, prototyping, glue code, notebooks Rust: Production systems, performance critical paths, long-running services
Chiến lược tốt nhất:
- Prototype trong Python
- Identify bottlenecks
- Rewrite critical parts trong Rust
- Use PyO3 để integrate
Trong 5-10 năm tới, Rust sẽ là lựa chọn phổ biến cho production data engineering workloads, tương tự như Go đã thay thế Python trong nhiều backend services.
References
- Are We Data Yet? - Rust data ecosystem tracker
- Polars Benchmarks
- DataFusion vs Spark
- Meilisearch
- PyO3 Documentation - Rust bindings for Python
- Ballista - Distributed DataFusion
AI và Large Language Models (LLM) với Rust
Rust đang ngày càng trở thành một lựa chọn mạnh mẽ cho việc xây dựng các ứng dụng AI và làm việc với Large Language Models (LLM). Với performance vượt trội, tính an toàn về bộ nhớ, và khả năng xử lý đồng thời hiệu quả, Rust mang đến những ưu điểm độc đáo cho lĩnh vực này.
Tại sao sử dụng Rust cho LLM?
1. Performance Cao
Rust cung cấp performance tương đương C/C++ nhờ vào:
- Zero-cost abstractions: Không có overhead khi sử dụng các abstractions
- Không có garbage collector: Quản lý bộ nhớ thông qua ownership system
- Tối ưu hóa compiler: LLVM backend cho phép tối ưu hóa mạnh mẽ
Điều này đặc biệt quan trọng khi:
- Chạy inference với models lớn
- Xử lý batch requests với throughput cao
- Triển khai trên edge devices với tài nguyên hạn chế
2. Memory Safety
Rust’s ownership system ngăn chặn:
- Memory leaks
- Data races
- Null pointer dereferences
- Buffer overflows
Tính năng này cực kỳ quan trọng khi xây dựng production systems xử lý sensitive data hoặc chạy 24/7.
3. Concurrency và Parallelism
Rust cung cấp:
- Fearless concurrency: Compiler đảm bảo thread-safety tại compile time
- async/await: Xử lý I/O-bound operations hiệu quả
- Rayon: Data parallelism dễ dàng
Điều này giúp xử lý multiple requests đồng thời và tận dụng tối đa hardware.
Ecosystem LLM trong Rust
Rust có một ecosystem ngày càng phát triển cho AI/ML và LLM:
Frameworks và Libraries
- Rig - Framework hoàn chỉnh để xây dựng LLM applications
- llm crate - Unified API cho nhiều LLM providers
- Candle - ML framework nhẹ với hỗ trợ CPU/GPU
Use Cases Phổ Biến
- LLM Inference: Chạy models như GPT, Claude, Llama trực tiếp
- RAG Systems: Retrieval-Augmented Generation với vector databases
- Multi-agent Systems: Orchestrate nhiều LLM agents
- API Wrappers: Tích hợp với OpenAI, Anthropic, Groq, etc.
- Model Serving: REST APIs với performance cao
So sánh với Python
| Đặc điểm | Rust | Python |
|---|---|---|
| Performance | ⚡ Rất cao (gần C/C++) | 🐌 Chậm hơn (interpreted) |
| Memory Safety | ✅ Compile-time guarantees | ⚠️ Runtime errors possible |
| Concurrency | ✅ Fearless concurrency | ⚠️ GIL limitations |
| Development Speed | 📚 Steep learning curve | 🚀 Rapid prototyping |
| Ecosystem Size | 📦 Đang phát triển | 📦 Rất lớn (mature) |
| Deployment | 📦 Single binary | 🐍 Requires runtime + deps |
Khi nào nên dùng Rust?
Nên dùng Rust khi:
- Performance là critical (inference latency, throughput)
- Cần deploy trên resource-constrained environments
- Xây dựng production systems yêu cầu high reliability
- Muốn single binary deployment (không cần Python runtime)
- Xử lý sensitive data (memory safety quan trọng)
Có thể dùng Python khi:
- Rapid prototyping và experimentation
- Ecosystem phong phú của Python là bắt buộc
- Team đã thành thạo Python
- Model training (Rust tốt hơn cho inference)
Getting Started
Để bắt đầu với LLM trong Rust, bạn có thể:
- Học các libraries chính: Rig, llm crate
- Xem Recent Updates 2025 để biết tin tức mới nhất
- Thử các examples từ awesome-rust-llm
Resources
- Rust for Large Language Model Operations (LLMOps) - Coursera
- awesome-rust-llm - GitHub
- Rust and LLM AI Infrastructure
Rig - Framework để xây dựng LLM Applications
Rig là một open-source Rust library giúp đơn giản hóa và tăng tốc việc phát triển các ứng dụng AI sử dụng Large Language Models. Rig cung cấp các components có sẵn, modular để implement các hệ thống AI phức tạp.
Đặc điểm chính
1. Unified API cho Multiple Providers
Rig hỗ trợ nhiều LLM providers thông qua một API nhất quán:
use rig::{completion::Prompt, providers::openai};
#[tokio::main]
async fn main() -> Result<(), anyhow::Error> {
// Khởi tạo OpenAI client
let openai_client = openai::Client::from_env();
let gpt4 = openai_client.agent("gpt-4")
.preamble("You are a helpful assistant.")
.build();
// Gửi prompt
let response = gpt4
.prompt("Explain Rust ownership in simple terms")
.await?;
println!("{}", response);
Ok(())
}Providers được hỗ trợ:
- OpenAI (GPT-4, GPT-3.5)
- Anthropic (Claude)
- Cohere
- Google (Gemini)
- Local models (Ollama)
2. RAG (Retrieval-Augmented Generation)
Rig có built-in support cho vector stores, cho phép similarity search và retrieval hiệu quả:
use rig::{
embeddings::EmbeddingsBuilder,
providers::openai::{Client, TEXT_EMBEDDING_ADA_002},
vector_store::{in_memory_store::InMemoryVectorStore, VectorStore},
};
#[tokio::main]
async fn main() -> Result<(), anyhow::Error> {
let openai_client = Client::from_env();
// Tạo vector store
let mut vector_store = InMemoryVectorStore::default();
// Thêm documents
let embeddings = EmbeddingsBuilder::new(TEXT_EMBEDDING_ADA_002.clone())
.simple_document("id-1", "Rust is a systems programming language")
.simple_document("id-2", "Rust has ownership and borrowing")
.simple_document("id-3", "Cargo is Rust's package manager")
.build(&openai_client)
.await?;
vector_store.add_documents(embeddings).await?;
// Search similar documents
let results = vector_store
.top_n("Tell me about Rust memory safety", 2)
.await?;
for (score, doc) in results {
println!("Score: {}, Doc: {}", score, doc);
}
Ok(())
}3. Multi-Agent Systems
Rig cho phép orchestrate nhiều agents để giải quyết complex tasks:
use rig::providers::openai::Client;
#[tokio::main]
async fn main() -> Result<(), anyhow::Error> {
let client = Client::from_env();
// Researcher agent
let researcher = client.agent("gpt-4")
.preamble("You are a research specialist. Gather and analyze information.")
.build();
// Writer agent
let writer = client.agent("gpt-4")
.preamble("You are a technical writer. Create clear documentation.")
.build();
// Workflow: Research -> Write
let research = researcher
.prompt("Research Rust async programming")
.await?;
let article = writer
.prompt(&format!("Write an article based on: {}", research))
.await?;
println!("{}", article);
Ok(())
}4. Tool Calling / Function Calling
Rig hỗ trợ function calling để LLM có thể gọi external tools:
use rig::{completion::ToolDefinition, tool};
// Define a tool
#[derive(Debug, serde::Deserialize)]
struct WeatherArgs {
location: String,
}
#[tool]
fn get_weather(args: WeatherArgs) -> String {
format!("Weather in {} is sunny", args.location)
}
#[tokio::main]
async fn main() -> Result<(), anyhow::Error> {
let client = openai::Client::from_env();
let agent = client.agent("gpt-4")
.preamble("You are a helpful assistant with access to weather information.")
.tool(get_weather)
.build();
let response = agent
.prompt("What's the weather in Hanoi?")
.await?;
println!("{}", response);
Ok(())
}Kiến trúc Rig
Rig được thiết kế với các components modular:
┌─────────────────────────────────────────┐
│ Application Layer │
├─────────────────────────────────────────┤
│ Agents │ Chains │ Tools │ RAG │
├─────────────────────────────────────────┤
│ Completion Providers │
│ OpenAI │ Anthropic │ Cohere │ Local │
├─────────────────────────────────────────┤
│ Vector Stores │
│ In-Memory │ MongoDB │ Qdrant │ etc. │
└─────────────────────────────────────────┘
Use Cases
1. Chatbot với Context
use rig::providers::openai::Client;
#[tokio::main]
async fn main() -> Result<(), anyhow::Error> {
let client = Client::from_env();
let chatbot = client.agent("gpt-4")
.preamble("You are a helpful coding assistant specializing in Rust.")
.temperature(0.7)
.max_tokens(500)
.build();
// Multiple turns conversation
let response1 = chatbot.prompt("What is borrowing in Rust?").await?;
println!("Bot: {}\n", response1);
let response2 = chatbot.prompt("Can you give me an example?").await?;
println!("Bot: {}\n", response2);
Ok(())
}2. Document QA System
use rig::{
embeddings::EmbeddingsBuilder,
providers::openai::{Client, TEXT_EMBEDDING_ADA_002},
vector_store::in_memory_store::InMemoryVectorStore,
};
#[tokio::main]
async fn main() -> Result<(), anyhow::Error> {
let client = Client::from_env();
let mut vector_store = InMemoryVectorStore::default();
// Index documents
let docs = vec![
"Rust was created by Graydon Hoare at Mozilla Research",
"First stable release was in May 2015",
"Rust is used at companies like Microsoft, Amazon, and Meta",
];
let embeddings = EmbeddingsBuilder::new(TEXT_EMBEDDING_ADA_002.clone())
.simple_documents(docs)
.build(&client)
.await?;
vector_store.add_documents(embeddings).await?;
// Query
let results = vector_store
.top_n("When was Rust released?", 1)
.await?;
println!("Answer: {}", results[0].1);
Ok(())
}Ưu điểm
✅ Type Safety: Leverage Rust’s type system cho LLM workflows ✅ Performance: Zero-cost abstractions và efficient memory usage ✅ Modularity: Mix and match components theo nhu cầu ✅ Provider Agnostic: Dễ dàng switch giữa các providers ✅ Production Ready: Built with reliability và scalability in mind
Cài đặt
Thêm vào Cargo.toml:
[dependencies]
rig-core = "0.1.0"
# Choose your provider
openai-api-rs = "5.0.0" # For OpenAI
# anthropic-sdk = "0.2.0" # For Anthropic
Resources
- Website: https://rig.rs/
- GitHub: https://github.com/0xPlaygrounds/rig
- Documentation: https://docs.rs/rig-core
- Examples: GitHub Examples
Kết luận
Rig là một framework mạnh mẽ và flexible để xây dựng LLM applications trong Rust. Với các components có sẵn cho RAG, multi-agent systems, và tool calling, Rig giúp bạn nhanh chóng phát triển các ứng dụng AI production-ready với all the benefits của Rust.
llm - Unified LLM Interface Crate
llm là một Rust crate cung cấp unified interface để làm việc với nhiều Large Language Model providers khác nhau. Crate này giúp đơn giản hóa việc integrate multiple LLM services vào application của bạn.
Đặc điểm chính
1. Multiple Provider Support
llm crate hỗ trợ rất nhiều providers thông qua một API nhất quán:
Supported Providers:
- OpenAI (GPT-4, GPT-3.5, etc.)
- Anthropic (Claude 3.5 Sonnet, Claude 3 Opus, etc.)
- Ollama (Local models)
- DeepSeek
- xAI (Grok)
- Phind
- Groq
- Google (Gemini)
- Cohere
- Mistral
- ElevenLabs
2. Builder Pattern API
Sử dụng builder pattern để cấu hình requests một cách rõ ràng và type-safe:
use llm::{
client::Client,
provider::openai::OpenAI,
};
#[tokio::main]
async fn main() -> Result<(), Box<dyn std::error::Error>> {
// Khởi tạo client
let client = Client::builder()
.provider(OpenAI::new(env::var("OPENAI_API_KEY")?))
.build()?;
// Tạo completion request
let response = client
.completion()
.model("gpt-4")
.prompt("Explain Rust ownership in simple terms")
.temperature(0.7)
.max_tokens(500)
.send()
.await?;
println!("{}", response.text());
Ok(())
}3. Request Validation
llm crate tự động validate requests trước khi gửi, giúp catch errors sớm:
use llm::client::Client;
#[tokio::main]
async fn main() -> Result<(), Box<dyn std::error::Error>> {
let client = Client::from_env()?;
// Validation sẽ kiểm tra:
// - Model name có valid không
// - Temperature trong range [0, 2]
// - Max tokens không vượt quá giới hạn
let response = client
.completion()
.model("gpt-4")
.temperature(0.7) // OK
// .temperature(3.0) // ❌ Sẽ error: temperature must be between 0 and 2
.max_tokens(100)
.prompt("Hello, world!")
.send()
.await?;
Ok(())
}4. Retry Logic với Exponential Backoff
Built-in retry mechanism với exponential backoff và jitter cho resilience:
use llm::client::Client;
use std::time::Duration;
#[tokio::main]
async fn main() -> Result<(), Box<dyn std::error::Error>> {
let client = Client::builder()
.retry_config(
llm::retry::RetryConfig::default()
.max_retries(3)
.initial_delay(Duration::from_millis(500))
.max_delay(Duration::from_secs(10))
.use_jitter(true)
)
.build()?;
// Tự động retry nếu có network errors hoặc rate limits
let response = client
.completion()
.model("gpt-4")
.prompt("Hello!")
.send()
.await?;
Ok(())
}Use Cases
1. Multi-Provider Support
Dễ dàng switch giữa các providers:
#![allow(unused)]
fn main() {
use llm::{
client::Client,
provider::{openai::OpenAI, anthropic::Anthropic},
};
async fn compare_models() -> Result<(), Box<dyn std::error::Error>> {
let prompt = "What is Rust's ownership system?";
// OpenAI GPT-4
let openai_client = Client::builder()
.provider(OpenAI::from_env()?)
.build()?;
let gpt4_response = openai_client
.completion()
.model("gpt-4")
.prompt(prompt)
.send()
.await?;
println!("GPT-4: {}\n", gpt4_response.text());
// Anthropic Claude
let anthropic_client = Client::builder()
.provider(Anthropic::from_env()?)
.build()?;
let claude_response = anthropic_client
.completion()
.model("claude-3-5-sonnet-20241022")
.prompt(prompt)
.send()
.await?;
println!("Claude: {}\n", claude_response.text());
Ok(())
}
}2. Streaming Responses
Hỗ trợ streaming cho real-time output:
use llm::client::Client;
use futures_util::StreamExt;
#[tokio::main]
async fn main() -> Result<(), Box<dyn std::error::Error>> {
let client = Client::from_env()?;
let mut stream = client
.completion()
.model("gpt-4")
.prompt("Write a haiku about Rust programming")
.stream()
.await?;
print!("Response: ");
while let Some(chunk) = stream.next().await {
let chunk = chunk?;
print!("{}", chunk.text());
std::io::Write::flush(&mut std::io::stdout())?;
}
println!();
Ok(())
}3. Function Calling
Sử dụng function calling để LLM có thể invoke tools:
use llm::{client::Client, function::Function};
use serde_json::json;
#[tokio::main]
async fn main() -> Result<(), Box<dyn std::error::Error>> {
let client = Client::from_env()?;
// Define function
let weather_function = Function::builder()
.name("get_weather")
.description("Get the current weather for a location")
.parameter("location", "string", "The city name")
.build();
let response = client
.completion()
.model("gpt-4")
.prompt("What's the weather in Hanoi?")
.function(weather_function)
.send()
.await?;
if let Some(function_call) = response.function_call() {
println!("Function: {}", function_call.name);
println!("Arguments: {}", function_call.arguments);
// Execute function
match function_call.name.as_str() {
"get_weather" => {
let args: serde_json::Value =
serde_json::from_str(&function_call.arguments)?;
println!("Getting weather for: {}", args["location"]);
}
_ => {}
}
}
Ok(())
}4. Evaluation & Scoring
Built-in capabilities để evaluate LLM outputs:
use llm::{client::Client, evaluation::Evaluator};
#[tokio::main]
async fn main() -> Result<(), Box<dyn std::error::Error>> {
let client = Client::from_env()?;
let response = client
.completion()
.model("gpt-4")
.prompt("Explain memory safety")
.send()
.await?;
// Evaluate response quality
let evaluator = Evaluator::new(&client);
let relevance_score = evaluator
.score_relevance("Explain memory safety", response.text())
.await?;
println!("Relevance score: {}/10", relevance_score);
Ok(())
}5. Serving as REST API
Serve bất kỳ LLM backend nào như một REST API với OpenAI-compatible format:
use llm::server::Server;
#[tokio::main]
async fn main() -> Result<(), Box<dyn std::error::Error>> {
// Start server on port 8080
let server = Server::builder()
.port(8080)
.provider(/* your provider */)
.build()?;
println!("Server running on http://localhost:8080");
// Clients có thể gọi như OpenAI API:
// POST http://localhost:8080/v1/chat/completions
server.run().await?;
Ok(())
}Configuration
Environment Variables
# OpenAI
export OPENAI_API_KEY="sk-..."
# Anthropic
export ANTHROPIC_API_KEY="sk-ant-..."
# Groq
export GROQ_API_KEY="gsk_..."
# Local Ollama
export OLLAMA_HOST="http://localhost:11434"
Cargo.toml
[dependencies]
llm = "0.5.0"
tokio = { version = "1.0", features = ["full"] }
futures-util = "0.3"
serde_json = "1.0"
Ưu điểm
✅ Unified Interface: Một API cho tất cả providers ✅ Type Safety: Rust’s type system bảo vệ bạn khỏi errors ✅ Resilience: Built-in retry và error handling ✅ Validation: Request validation trước khi gửi ✅ Flexibility: Dễ dàng switch providers ✅ Production Ready: Được thiết kế cho production use
Nhược điểm
⚠️ Abstraction Overhead: Có thể không expose tất cả provider-specific features ⚠️ Learning Curve: Cần học builder pattern API ⚠️ Dependencies: Thêm dependencies vào project
Khi nào nên dùng?
Nên dùng llm crate khi:
- Muốn support multiple LLM providers
- Cần unified interface để dễ switch providers
- Muốn built-in retry và validation
- Xây dựng production systems cần resilience
Có thể dùng provider SDK trực tiếp khi:
- Chỉ dùng một provider duy nhất
- Cần access provider-specific features
- Muốn minimize dependencies
Resources
- Documentation: https://docs.rs/llm
- Crates.io: https://crates.io/crates/llm
- GitHub: Check the crate documentation for repository link
Kết luận
llm crate là một excellent choice khi bạn cần làm việc với multiple LLM providers trong Rust. Với unified API, built-in resilience, và type safety, nó giúp xây dựng robust LLM applications một cách nhanh chóng và an toàn.
Candle - Minimalist ML Framework
Candle là một minimalist machine learning framework cho Rust được phát triển bởi Hugging Face. Candle được thiết kế để đơn giản, nhanh, và dễ sử dụng cho cả CPU và GPU inference.
Đặc điểm chính
1. Minimal và Performant
Candle focus vào simplicity và performance:
- Lightweight: Không có heavy dependencies
- Fast: Tối ưu cho cả CPU và GPU
- Simple API: Dễ học và sử dụng
- No Python required: Pure Rust implementation
2. Hardware Support
Candle hỗ trợ nhiều backends:
- CPU: Optimized CPU operations
- CUDA: NVIDIA GPU support
- Metal: Apple Silicon (M1/M2/M3) support
- WebGPU: Browser-based inference
3. Model Support
Hỗ trợ các popular model architectures:
- Transformers: BERT, GPT, T5, etc.
- Vision: ResNet, ViT, CLIP
- Audio: Whisper (speech-to-text)
- Multimodal: CLIP, BLIP
- LLMs: Llama, Mistral, Phi
Installation
Thêm vào Cargo.toml:
[dependencies]
candle-core = "0.4.0"
candle-nn = "0.4.0"
candle-transformers = "0.4.0"
# Optional: CUDA support
candle-cuda = "0.4.0"
# Optional: Metal support (Apple Silicon)
candle-metal = "0.4.0"
Basic Usage
1. Tensor Operations
use candle_core::{Device, Tensor};
fn main() -> Result<(), Box<dyn std::error::Error>> {
// Tạo tensor trên CPU
let device = Device::Cpu;
let a = Tensor::new(&[1f32, 2., 3., 4.], &device)?;
let b = Tensor::new(&[5f32, 6., 7., 8.], &device)?;
// Phép tính
let sum = (&a + &b)?;
let product = (&a * &b)?;
println!("Sum: {:?}", sum.to_vec1::<f32>()?);
println!("Product: {:?}", product.to_vec1::<f32>()?);
Ok(())
}2. Matrix Operations
use candle_core::{Device, Tensor};
fn main() -> Result<(), Box<dyn std::error::Error>> {
let device = Device::Cpu;
// Tạo matrices
let a = Tensor::new(
&[[1f32, 2.], [3., 4.]],
&device
)?;
let b = Tensor::new(
&[[5f32, 6.], [7., 8.]],
&device
)?;
// Matrix multiplication
let result = a.matmul(&b)?;
println!("Result: {:?}", result.to_vec2::<f32>()?);
Ok(())
}Running LLMs with Candle
1. Llama Model Inference
use candle_core::{Device, Tensor};
use candle_transformers::models::llama::{Llama, Config};
use candle_nn::VarBuilder;
fn main() -> Result<(), Box<dyn std::error::Error>> {
// Load model
let device = Device::cuda_if_available(0)?;
let config = Config::config_7b_v2();
let vb = VarBuilder::from_pth("model.safetensors", &device)?;
let mut model = Llama::load(vb, &config)?;
// Tokenize input
let prompt = "The Rust programming language is";
let tokens = tokenize(prompt)?;
// Generate
let mut output_tokens = tokens.clone();
for _ in 0..50 { // Generate 50 tokens
let logits = model.forward(&output_tokens)?;
let next_token = sample(&logits)?;
output_tokens.push(next_token);
}
// Decode
let generated_text = detokenize(&output_tokens)?;
println!("{}", generated_text);
Ok(())
}2. Whisper (Speech-to-Text)
#![allow(unused)]
fn main() {
use candle_core::Device;
use candle_transformers::models::whisper::{self, Config, Model};
fn transcribe_audio(audio_path: &str) -> Result<String, Box<dyn std::error::Error>> {
let device = Device::cuda_if_available(0)?;
// Load model
let config = Config::tiny_en();
let model = Model::load(&config, &device)?;
// Load and preprocess audio
let audio = load_audio(audio_path)?;
let mel = audio_to_mel(&audio)?;
// Transcribe
let tokens = model.decode(&mel)?;
let text = tokens_to_text(&tokens)?;
Ok(text)
}
}3. BERT Embeddings
#![allow(unused)]
fn main() {
use candle_core::{Device, Tensor};
use candle_transformers::models::bert::{BertModel, Config};
fn get_embeddings(text: &str) -> Result<Tensor, Box<dyn std::error::Error>> {
let device = Device::Cpu;
// Load BERT model
let config = Config::default();
let model = BertModel::load(&config, &device)?;
// Tokenize
let tokens = tokenize(text)?;
let token_ids = Tensor::new(tokens.as_slice(), &device)?;
// Get embeddings
let embeddings = model.forward(&token_ids)?;
Ok(embeddings)
}
}Advanced Usage
1. GPU Acceleration
use candle_core::{Device, Tensor};
fn main() -> Result<(), Box<dyn std::error::Error>> {
// Sử dụng CUDA nếu có
let device = Device::cuda_if_available(0)?;
// Hoặc explicitly chọn device
let device = if cfg!(feature = "cuda") {
Device::new_cuda(0)?
} else if cfg!(feature = "metal") {
Device::new_metal(0)?
} else {
Device::Cpu
};
let tensor = Tensor::randn(0f32, 1f32, (1000, 1000), &device)?;
println!("Running on: {:?}", device);
Ok(())
}2. Custom Models
#![allow(unused)]
fn main() {
use candle_core::{Device, Tensor, Module};
use candle_nn::{Linear, VarBuilder, ops};
struct SimpleNN {
fc1: Linear,
fc2: Linear,
}
impl SimpleNN {
fn new(vb: VarBuilder) -> Result<Self, Box<dyn std::error::Error>> {
let fc1 = candle_nn::linear(784, 128, vb.pp("fc1"))?;
let fc2 = candle_nn::linear(128, 10, vb.pp("fc2"))?;
Ok(Self { fc1, fc2 })
}
fn forward(&self, x: &Tensor) -> Result<Tensor, Box<dyn std::error::Error>> {
let x = self.fc1.forward(x)?;
let x = x.relu()?;
let x = self.fc2.forward(&x)?;
Ok(x)
}
}
}3. Quantization
Candle hỗ trợ quantization để giảm model size và tăng tốc inference:
#![allow(unused)]
fn main() {
use candle_core::{Device, Tensor};
use candle_transformers::quantized_llama::ModelWeights;
fn load_quantized_model() -> Result<(), Box<dyn std::error::Error>> {
let device = Device::Cpu;
// Load quantized model (4-bit, 8-bit)
let model = ModelWeights::from_gguf(
"llama-2-7b-Q4_K_M.gguf",
&device
)?;
// Model size nhỏ hơn rất nhiều
// 7B model: ~14GB -> ~4GB với Q4 quantization
Ok(())
}
}Use Cases
1. Local LLM Inference
#![allow(unused)]
fn main() {
use candle_transformers::models::quantized_llama::ModelWeights;
fn chat_with_local_llm(prompt: &str) -> Result<String, Box<dyn std::error::Error>> {
let device = Device::Cpu;
// Load quantized Llama
let mut model = ModelWeights::from_gguf(
"llama-2-7b-chat.Q4_K_M.gguf",
&device
)?;
// Generate response
let response = model.generate(prompt, 512)?;
Ok(response)
}
}2. Image Classification
#![allow(unused)]
fn main() {
use candle_transformers::models::resnet;
fn classify_image(image_path: &str) -> Result<String, Box<dyn std::error::Error>> {
let device = Device::Cpu;
// Load ResNet
let model = resnet::resnet50(&device)?;
// Load and preprocess image
let image = load_image(image_path)?;
let tensor = preprocess_image(&image)?;
// Classify
let logits = model.forward(&tensor)?;
let class = argmax(&logits)?;
Ok(imagenet_classes()[class].to_string())
}
}3. Text Embeddings for RAG
#![allow(unused)]
fn main() {
use candle_transformers::models::bert;
fn generate_embeddings(texts: Vec<&str>) -> Result<Vec<Vec<f32>>, Box<dyn std::error::Error>> {
let device = Device::Cpu;
let model = bert::BertModel::load_default(&device)?;
let mut embeddings = Vec::new();
for text in texts {
let tokens = tokenize(text)?;
let embedding = model.encode(&tokens)?;
embeddings.push(embedding.to_vec1()?);
}
Ok(embeddings)
}
}Performance Comparison
| Backend | Llama 7B Inference | Speedup |
|---|---|---|
| CPU (Intel i9) | ~2.5 tokens/s | 1x |
| CUDA (RTX 4090) | ~45 tokens/s | 18x |
| Metal (M2 Max) | ~25 tokens/s | 10x |
Quantized models (Q4): ~2-3x faster with similar quality
Ưu điểm
✅ Pure Rust: Không cần Python runtime ✅ Fast: Optimized cho performance ✅ Minimal: Ít dependencies, dễ build ✅ Cross-platform: CPU, CUDA, Metal, WebGPU ✅ Model Support: Nhiều popular architectures ✅ Quantization: Giảm memory usage
Nhược điểm
⚠️ Younger Ecosystem: Ít mature hơn PyTorch/TensorFlow ⚠️ Fewer Models: Không nhiều pre-trained models như Python ⚠️ Training: Chủ yếu focus vào inference
Khi nào nên dùng Candle?
Nên dùng Candle khi:
- Muốn run models locally không cần Python
- Cần fast inference với low latency
- Deploy trên edge devices
- Xây dựng production services trong Rust
- Muốn single binary deployment
Có thể dùng Python frameworks khi:
- Training models (PyTorch, TensorFlow tốt hơn)
- Cần extensive model zoo
- Team đã thành thạo Python ML stack
Resources
- GitHub: https://github.com/huggingface/candle
- Examples: Candle Examples
- Documentation: docs.rs/candle-core
Kết luận
Candle là một excellent choice để run ML models, đặc biệt là LLMs, trong Rust. Với pure Rust implementation, cross-platform support, và focus vào performance, Candle giúp bạn xây dựng fast và reliable ML inference systems mà không cần Python dependency.
Building AI Agents và Workflows với Rust
Rust đang nổi lên như một lựa chọn mạnh mẽ để xây dựng AI agents và workflows nhờ vào performance, type safety, và khả năng xử lý concurrent operations. Nhiều developers đang chuyển từ Python sang Rust cho các agentic systems yêu cầu high performance và reliability.
Tại sao dùng Rust cho AI Agents?
1. Performance và Concurrency
AI agents thường cần:
- Xử lý multiple requests đồng thời
- Coordinate nhiều agents parallel
- Low-latency response times
- Efficient resource usage
Rust cung cấp:
- Fearless concurrency: Thread-safety được đảm bảo tại compile time
- Zero-cost abstractions: High-level code với C-level performance
- Async/await: Efficient I/O-bound operations
2. Type Safety và Reliability
#![allow(unused)]
fn main() {
// Rust's type system prevents runtime errors
enum AgentState {
Idle,
Processing { task_id: String },
Waiting { for_agent: String },
Completed { result: String },
Failed { error: String },
}
// Compiler forces you to handle all states
match agent.state {
AgentState::Idle => start_task(),
AgentState::Processing { task_id } => monitor_task(task_id),
AgentState::Waiting { for_agent } => check_dependency(for_agent),
AgentState::Completed { result } => return_result(result),
AgentState::Failed { error } => handle_error(error),
}
}3. Error Handling
Rust’s Result type là perfect cho AI agents có thể hallucinate hoặc fail:
#![allow(unused)]
fn main() {
async fn agent_task() -> Result<String, AgentError> {
let llm_response = call_llm().await?;
// Validate response
if llm_response.is_valid() {
Ok(llm_response.content)
} else {
Err(AgentError::InvalidResponse)
}
}
}Rust AI Agent Frameworks
1. Kowalski - Rust-Native Agentic Framework
Kowalski là một powerful, modular agentic AI framework cho local-first, extensible LLM workflows.
Key Features:
- 🦀 Full-stack Rust (zero Python dependencies)
- 🤖 Multi-agent orchestration
- 🔧 Modular architecture với specialized agents
- 📚 Local-first design
- 🎯 Task-passing layers cho agent collaboration
Architecture:
┌─────────────────────────────────────────────┐
│ Federation Layer │
│ (Multi-agent Orchestration) │
├─────────────────────────────────────────────┤
│ Academic │ Code │ Data │ Web │ Custom │
│ Agent │Agent │Agent │Agent│ Agents │
├─────────────────────────────────────────────┤
│ Core Execution Engine │
│ (Task Processing & State Management) │
├─────────────────────────────────────────────┤
│ LLM Integration Layer │
│ (OpenAI, Anthropic, Local Models) │
└─────────────────────────────────────────────┘
Example - Multi-Agent System:
use kowalski::{Agent, Federation, Task};
#[tokio::main]
async fn main() -> Result<(), Box<dyn std::error::Error>> {
// Create specialized agents
let research_agent = Agent::new("researcher")
.with_capability("web_search")
.with_capability("document_analysis")
.build()?;
let code_agent = Agent::new("coder")
.with_capability("code_generation")
.with_capability("code_review")
.build()?;
let writer_agent = Agent::new("writer")
.with_capability("content_creation")
.with_capability("editing")
.build()?;
// Create federation for orchestration
let mut federation = Federation::new()
.register(research_agent)
.register(code_agent)
.register(writer_agent)
.build()?;
// Define workflow
let task = Task::new("Create a tutorial on Rust async programming")
.step("researcher", "Research Rust async/await patterns")
.step("coder", "Create code examples")
.step("writer", "Write tutorial content")
.build()?;
// Execute
let result = federation.execute(task).await?;
println!("{}", result);
Ok(())
}2. AutoAgents - Multi-Agent Framework
AutoAgents là cutting-edge framework built với Rust và Ractor cho autonomous agents.
Key Features:
- 🚀 Built on Ractor (Actor model)
- 🌐 WASM compilation support (run in browser!)
- 📝 YAML-based workflow definitions
- 🔄 Streaming support
- ⚡ High performance và scalability
Example - YAML Workflow:
name: research_workflow
description: Research and summarize a topic
agents:
- name: researcher
type: research
llm:
provider: openai
model: gpt-4
- name: analyst
type: analysis
llm:
provider: anthropic
model: claude-3-5-sonnet-20241022
workflow:
- agent: researcher
task: "Research the topic: {input}"
output: research_results
- agent: analyst
task: "Analyze and summarize: {research_results}"
output: final_summary
output: final_summary
Running in Rust:
use autoagents::{Workflow, WorkflowExecutor};
#[tokio::main]
async fn main() -> Result<(), Box<dyn std::error::Error>> {
// Load workflow from YAML
let workflow = Workflow::from_file("research_workflow.yaml")?;
// Create executor
let executor = WorkflowExecutor::new();
// Execute with input
let result = executor
.execute(&workflow)
.with_input("Rust for machine learning")
.await?;
println!("Result: {}", result);
Ok(())
}Deploy to WASM:
#![allow(unused)]
fn main() {
use autoagents::wasm::WasmExecutor;
use wasm_bindgen::prelude::*;
#[wasm_bindgen]
pub async fn run_agent_workflow(input: String) -> Result<String, JsValue> {
let workflow = Workflow::from_file("workflow.yaml")
.map_err(|e| JsValue::from_str(&e.to_string()))?;
let executor = WasmExecutor::new();
let result = executor.execute(&workflow, input).await
.map_err(|e| JsValue::from_str(&e.to_string()))?;
Ok(result)
}
}3. graph-flow - LangGraph Alternative trong Rust
graph-flow mang LangGraph’s workflow patterns vào Rust với type safety và performance.
Key Features:
- 📊 Graph-based workflow orchestration
- 🔄 Stateful task execution
- 🎯 Type-safe agent coordination
- ⚡ Integration với Rig crate
Example - Graph Workflow:
use graph_flow::{Graph, Node, Edge, State};
use rig::providers::openai::Client;
#[derive(Clone)]
struct WorkflowState {
query: String,
research: Option<String>,
code: Option<String>,
review: Option<String>,
}
#[tokio::main]
async fn main() -> Result<(), Box<dyn std::error::Error>> {
let client = Client::from_env();
// Define nodes
let research_node = Node::new("research", |state: &mut WorkflowState| async {
let agent = client.agent("gpt-4").build();
let result = agent.prompt(&state.query).await?;
state.research = Some(result);
Ok(())
});
let code_node = Node::new("code", |state: &mut WorkflowState| async {
let research = state.research.as_ref().unwrap();
let agent = client.agent("gpt-4").build();
let result = agent.prompt(&format!("Generate code for: {}", research)).await?;
state.code = Some(result);
Ok(())
});
let review_node = Node::new("review", |state: &mut WorkflowState| async {
let code = state.code.as_ref().unwrap();
let agent = client.agent("gpt-4").build();
let result = agent.prompt(&format!("Review this code: {}", code)).await?;
state.review = Some(result);
Ok(())
});
// Build graph
let graph = Graph::new()
.add_node(research_node)
.add_node(code_node)
.add_node(review_node)
.add_edge(Edge::new("research", "code"))
.add_edge(Edge::new("code", "review"))
.set_entry("research")
.build()?;
// Execute
let mut state = WorkflowState {
query: "Create a REST API in Rust".to_string(),
research: None,
code: None,
review: None,
};
graph.execute(&mut state).await?;
println!("Review: {}", state.review.unwrap());
Ok(())
}4. Anda - AI Agent Framework với Blockchain
Anda combines AI agents với ICP blockchain và TEE support.
Key Features:
- 🔐 TEE (Trusted Execution Environment) support
- ⛓️ Blockchain integration
- 🧠 Perpetual memory
- 🤝 Composable agents
Use Case: Autonomous agents với verifiable execution và persistent memory.
5. AgentAI - Simplified Agent Creation
AgentAI simplifies việc tạo AI agents trong Rust.
Example:
use agentai::{Agent, Tool};
#[tokio::main]
async fn main() -> Result<(), Box<dyn std::error::Error>> {
// Define tools
let calculator = Tool::new("calculator")
.description("Performs mathematical calculations")
.function(|input: &str| {
// Parse and calculate
Ok(format!("Result: {}", eval(input)?))
});
let web_search = Tool::new("web_search")
.description("Searches the web")
.async_function(|query: &str| async move {
let results = search_web(query).await?;
Ok(results)
});
// Create agent
let agent = Agent::new("assistant")
.with_llm("gpt-4")
.with_tool(calculator)
.with_tool(web_search)
.with_system_prompt("You are a helpful assistant with access to tools.")
.build()?;
// Run
let response = agent.run("What is 25 * 34 and search for Rust tutorials").await?;
println!("{}", response);
Ok(())
}Common Agent Patterns
1. ReAct Pattern (Reasoning + Acting)
#![allow(unused)]
fn main() {
use rig::providers::openai::Client;
struct ReActAgent {
client: Client,
tools: Vec<Tool>,
}
impl ReActAgent {
async fn run(&self, task: &str) -> Result<String, Box<dyn std::error::Error>> {
let mut thought_log = Vec::new();
let mut max_iterations = 5;
loop {
// Thought
let thought = self.think(task, &thought_log).await?;
thought_log.push(format!("Thought: {}", thought));
// Action
if let Some(action) = self.parse_action(&thought)? {
thought_log.push(format!("Action: {:?}", action));
// Execute tool
let observation = self.execute_tool(&action).await?;
thought_log.push(format!("Observation: {}", observation));
max_iterations -= 1;
if max_iterations == 0 {
break;
}
} else {
// Final answer
return Ok(thought);
}
}
Ok(thought_log.join("\n"))
}
async fn think(&self, task: &str, history: &[String]) -> Result<String, Box<dyn std::error::Error>> {
let prompt = format!(
"Task: {}\nHistory:\n{}\n\nThought:",
task,
history.join("\n")
);
let agent = self.client.agent("gpt-4").build();
let response = agent.prompt(&prompt).await?;
Ok(response)
}
}
}2. Tool-Using Agent
#![allow(unused)]
fn main() {
use std::collections::HashMap;
#[derive(Clone)]
struct Tool {
name: String,
description: String,
function: fn(&str) -> Result<String, Box<dyn std::error::Error>>,
}
struct ToolAgent {
llm_client: Client,
tools: HashMap<String, Tool>,
}
impl ToolAgent {
fn register_tool(&mut self, tool: Tool) {
self.tools.insert(tool.name.clone(), tool);
}
async fn execute(&self, user_input: &str) -> Result<String, Box<dyn std::error::Error>> {
// Get tool definitions
let tool_descriptions: Vec<String> = self.tools
.values()
.map(|t| format!("{}: {}", t.name, t.description))
.collect();
// Ask LLM which tool to use
let prompt = format!(
"Available tools:\n{}\n\nUser request: {}\n\nWhich tool should be used? Respond with just the tool name.",
tool_descriptions.join("\n"),
user_input
);
let agent = self.llm_client.agent("gpt-4").build();
let tool_name = agent.prompt(&prompt).await?;
// Execute tool
if let Some(tool) = self.tools.get(tool_name.trim()) {
let result = (tool.function)(user_input)?;
Ok(result)
} else {
Err("Tool not found".into())
}
}
}
}3. Multi-Agent Collaboration
#![allow(unused)]
fn main() {
struct AgentTeam {
agents: HashMap<String, Agent>,
coordinator: Coordinator,
}
impl AgentTeam {
async fn solve(&self, problem: &str) -> Result<String, Box<dyn std::error::Error>> {
// Coordinator decides task distribution
let plan = self.coordinator.plan(problem).await?;
let mut results = HashMap::new();
// Execute tasks in parallel
let mut handles = vec![];
for task in plan.tasks {
let agent = self.agents.get(&task.agent_name).unwrap().clone();
let task_clone = task.clone();
let handle = tokio::spawn(async move {
agent.execute(&task_clone.description).await
});
handles.push((task.id.clone(), handle));
}
// Collect results
for (task_id, handle) in handles {
let result = handle.await??;
results.insert(task_id, result);
}
// Coordinator synthesizes final answer
let final_result = self.coordinator.synthesize(results).await?;
Ok(final_result)
}
}
}4. Stateful Conversational Agent
#![allow(unused)]
fn main() {
use std::sync::Arc;
use tokio::sync::RwLock;
struct ConversationalAgent {
client: Client,
conversation_history: Arc<RwLock<Vec<Message>>>,
}
#[derive(Clone)]
struct Message {
role: String,
content: String,
}
impl ConversationalAgent {
async fn chat(&self, user_message: &str) -> Result<String, Box<dyn std::error::Error>> {
// Add user message to history
let mut history = self.conversation_history.write().await;
history.push(Message {
role: "user".to_string(),
content: user_message.to_string(),
});
// Build context from history
let context: Vec<String> = history
.iter()
.map(|m| format!("{}: {}", m.role, m.content))
.collect();
// Get response
let agent = self.client.agent("gpt-4").build();
let response = agent.prompt(&context.join("\n")).await?;
// Add assistant response to history
history.push(Message {
role: "assistant".to_string(),
content: response.clone(),
});
Ok(response)
}
async fn clear_history(&self) {
let mut history = self.conversation_history.write().await;
history.clear();
}
}
}Building MCP Servers trong Rust
Model Context Protocol (MCP) cho phép AI agents access external tools và data sources.
Example MCP Server:
use mcp_server::{Server, Tool, Resource};
#[tokio::main]
async fn main() -> Result<(), Box<dyn std::error::Error>> {
let server = Server::builder()
.name("rust-tools")
.version("1.0.0")
// Register tools
.tool(Tool::new("file_reader")
.description("Read file contents")
.handler(|args| async move {
let path = args.get("path").unwrap();
let content = tokio::fs::read_to_string(path).await?;
Ok(content)
}))
.tool(Tool::new("web_fetch")
.description("Fetch web page content")
.handler(|args| async move {
let url = args.get("url").unwrap();
let response = reqwest::get(url).await?;
let text = response.text().await?;
Ok(text)
}))
// Register resources
.resource(Resource::new("database")
.description("Database connection")
.handler(|| async move {
// Return database schema or data
Ok("Database info")
}))
.build()?;
server.run("localhost:3000").await?;
Ok(())
}Production Considerations
1. Error Handling và Retry Logic
#![allow(unused)]
fn main() {
use tokio::time::{sleep, Duration};
async fn resilient_agent_call<F, T>(
operation: F,
max_retries: u32,
) -> Result<T, Box<dyn std::error::Error>>
where
F: Fn() -> Pin<Box<dyn Future<Output = Result<T, Box<dyn std::error::Error>>>>>,
{
let mut attempts = 0;
loop {
match operation().await {
Ok(result) => return Ok(result),
Err(e) if attempts < max_retries => {
attempts += 1;
let delay = Duration::from_secs(2u64.pow(attempts));
eprintln!("Attempt {} failed: {}. Retrying in {:?}", attempts, e, delay);
sleep(delay).await;
}
Err(e) => return Err(e),
}
}
}
}2. Rate Limiting
#![allow(unused)]
fn main() {
use governor::{Quota, RateLimiter};
use std::num::NonZeroU32;
struct RateLimitedAgent {
agent: Agent,
rate_limiter: RateLimiter<NotKeyed, InMemoryState, DefaultClock>,
}
impl RateLimitedAgent {
fn new(agent: Agent, requests_per_minute: u32) -> Self {
let quota = Quota::per_minute(NonZeroU32::new(requests_per_minute).unwrap());
let rate_limiter = RateLimiter::direct(quota);
Self { agent, rate_limiter }
}
async fn execute(&self, prompt: &str) -> Result<String, Box<dyn std::error::Error>> {
// Wait for rate limit
self.rate_limiter.until_ready().await;
// Execute
self.agent.run(prompt).await
}
}
}3. Observability
#![allow(unused)]
fn main() {
use tracing::{info, warn, error, instrument};
#[instrument(skip(agent))]
async fn traced_agent_execution(
agent: &Agent,
task: &str,
) -> Result<String, Box<dyn std::error::Error>> {
info!("Starting agent execution for task: {}", task);
let start = std::time::Instant::now();
match agent.execute(task).await {
Ok(result) => {
let duration = start.elapsed();
info!("Agent execution completed in {:?}", duration);
Ok(result)
}
Err(e) => {
error!("Agent execution failed: {}", e);
Err(e)
}
}
}
}Real-World Use Cases
1. Customer Support Bot
#![allow(unused)]
fn main() {
struct SupportBot {
agent: Agent,
knowledge_base: VectorStore,
}
impl SupportBot {
async fn handle_query(&self, query: &str) -> Result<String, Box<dyn std::error::Error>> {
// Search knowledge base
let relevant_docs = self.knowledge_base.search(query, 3).await?;
// Build context
let context = format!(
"Knowledge base:\n{}\n\nUser query: {}",
relevant_docs.join("\n"),
query
);
// Generate response
let response = self.agent.run(&context).await?;
Ok(response)
}
}
}2. Code Review Agent
#![allow(unused)]
fn main() {
struct CodeReviewAgent {
agent: Agent,
}
impl CodeReviewAgent {
async fn review(&self, code: &str, language: &str) -> Result<Review, Box<dyn std::error::Error>> {
let prompt = format!(
"Review this {} code and provide feedback on:\n\
1. Correctness\n\
2. Performance\n\
3. Security\n\
4. Best practices\n\n\
Code:\n```{}\n{}\n```",
language, language, code
);
let response = self.agent.run(&prompt).await?;
let review = parse_review(&response)?;
Ok(review)
}
}
}3. Research Assistant
#![allow(unused)]
fn main() {
struct ResearchAssistant {
searcher: Agent,
analyzer: Agent,
summarizer: Agent,
}
impl ResearchAssistant {
async fn research(&self, topic: &str) -> Result<Report, Box<dyn std::error::Error>> {
// Step 1: Search
let search_results = self.searcher.run(&format!("Search for: {}", topic)).await?;
// Step 2: Analyze
let analysis = self.analyzer.run(&format!("Analyze: {}", search_results)).await?;
// Step 3: Summarize
let summary = self.summarizer.run(&format!("Summarize: {}", analysis)).await?;
Ok(Report {
topic: topic.to_string(),
sources: extract_sources(&search_results),
analysis,
summary,
})
}
}
}Performance Comparison: Rust vs Python
Agent Workflow Execution (100 tasks):
Metric | Python (LangChain) | Rust (Kowalski) | Improvement
------------------------|-------------------|-----------------|------------
Execution Time | 45.2s | 8.3s | 5.4x faster
Memory Usage | 380 MB | 85 MB | 4.5x less
Concurrent Agents (max) | 50 | 500+ | 10x more
Cold Start Time | 2.1s | 0.15s | 14x faster
Tài nguyên học tập
Frameworks
- Kowalski - Rust-native agentic framework
- AutoAgents - Multi-agent với Ractor
- graph-flow - LangGraph alternative
- Anda - Blockchain-enabled agents
Tutorials
Community
Kết luận
Rust cung cấp một nền tảng xuất sắc để xây dựng AI agents và workflows với:
✅ Performance: 5-10x nhanh hơn Python cho agent workflows ✅ Type Safety: Catch errors tại compile time ✅ Concurrency: Xử lý hundreds of agents đồng thời ✅ Reliability: Memory safety và error handling mạnh mẽ ✅ Production Ready: Single binary deployment
Với ecosystem đang phát triển nhanh (Kowalski, AutoAgents, graph-flow), Rust đang trở thành lựa chọn hàng đầu cho production AI agent systems yêu cầu performance và reliability cao.
LLM + Rust: Recent Updates 2025
Năm 2025 chứng kiến sự phát triển mạnh mẽ của ecosystem LLM trong Rust. Dưới đây là các updates và developments quan trọng nhất.
🚀 Major Developments
1. GPT-4.1 Nano - Best LLM for Rust Coding
Theo benchmark DevQualityEval v1.1 được công bố đầu năm 2025:
- OpenAI GPT-4.1 Nano được xác nhận là LLM tốt nhất cho Rust coding
- DeepSeek V3 là best open-weight model cho Rust
- ChatGPT-4o vẫn là most capable overall
Key Findings:
Model Performance Rankings (Rust Code Quality):
1. GPT-4.1 Nano - Best cost-efficiency
2. ChatGPT-4o - Most capable
3. DeepSeek V3 - Best open-weight
4. Claude 3.5 Sonnet - Strong alternative
Tại sao quan trọng:
- First time có benchmark chính thức cho LLM coding in Rust
- Rust support được added vào DevQualityEval v1.1
- Validation quan trọng của Rust trong AI/ML space
Source: Symflower DevQualityEval v1.1
2. Microsoft RustAssistant
Microsoft Research phát hành RustAssistant - tool sử dụng LLMs để tự động fix Rust compilation errors:
Capabilities:
- Automatically suggest fixes cho compilation errors
- 74% accuracy trên real-world errors
- Leverages state-of-the-art LLMs (GPT-4, Claude)
- Helps developers learn from mistakes
Example Workflow:
// Original code with error
fn main() {
let s = String::from("hello");
let len = calculate_length(s);
println!("Length: {}", s); // ❌ Error: value borrowed after move
}
// RustAssistant suggests:
fn main() {
let s = String::from("hello");
let len = calculate_length(&s); // ✅ Pass reference
println!("Length: {}", s); // ✅ Now works!
}
fn calculate_length(s: &String) -> usize {
s.len()
}Impact:
- Giúp newcomers học Rust nhanh hơn
- Reduce time debugging compiler errors
- Demonstrates LLM understanding of Rust semantics
Source: Microsoft Research - RustAssistant
3. Rust for LLMOps Course (Coursera)
Coursera ra mắt course chính thức về Rust for Large Language Model Operations:
Course Content:
- Week 1: Rust fundamentals for ML
- Week 2: LLM integration với Rust
- Week 3: Building production LLM systems
- Week 4: Optimization và deployment
Key Technologies:
- Rust BERT: BERT implementation in Rust
- tch-rs: PyTorch bindings for Rust
- ONNX Runtime: Cross-platform inference
- Candle: Hugging Face’s ML framework
Tại sao quan trọng:
- First major educational platform với Rust LLM course
- Validation của Rust trong production ML workflows
- Growing demand for Rust ML engineers
Link: Coursera - Rust for LLMOps
4. lm.rs - Minimal CPU LLM Inference
lm.rs được released - minimal LLM inference library với no dependencies:
Features:
- Pure Rust implementation
- No external dependencies
- CPU-only inference
- Support cho popular models (Llama, GPT-2, etc.)
- Tiny binary size (~2MB)
Example:
use lm_rs::{Model, Tokenizer};
fn main() -> Result<(), Box<dyn std::error::Error>> {
// Load model - no Python, no heavy deps!
let model = Model::from_file("llama-2-7b.bin")?;
let tokenizer = Tokenizer::from_file("tokenizer.json")?;
// Generate
let prompt = "Rust is";
let output = model.generate(prompt, &tokenizer, 50)?;
println!("{}", output);
Ok(())
}Use Cases:
- Edge devices
- Embedded systems
- Environments without GPU
- Minimal footprint deployments
Discussion: Hacker News
📚 Ecosystem Growth
Active Libraries & Frameworks
Production-Ready:
-
Rig (v0.3.0+) - Full-featured LLM framework
- RAG support
- Multi-agent systems
- Vector stores integration
-
llm crate (v0.5.0+) - Unified LLM interface
- 12+ provider support
- Built-in retry logic
- Evaluation capabilities
-
Candle (v0.4.0+) - Hugging Face ML framework
- CPU/GPU/Metal support
- Quantization support
- Growing model library
Emerging Tools:
- mistral.rs: Optimized Mistral inference
- Ratchet: WebGPU-based ML inference
- llama.rs: Llama-focused inference engine
Library Ecosystem Status
Note: rustformers/llm is now unmaintained (archived in 2025)
- Recommends migration to: Candle, mistral.rs, or Ratchet
- Active fork available:
qooba/llm
🔬 Research & Papers
Key Publications (2025)
-
“Rust for High-Performance ML Inference”
- Comparison: Rust vs. Python for production ML
- Results: 3-10x faster inference với Rust
- Memory usage: 2-5x lower
-
“Safety and Performance in LLM Serving”
- Analysis of memory safety in production LLM systems
- Case studies: Rust-based vs. Python-based serving
- Recommendation: Rust for mission-critical systems
💼 Industry Adoption
Companies Using Rust for LLM/AI
New in 2025:
- Anthropic: Claude API infrastructure partly in Rust
- Hugging Face: Candle framework investment
- Microsoft: RustAssistant research
- Cloudflare: AI workers với Rust
Continued Growth:
- Discord: ML features in Rust
- Amazon: SageMaker components
- Google: Internal ML tooling
🎯 Performance Benchmarks
Rust vs. Python for LLM Inference (2025)
Llama 2 7B Inference (Tokens/Second):
Environment | Python (llama.cpp) | Rust (Candle) | Speedup
--------------------|-------------------|---------------|--------
CPU (Intel i9) | 2.1 tok/s | 2.5 tok/s | 1.2x
CUDA (RTX 4090) | 38 tok/s | 45 tok/s | 1.2x
Metal (M2 Max) | 20 tok/s | 25 tok/s | 1.25x
Memory Usage | ~8.5 GB | ~7.2 GB | 15% less
API Serving Latency:
Metric | Python (FastAPI) | Rust (Axum) | Improvement
--------------------|------------------|---------------|------------
p50 latency | 125ms | 45ms | 2.8x
p99 latency | 850ms | 180ms | 4.7x
Throughput (req/s) | 120 | 340 | 2.8x
🛠️ Developer Experience
New Tools & Features (2025)
IDE Support:
- Rust-Analyzer: Improved LLM-related completions
- VSCode extensions: Rust LLM snippets
- IntelliJ IDEA: Better async support for LLM code
Debugging:
- Better error messages for async LLM code
- Improved trace logging for LLM requests
- Performance profiling tools
Testing:
- Mock LLM response frameworks
- Snapshot testing for LLM outputs
- Property-based testing for LLM pipelines
📈 Market Trends
Job Market (2025)
Growth Areas:
- “Rust + ML Engineer” listings: +250% YoY
- “LLMOps with Rust” positions emerging
- Average salary: $140k-$200k (US)
Required Skills:
- Rust systems programming
- LLM integration (OpenAI, Anthropic APIs)
- Vector databases (Qdrant, Milvus)
- async/await patterns
- Deployment (Docker, Kubernetes)
🔮 Future Outlook
Expected in Late 2025 / 2026
Technology:
- More mature training frameworks in Rust
- Better GPU support across platforms
- Standardized LLM serving protocols
- Improved quantization techniques
Ecosystem:
- Consolidated libraries (fewer, better maintained)
- More pre-trained models in Rust-native formats
- Better Python interop for gradual migration
- Enterprise-grade LLM frameworks
Adoption:
- More companies using Rust for production LLM serving
- Rust becoming default choice for performance-critical ML
- Growing educational resources
🎓 Learning Resources (2025)
Courses
Books & Guides
- “Rust for ML: Writing High-Performance Inference Engines in 2025”
- “Rust and LLM AI Infrastructure” (Better Programming)
Community
- awesome-rust-llm - Curated list
- Rust ML Discord
- r/rust discussions về ML/AI
📊 Statistics Summary
Rust LLM Ecosystem (2025):
- 50+ active LLM-related crates
- 12+ supported LLM providers
- 3 major frameworks (Rig, llm, Candle)
- 80%+ developers interested in using Rust for ML
- 250% YoY growth in job postings
🔗 Important Links
- DevQualityEval Benchmark
- Microsoft RustAssistant
- awesome-rust-llm
- Candle by Hugging Face
- Coursera Rust for LLMOps
Kết luận
2025 là năm breakthrough cho Rust trong LLM space. Với research từ Microsoft, benchmarks chính thức, educational resources chất lượng cao, và growing industry adoption, Rust đã established itself như một serious choice cho production LLM systems.
Performance advantages, memory safety, và ecosystem maturity làm cho Rust increasingly attractive cho teams xây dựng scalable, reliable LLM applications.
Functional Programming
Rust không phải là một pure functional programming language như Haskell hay ML, nhưng Rust có rất nhiều concepts từ functional programming, giúp code ngắn gọn, dễ maintain và ít bugs hơn.
Các đặc điểm Functional Programming trong Rust
- Immutability by default - Variables mặc định là immutable
- First-class functions - Functions là values
- Higher-order functions - Functions nhận/trả về functions khác
- Iterators - Lazy evaluation
- Pattern matching - Declarative code
- No null -
Option<T>thay vì null - Algebraic data types - Enums với data
Immutability
#![allow(unused)]
fn main() {
// ✅ Functional style - immutable by default
let x = 5;
let y = x + 1; // Tạo giá trị mới thay vì modify
let z = y * 2;
println!("{}", z); // 12
// ❌ Imperative style - mutation
let mut x = 5;
x = x + 1;
x = x * 2;
println!("{}", x); // 12
}Transform thay vì Mutate
#![allow(unused)]
fn main() {
// ✅ Functional - transform
fn add_one_to_all(numbers: Vec<i32>) -> Vec<i32> {
numbers.into_iter()
.map(|n| n + 1)
.collect()
}
// ❌ Imperative - mutate
fn add_one_to_all_mut(numbers: &mut Vec<i32>) {
for n in numbers.iter_mut() {
*n += 1;
}
}
}Higher-Order Functions
Functions nhận functions khác làm arguments:
fn apply_twice<F>(f: F, x: i32) -> i32
where
F: Fn(i32) -> i32,
{
f(f(x))
}
fn add_one(x: i32) -> i32 {
x + 1
}
fn main() {
let result = apply_twice(add_one, 5);
println!("{}", result); // 7
}Returning Functions
fn make_adder(n: i32) -> impl Fn(i32) -> i32 {
move |x| x + n
}
fn main() {
let add_five = make_adder(5);
println!("{}", add_five(10)); // 15
let add_ten = make_adder(10);
println!("{}", add_ten(10)); // 20
}Iterators và Lazy Evaluation
Iterators trong Rust là lazy - chỉ compute khi cần:
fn main() {
let numbers = vec![1, 2, 3, 4, 5];
// Lazy - chưa execute
let doubled = numbers.iter()
.map(|x| {
println!("Doubling {}", x);
x * 2
});
// Chỉ execute khi collect
let result: Vec<_> = doubled.collect();
println!("{:?}", result);
}Chaining Operations
fn main() {
let result: i32 = (1..=10)
.filter(|x| x % 2 == 0) // Chỉ số chẵn
.map(|x| x * x) // Bình phương
.sum(); // Tổng
println!("{}", result); // 220 (4 + 16 + 36 + 64 + 100)
}Combinators
map, filter, fold
fn main() {
let numbers = vec![1, 2, 3, 4, 5];
// map: transform từng phần tử
let doubled: Vec<_> = numbers.iter()
.map(|x| x * 2)
.collect();
// filter: lọc phần tử
let evens: Vec<_> = numbers.iter()
.filter(|x| *x % 2 == 0)
.collect();
// fold: reduce về một giá trị
let sum = numbers.iter()
.fold(0, |acc, x| acc + x);
println!("Doubled: {:?}", doubled); // [2, 4, 6, 8, 10]
println!("Evens: {:?}", evens); // [2, 4]
println!("Sum: {}", sum); // 15
}Option combinators
fn main() {
let maybe_number: Option<i32> = Some(5);
// map: transform nếu có giá trị
let doubled = maybe_number.map(|x| x * 2);
println!("{:?}", doubled); // Some(10)
// and_then: chain operations
let result = Some(5)
.and_then(|x| Some(x * 2))
.and_then(|x| if x > 5 { Some(x) } else { None });
println!("{:?}", result); // Some(10)
// filter: giữ nếu match condition
let filtered = Some(5)
.filter(|x| *x > 3);
println!("{:?}", filtered); // Some(5)
}Result combinators
fn divide(a: f64, b: f64) -> Result<f64, String> {
if b == 0.0 {
Err("Division by zero".to_string())
} else {
Ok(a / b)
}
}
fn main() {
let result = divide(10.0, 2.0)
.map(|x| x * 2.0) // Transform OK value
.map_err(|e| format!("Error: {}", e)); // Transform Err value
println!("{:?}", result); // Ok(10.0)
}Pattern Matching
Declarative control flow:
enum Message {
Quit,
Move { x: i32, y: i32 },
Write(String),
}
fn process(msg: Message) -> String {
match msg {
Message::Quit => "Quitting".to_string(),
Message::Move { x, y } => format!("Moving to ({}, {})", x, y),
Message::Write(text) => format!("Writing: {}", text),
}
}
fn main() {
let msg = Message::Move { x: 10, y: 20 };
println!("{}", process(msg));
}Recursion
// Factorial
fn factorial(n: u64) -> u64 {
match n {
0 | 1 => 1,
n => n * factorial(n - 1),
}
}
// Tail-recursive (được optimize)
fn factorial_tail(n: u64) -> u64 {
fn helper(n: u64, acc: u64) -> u64 {
match n {
0 | 1 => acc,
n => helper(n - 1, n * acc),
}
}
helper(n, 1)
}
fn main() {
println!("{}", factorial(5)); // 120
println!("{}", factorial_tail(5)); // 120
}Functional Error Handling
Sử dụng ? operator
#![allow(unused)]
fn main() {
use std::fs::File;
use std::io::{self, Read};
fn read_file(path: &str) -> io::Result<String> {
let mut file = File::open(path)?;
let mut contents = String::new();
file.read_to_string(&mut contents)?;
Ok(contents)
}
}Chaining với and_then
fn parse_number(s: &str) -> Result<i32, std::num::ParseIntError> {
s.parse()
}
fn double(n: i32) -> Result<i32, String> {
Ok(n * 2)
}
fn main() {
let result = parse_number("42")
.map_err(|e| e.to_string())
.and_then(double);
println!("{:?}", result); // Ok(84)
}Closure Capture
fn main() {
let x = 5;
// Capture by reference
let print_x = || println!("x = {}", x);
print_x();
// Capture by move
let consume_x = move || println!("x = {}", x);
consume_x();
// x vẫn có thể dùng vì i32 impl Copy
}Ví dụ thực tế: Data Processing
#[derive(Debug)]
struct User {
id: u32,
name: String,
age: u32,
active: bool,
}
fn main() {
let users = vec![
User { id: 1, name: "Alice".to_string(), age: 25, active: true },
User { id: 2, name: "Bob".to_string(), age: 30, active: false },
User { id: 3, name: "Charlie".to_string(), age: 35, active: true },
User { id: 4, name: "Diana".to_string(), age: 28, active: true },
];
// Functional pipeline
let active_user_names: Vec<String> = users.into_iter()
.filter(|u| u.active) // Chỉ active users
.filter(|u| u.age >= 30) // Age >= 30
.map(|u| u.name.to_uppercase()) // Uppercase names
.collect();
println!("{:?}", active_user_names); // ["CHARLIE"]
}Functional vs Imperative
Imperative style
#![allow(unused)]
fn main() {
fn sum_of_squares_imperative(numbers: &[i32]) -> i32 {
let mut sum = 0;
for &n in numbers {
if n % 2 == 0 {
sum += n * n;
}
}
sum
}
}Functional style
fn sum_of_squares_functional(numbers: &[i32]) -> i32 {
numbers.iter()
.filter(|n| *n % 2 == 0)
.map(|n| n * n)
.sum()
}
fn main() {
let nums = vec![1, 2, 3, 4, 5, 6];
println!("{}", sum_of_squares_imperative(&nums)); // 56
println!("{}", sum_of_squares_functional(&nums)); // 56
}Ưu điểm của functional style:
- Dễ đọc, dễ hiểu intent
- Ít bugs (không có mutable state)
- Dễ test
- Có thể parallel dễ dàng (với
rayon)
Parallel Processing với Rayon
use rayon::prelude::*;
fn main() {
let numbers: Vec<i32> = (1..=1000).collect();
// Sequential
let sum: i32 = numbers.iter().map(|x| x * x).sum();
// Parallel - chỉ cần thêm par_iter()!
let sum_parallel: i32 = numbers.par_iter().map(|x| x * x).sum();
println!("Sum: {}", sum);
println!("Sum (parallel): {}", sum_parallel);
}Best Practices
1. Prefer iterators over loops
#![allow(unused)]
fn main() {
// ✅ Functional
let sum: i32 = (1..=10).sum();
// ❌ Imperative
let mut sum = 0;
for i in 1..=11 {
sum += i;
}
}2. Use combinators
#![allow(unused)]
fn main() {
// ✅ Functional
let result = Some(5)
.map(|x| x * 2)
.filter(|x| *x > 5);
// ❌ Imperative
let result = if let Some(x) = Some(5) {
let doubled = x * 2;
if doubled > 5 {
Some(doubled)
} else {
None
}
} else {
None
};
}3. Immutability when possible
#![allow(unused)]
fn main() {
// ✅ Immutable
let numbers = vec![1, 2, 3];
let doubled: Vec<_> = numbers.iter().map(|x| x * 2).collect();
// ❌ Mutable
let mut numbers = vec![1, 2, 3];
for n in &mut numbers {
*n *= 2;
}
}4. Chain operations
#![allow(unused)]
fn main() {
// ✅ Chaining
let result = data
.into_iter()
.filter(|x| x.is_valid())
.map(|x| x.process())
.collect();
// ❌ Intermediate variables
let filtered: Vec<_> = data.into_iter().filter(|x| x.is_valid()).collect();
let processed: Vec<_> = filtered.into_iter().map(|x| x.process()).collect();
}Khi nào không nên dùng FP?
- Performance critical code - Imperative có thể nhanh hơn trong một số cases
- Quá nhiều allocations - Iterator chains có thể allocate nhiều
- Complex state management - Mutation có thể clear hơn
Tổng kết
Functional programming trong Rust:
- ✅ Immutability by default
- ✅ Powerful iterators
- ✅ Rich combinators (map, filter, fold…)
- ✅ Pattern matching
- ✅ Type-safe error handling
- ✅ Easy parallelization
Best practices:
- Prefer iterators và chaining
- Use combinators
- Immutability when possible
- Declarative over imperative
- Test pure functions
References
Use borrowed types for arguments
Khi viết functions trong Rust, prefer sử dụng borrowed types (&str, &[T], &Path) thay vì owned types (String, Vec
Vấn đề với Owned Types
// ❌ Không tốt - chỉ nhận String
fn print_message(message: String) {
println!("{}", message);
}
fn main() {
let msg = "Hello";
// Phải convert từ &str sang String
print_message(msg.to_string()); // Allocate bộ nhớ không cần thiết
// Hoặc
print_message(String::from(msg));
}Giải pháp: Borrowed Types
// ✅ Tốt - nhận &str (borrowed)
fn print_message(message: &str) {
println!("{}", message);
}
fn main() {
// Có thể truyền &str
print_message("Hello");
// Hoặc String (tự động coerce sang &str)
let owned = String::from("World");
print_message(&owned);
}String vs &str
Owned: String
// ❌ Hạn chế - chỉ nhận String
fn process(s: String) {
println!("{}", s.to_uppercase());
}
fn main() {
let owned = String::from("hello");
process(owned); // OK
// String literal phải convert
process("world".to_string()); // Phải allocate
// Không thể dùng owned sau khi pass
// println!("{}", owned); // ❌ Error: value moved
}Borrowed: &str
// ✅ Linh hoạt - nhận cả &str và &String
fn process(s: &str) {
println!("{}", s.to_uppercase());
}
fn main() {
let owned = String::from("hello");
process(&owned); // OK, borrow
// String literal - không cần allocate
process("world"); // OK, zero-cost
// Có thể dùng owned sau đó
println!("{}", owned); // ✅ OK
}Vec vs &[T]
Owned: Vec
// ❌ Hạn chế - chỉ nhận Vec
fn sum(numbers: Vec<i32>) -> i32 {
numbers.iter().sum()
}
fn main() {
let vec = vec![1, 2, 3];
let total = sum(vec);
// ❌ Error: vec đã bị moved
// println!("{:?}", vec);
}Borrowed: &[T]
// ✅ Linh hoạt - nhận slice
fn sum(numbers: &[i32]) -> i32 {
numbers.iter().sum()
}
fn main() {
// Với Vec
let vec = vec![1, 2, 3];
let total = sum(&vec);
println!("{:?}", vec); // ✅ OK, vẫn dùng được
// Với array
let arr = [4, 5, 6];
let total2 = sum(&arr);
// Với slice
let total3 = sum(&vec[1..]);
println!("{}, {}, {}", total, total2, total3);
}PathBuf vs &Path
Owned: PathBuf
use std::path::PathBuf;
// ❌ Hạn chế
fn read_config(path: PathBuf) -> std::io::Result<String> {
std::fs::read_to_string(path)
}
fn main() -> std::io::Result<()> {
let path = PathBuf::from("config.toml");
read_config(path)?;
// ❌ path đã moved, không dùng được nữa
Ok(())
}Borrowed: &Path
use std::path::Path;
// ✅ Linh hoạt
fn read_config(path: &Path) -> std::io::Result<String> {
std::fs::read_to_string(path)
}
fn main() -> std::io::Result<()> {
// Với PathBuf
let path = std::path::PathBuf::from("config.toml");
read_config(&path)?;
// Với &str
read_config(Path::new("config.toml"))?;
// path vẫn dùng được
println!("{:?}", path);
Ok(())
}Bảng so sánh
| Owned Type | Borrowed Type | Use Case |
|---|---|---|
String | &str | Text processing, không cần ownership |
Vec<T> | &[T] | Read-only access to collection |
PathBuf | &Path | File path operations |
OsString | &OsStr | OS strings |
CString | &CStr | C strings |
Khi nào dùng Owned Types?
1. Function cần ownership
#![allow(unused)]
fn main() {
// ✅ Cần owned để store hoặc modify
fn store_message(message: String) -> Message {
Message { content: message } // Move vào struct
}
struct Message {
content: String,
}
}2. Function modify data
// ✅ Cần owned để modify
fn uppercase(mut s: String) -> String {
s.make_ascii_uppercase();
s
}
fn main() {
let msg = "hello".to_string();
let upper = uppercase(msg);
println!("{}", upper); // HELLO
}3. Builder pattern
struct Request {
url: String,
method: String,
}
impl Request {
fn new(url: String) -> Self {
Self {
url,
method: "GET".to_string(),
}
}
// Builder methods take ownership
fn method(mut self, method: String) -> Self {
self.method = method;
self
}
}
fn main() {
let req = Request::new("https://example.com".to_string())
.method("POST".to_string());
}Generic over Borrowed Types
Sử dụng generic bounds để accept cả owned và borrowed:
use std::borrow::Borrow;
// Accept cả String và &str
fn print<S: AsRef<str>>(s: S) {
println!("{}", s.as_ref());
}
fn main() {
print("hello"); // &str
print(String::from("world")); // String
print(&String::from("rust")); // &String
}With collections
use std::borrow::Borrow;
fn contains<T, Q>(slice: &[T], item: &Q) -> bool
where
T: Borrow<Q>,
Q: Eq + ?Sized,
{
slice.iter().any(|x| x.borrow() == item)
}
fn main() {
let strings = vec![
String::from("hello"),
String::from("world"),
];
// Tìm với &str, không cần String
println!("{}", contains(&strings, "hello")); // true
}Deref Coercion
Rust tự động convert owned → borrowed trong một số cases:
fn print_str(s: &str) {
println!("{}", s);
}
fn main() {
let owned = String::from("hello");
// Auto deref: &String → &str
print_str(&owned);
// Tương đương với:
// print_str(&*owned);
// print_str(owned.as_str());
}Ví dụ thực tế
File operations
use std::path::Path;
use std::fs;
// ✅ Linh hoạt với &Path
fn file_exists(path: &Path) -> bool {
path.exists()
}
fn read_file(path: &Path) -> std::io::Result<String> {
fs::read_to_string(path)
}
fn main() -> std::io::Result<()> {
// Nhiều cách gọi
println!("{}", file_exists(Path::new("config.toml")));
let path_buf = std::path::PathBuf::from("data.txt");
println!("{}", file_exists(&path_buf));
Ok(())
}API design
use std::collections::HashMap;
struct UserService {
users: HashMap<String, User>,
}
struct User {
name: String,
email: String,
}
impl UserService {
// ✅ Borrowed - không cần own the key
fn get_user(&self, username: &str) -> Option<&User> {
self.users.get(username)
}
// ✅ Owned - cần store the user
fn add_user(&mut self, username: String, user: User) {
self.users.insert(username, user);
}
}
fn main() {
let mut service = UserService {
users: HashMap::new(),
};
// Add với owned
service.add_user(
"alice".to_string(),
User {
name: "Alice".to_string(),
email: "alice@example.com".to_string(),
},
);
// Get với borrowed
if let Some(user) = service.get_user("alice") {
println!("{}", user.name);
}
}Performance Considerations
Zero-cost với borrowed types
// ✅ Zero allocations
fn process(s: &str) {
for c in s.chars() {
// Process character
}
}
fn main() {
process("hello"); // Không allocate memory
}Unnecessary allocations với owned
// ❌ Allocates mỗi lần gọi
fn process(s: String) {
for c in s.chars() {
// Process character
}
}
fn main() {
process("hello".to_string()); // Allocate memory
}Best Practices
1. Default to borrowed
#![allow(unused)]
fn main() {
// ✅ Bắt đầu với borrowed
fn process(data: &str) { }
// Chỉ dùng owned nếu thực sự cần
fn store(data: String) -> Storage {
Storage { data }
}
}2. Use AsRef/Borrow traits
#![allow(unused)]
fn main() {
// ✅ Generic over borrowed/owned
fn process<S: AsRef<str>>(s: S) {
println!("{}", s.as_ref());
}
}3. Document ownership requirements
#![allow(unused)]
fn main() {
/// Process data without taking ownership
fn process(data: &[u8]) { }
/// Takes ownership and stores the data
fn store(data: Vec<u8>) -> DataStore {
DataStore { data }
}
}4. Consider &mut for in-place modification
#![allow(unused)]
fn main() {
// ✅ Modify in-place
fn uppercase_in_place(s: &mut String) {
s.make_ascii_uppercase();
}
// ❌ Unnecessary allocation
fn uppercase(s: String) -> String {
s.to_uppercase()
}
}Common Patterns
Accepting both owned and borrowed
#![allow(unused)]
fn main() {
// Pattern 1: AsRef
fn print1<S: AsRef<str>>(s: S) {
println!("{}", s.as_ref());
}
// Pattern 2: Into
fn print2(s: impl Into<String>) {
let s: String = s.into();
println!("{}", s);
}
// Pattern 3: Borrow
use std::borrow::Borrow;
fn print3<S: Borrow<str>>(s: S) {
println!("{}", s.borrow());
}
}Tổng kết
Use borrowed types for arguments:
- ✅ More flexible (accept owned và borrowed)
- ✅ Better performance (avoid clones)
- ✅ Clearer ownership semantics
- ✅ Idiomatic Rust
Guidelines:
- Default to borrowed (&str, &[T], &Path)
- Use owned khi cần ownership (store, modify, return)
- Use AsRef/Borrow cho flexible APIs
- Document ownership requirements
Common borrowed types:
&strinstead ofString&[T]instead ofVec<T>&Pathinstead ofPathBuf&Tinstead ofT(when possible)
References
Concatenating strings with format!
Trong Rust, khi cần nối các chuỗi với nhau, sử dụng macro format! là một idiom phổ biến và hiệu quả.
Tại sao nên dùng format!?
format! macro tạo ra một String mới bằng cách kết hợp các giá trị theo một template định sẵn. Điều này giúp code dễ đọc và bảo trì hơn so với việc nối chuỗi thủ công.
Ví dụ cơ bản
#![allow(unused)]
fn main() {
let name = "Duyet";
let age = 18;
let message = format!("{} is {} years old", name, age);
println!("{}", message);
// Output: Duyet is 18 years old
}Các cách sử dụng khác
Named parameters
#![allow(unused)]
fn main() {
let message = format!("{name} is {age} years old", name = "Duyet", age = 18);
println!("{}", message);
// Output: Duyet is 18 years old
}Formatting numbers
#![allow(unused)]
fn main() {
let pi = 3.14159265359;
let formatted = format!("Pi rounded to 2 decimals: {:.2}", pi);
println!("{}", formatted);
// Output: Pi rounded to 2 decimals: 3.14
let hex = format!("Hex: 0x{:X}", 255);
println!("{}", hex);
// Output: Hex: 0xFF
}Debug formatting
#![allow(unused)]
fn main() {
#[derive(Debug)]
struct Point {
x: i32,
y: i32,
}
let point = Point { x: 10, y: 20 };
let debug_output = format!("Point: {:?}", point);
println!("{}", debug_output);
// Output: Point: Point { x: 10, y: 20 }
let pretty_output = format!("Point:\n{:#?}", point);
println!("{}", pretty_output);
// Output (pretty-printed):
// Point:
// Point {
// x: 10,
// y: 20,
// }
}Padding và Alignment
#![allow(unused)]
fn main() {
// Padding với spaces
let padded = format!("{:>10}", "Rust");
println!("'{}'", padded);
// Output: ' Rust'
// Padding bên trái
let left_padded = format!("{:<10}", "Rust");
println!("'{}'", left_padded);
// Output: 'Rust '
// Center alignment
let centered = format!("{:^10}", "Rust");
println!("'{}'", centered);
// Output: ' Rust '
// Padding với custom character
let custom = format!("{:*>10}", "Rust");
println!("{}", custom);
// Output: ******Rust
}So sánh với các cách khác
❌ Không nên: Sử dụng + operator
#![allow(unused)]
fn main() {
let name = "Duyet".to_string();
let age = 18;
// Phức tạp và khó đọc
let message = name + " is " + &age.to_string() + " years old";
}❌ Không nên: Sử dụng push_str nhiều lần
#![allow(unused)]
fn main() {
let mut message = String::new();
message.push_str("Duyet");
message.push_str(" is ");
message.push_str(&18.to_string());
message.push_str(" years old");
// Dài dòng và khó maintain
}✅ Nên: Sử dụng format!
#![allow(unused)]
fn main() {
let message = format!("{} is {} years old", "Duyet", 18);
// Ngắn gọn, dễ đọc, dễ maintain
}Hiệu năng
Lưu ý rằng format! sẽ allocate memory mới cho String kết quả. Nếu bạn đang trong một vòng lặp hiệu năng cao và cần tối ưu, có thể cân nhắc sử dụng write! macro để ghi trực tiếp vào một buffer có sẵn:
#![allow(unused)]
fn main() {
use std::fmt::Write;
let mut output = String::new();
write!(&mut output, "{} is {} years old", "Duyet", 18).unwrap();
}Tham khảo
Constructor
Rust không có constructors như các ngôn ngữ hướng đối tượng khác (Java, C++, etc.). Thay vào đó, Rust sử dụng convention là tạo Associated Functions có tên new để khởi tạo instance mới.
Convention cơ bản: new()
struct Point {
x: i32,
y: i32,
}
impl Point {
fn new(x: i32, y: i32) -> Point {
Point { x, y }
}
}
fn main() {
let point = Point::new(1, 2);
println!("({}, {})", point.x, point.y);
}Tại sao không dùng pub cho fields?
Trong thực tế, chúng ta thường giữ các fields là private và cung cấp constructor new() để kiểm soát việc khởi tạo:
pub struct Rectangle {
width: u32,
height: u32,
}
impl Rectangle {
// Constructor đảm bảo width và height hợp lệ
pub fn new(width: u32, height: u32) -> Result<Self, String> {
if width == 0 || height == 0 {
return Err("Width and height must be positive".to_string());
}
Ok(Rectangle { width, height })
}
pub fn area(&self) -> u32 {
self.width * self.height
}
}
fn main() {
let rect = Rectangle::new(10, 20).unwrap();
println!("Area: {}", rect.area());
// Lỗi compile: fields are private
// println!("{}", rect.width);
}Multiple Constructors
Rust cho phép tạo nhiều constructor methods với tên khác nhau:
pub struct Color {
r: u8,
g: u8,
b: u8,
}
impl Color {
pub fn new(r: u8, g: u8, b: u8) -> Self {
Color { r, g, b }
}
pub fn from_hex(hex: u32) -> Self {
Color {
r: ((hex >> 16) & 0xFF) as u8,
g: ((hex >> 8) & 0xFF) as u8,
b: (hex & 0xFF) as u8,
}
}
pub fn black() -> Self {
Color { r: 0, g: 0, b: 0 }
}
pub fn white() -> Self {
Color { r: 255, g: 255, b: 255 }
}
}
fn main() {
let c1 = Color::new(255, 0, 0); // Red
let c2 = Color::from_hex(0x00FF00); // Green
let c3 = Color::black(); // Black
let c4 = Color::white(); // White
}Builder Pattern cho complex constructors
Khi struct có nhiều parameters, nên sử dụng Builder Pattern:
pub struct User {
username: String,
email: String,
age: Option<u32>,
country: Option<String>,
}
pub struct UserBuilder {
username: String,
email: String,
age: Option<u32>,
country: Option<String>,
}
impl User {
pub fn builder(username: String, email: String) -> UserBuilder {
UserBuilder {
username,
email,
age: None,
country: None,
}
}
}
impl UserBuilder {
pub fn age(mut self, age: u32) -> Self {
self.age = Some(age);
self
}
pub fn country(mut self, country: String) -> Self {
self.country = Some(country);
self
}
pub fn build(self) -> User {
User {
username: self.username,
email: self.email,
age: self.age,
country: self.country,
}
}
}
fn main() {
let user = User::builder(
"duyet".to_string(),
"duyet@example.com".to_string()
)
.age(25)
.country("Vietnam".to_string())
.build();
}Constructor với validation
pub struct Email {
address: String,
}
impl Email {
pub fn new(address: String) -> Result<Self, &'static str> {
if !address.contains('@') {
return Err("Invalid email address");
}
Ok(Email { address })
}
pub fn as_str(&self) -> &str {
&self.address
}
}
fn main() {
match Email::new("user@example.com".to_string()) {
Ok(email) => println!("Valid email: {}", email.as_str()),
Err(e) => println!("Error: {}", e),
}
}Khi nào dùng new() vs default()?
new(): Khi cần parameters để khởi tạodefault(): Khi có thể tạo instance với giá trị mặc định hợp lý
Thông thường, struct sẽ implement cả hai:
#[derive(Debug)]
pub struct Config {
pub host: String,
pub port: u16,
}
impl Config {
pub fn new(host: String, port: u16) -> Self {
Config { host, port }
}
}
impl Default for Config {
fn default() -> Self {
Config {
host: "localhost".to_string(),
port: 8080,
}
}
}
fn main() {
let config1 = Config::new("example.com".to_string(), 3000);
let config2 = Config::default();
println!("{:?}", config1);
println!("{:?}", config2);
}The Default Trait (Default Constructors)
Rust hỗ trợ default constructor thông qua Default trait.
struct Point {
x: i32,
y: i32,
}
impl Default for Point {
fn default() -> Self {
Point { x: 0, y: 0 }
}
}
fn main() {
let point = Point::default();
println!("({}, {})", point.x, point.y);
}Default còn có thể sử dụng như một derive nếu tất cả các field của struct implement Default.
#[derive(Default)]
struct Point {
x: i32,
y: i32,
}
fn main() {
let point = Point::default();
println!("({}, {})", point.x, point.y);
}Thường với một struct cơ bản chúng ta thường sẽ phải cần cả new và Default method.
Một ưu điểm của Default là struct hoặc enum của chúng ta có thể được sử dụng một cách
generic trong các trường hợp như dưới đây hoặc cho tất cả các *or_default() functions
trong standard library.
#![allow(unused)]
fn main() {
fn create<T: Default>() -> T {
T::default()
}
}Finalisation in Destructors
Trong Rust, destructors (hay còn gọi là “drop handlers”) được gọi tự động khi một value ra khỏi scope. Điều này cho phép chúng ta thực hiện các tác vụ cleanup một cách tự động và an toàn.
Drop Trait
Rust cung cấp Drop trait để customize hành vi khi một value bị dropped:
struct FileHandler {
filename: String,
}
impl Drop for FileHandler {
fn drop(&mut self) {
println!("Closing file: {}", self.filename);
// Cleanup code ở đây
}
}
fn main() {
let handler = FileHandler {
filename: "data.txt".to_string(),
};
println!("Working with file...");
// Khi handler ra khỏi scope, drop() sẽ được gọi tự động
}
// Output:
// Working with file...
// Closing file: data.txtUse Cases phổ biến
1. Resource Management (RAII Pattern)
RAII (Resource Acquisition Is Initialization) là một pattern quan trọng trong Rust:
use std::fs::File;
use std::io::Write;
struct Logger {
file: File,
}
impl Logger {
fn new(path: &str) -> std::io::Result<Self> {
Ok(Logger {
file: File::create(path)?,
})
}
fn log(&mut self, message: &str) -> std::io::Result<()> {
writeln!(self.file, "{}", message)
}
}
impl Drop for Logger {
fn drop(&mut self) {
writeln!(self.file, "Logger closed").ok();
// File sẽ tự động được đóng khi ra khỏi scope
}
}
fn main() -> std::io::Result<()> {
{
let mut logger = Logger::new("app.log")?;
logger.log("Application started")?;
logger.log("Processing data")?;
// Logger tự động flush và đóng file khi ra khỏi scope
}
Ok(())
}2. Lock Management
Sử dụng Drop để tự động release locks:
use std::sync::{Arc, Mutex};
use std::thread;
fn main() {
let data = Arc::new(Mutex::new(vec![1, 2, 3]));
let mut handles = vec![];
for i in 0..3 {
let data = Arc::clone(&data);
let handle = thread::spawn(move || {
let mut locked_data = data.lock().unwrap();
locked_data.push(i);
// Lock tự động được release khi locked_data ra khỏi scope
});
handles.push(handle);
}
for handle in handles {
handle.join().unwrap();
}
println!("Result: {:?}", *data.lock().unwrap());
}3. Connection Pooling
struct DatabaseConnection {
id: u32,
}
impl DatabaseConnection {
fn new(id: u32) -> Self {
println!("Opening database connection #{}", id);
DatabaseConnection { id }
}
fn execute(&self, query: &str) {
println!("Connection #{} executing: {}", self.id, query);
}
}
impl Drop for DatabaseConnection {
fn drop(&mut self) {
println!("Closing database connection #{}", self.id);
// Return connection to pool
}
}
fn main() {
{
let conn = DatabaseConnection::new(1);
conn.execute("SELECT * FROM users");
// Connection tự động được trả về pool khi ra khỏi scope
}
println!("Connection has been returned to pool");
}Thứ tự Drop
Rust drop các values theo thứ tự ngược lại với thứ tự chúng được tạo ra:
struct PrintOnDrop(&'static str);
impl Drop for PrintOnDrop {
fn drop(&mut self) {
println!("Dropping: {}", self.0);
}
}
fn main() {
let _first = PrintOnDrop("First");
let _second = PrintOnDrop("Second");
let _third = PrintOnDrop("Third");
println!("End of main");
}
// Output:
// End of main
// Dropping: Third
// Dropping: Second
// Dropping: FirstDrop với Struct Fields
Fields trong một struct được dropped theo thứ tự khai báo:
struct Container {
first: PrintOnDrop,
second: PrintOnDrop,
}
impl Drop for Container {
fn drop(&mut self) {
println!("Dropping Container");
}
}
fn main() {
let _container = Container {
first: PrintOnDrop("Field 1"),
second: PrintOnDrop("Field 2"),
};
}
// Output:
// Dropping Container
// Dropping: Field 1
// Dropping: Field 2Manual Drop với std::mem::drop
Đôi khi cần drop một value trước khi nó ra khỏi scope:
fn main() {
let handler = FileHandler {
filename: "data.txt".to_string(),
};
println!("Before manual drop");
drop(handler); // Gọi destructor ngay lập tức
println!("After manual drop");
// handler không còn tồn tại ở đây
}Lưu ý quan trọng
1. Không thể gọi drop() trực tiếp
#![allow(unused)]
fn main() {
// ❌ Sai: không thể gọi drop() method trực tiếp
// handler.drop(); // Compile error!
// ✅ Đúng: sử dụng std::mem::drop
drop(handler);
}2. Drop không được gọi trong panic
Nếu panic xảy ra trong drop(), chương trình sẽ abort:
#![allow(unused)]
fn main() {
impl Drop for Risky {
fn drop(&mut self) {
// Tránh panic trong drop!
if let Err(e) = self.cleanup() {
eprintln!("Cleanup failed: {}", e);
// Log error nhưng không panic
}
}
}
}3. Copy types không có Drop
Types implement Copy không thể implement Drop:
#![allow(unused)]
fn main() {
// ❌ Compile error: Copy và Drop không thể cùng tồn tại
#[derive(Copy, Clone)]
struct CopyType {
value: i32,
}
impl Drop for CopyType {
fn drop(&mut self) {
// Error: Copy type cannot implement Drop
}
}
}Best Practices
- Giữ
drop()đơn giản: Tránh logic phức tạp trong destructor - Không panic: Handle errors gracefully trong
drop() - Sử dụng RAII: Tự động quản lý resources thông qua scope
- Document behavior: Ghi rõ side effects của destructor
Ví dụ thực tế: Guard Pattern
use std::fs::File;
use std::io::Write;
struct FileGuard {
file: Option<File>,
path: String,
}
impl FileGuard {
fn new(path: &str) -> std::io::Result<Self> {
Ok(FileGuard {
file: Some(File::create(path)?),
path: path.to_string(),
})
}
fn write(&mut self, data: &str) -> std::io::Result<()> {
if let Some(ref mut file) = self.file {
writeln!(file, "{}", data)
} else {
Err(std::io::Error::new(
std::io::ErrorKind::Other,
"File already closed",
))
}
}
}
impl Drop for FileGuard {
fn drop(&mut self) {
if let Some(file) = self.file.take() {
drop(file); // Explicit flush
println!("File '{}' has been closed", self.path);
}
}
}
fn main() -> std::io::Result<()> {
let mut guard = FileGuard::new("output.txt")?;
guard.write("Hello")?;
guard.write("World")?;
// File sẽ tự động được flush và close
Ok(())
}Tham khảo
Temporary mutability
Thường chúng ta sẽ cần phải prepare hoặc process dữ liệu, nhưng sau đó chúng ta không cần tính mutable nữa, để tránh lỗi phát sinh ngoài ý muốn.
Temporary mutability giúp chúng ta tạo một biến mutable trong một phạm vi nhất định, sau đó biến đó sẽ trở thành immutable.
Nested block:
#![allow(unused)]
fn main() {
let data = {
let mut data = get_vec();
data.sort();
data
};
// Here `data` is immutable.
}Variable rebinding:
#![allow(unused)]
fn main() {
let mut data = get_vec();
data.sort();
let data = data;
// Here `data` is immutable.
}Ưu điểm
Giúp tránh side effect. Compiler sẽ báo lỗi nếu chúng ta vô tình thay đổi giá trị của biến immutable.
Aim For Immutability in Rust
Immutable code giúp dễ test, parallelize, dễ refactor, và dễ đọc hơn. Chúng ta không cần lo lắng quá nhiều về side effect.
Rust ép chúng ta sử dụng immutable code mặc định, sử dụng từ khoá mut khi chúng ta cần mutable. Trong khi hầu hết các ngôn ngữ khác làm ngược lại.
fn main() {
let mut x = 42;
black_box(&mut x);
println!("{}", x);
}
fn black_box(x: &mut i32) {
*x = 23;
}Vì sao chúng ta cần tránh sử dụng mutable?
Vì chúng ta hầu hết sử dụng state rất nhiều để xử lý logic.
Vấn đề là con người rất khó để theo dõi state khi chuyển từ giá trị này sang giá trị khác, dẫn đến nhầm lẫn hoặc sai sót.
Immutable code giúp chúng ta giảm thiểu lỗi, giúp chúng ta dễ dàng theo dõi logic.
Trong Rust, variable mặc định là immutable, chúng ta cần sử dụng từ khoá mut để khai báo mutable.
#![allow(unused)]
fn main() {
let x = 100;
x = 200; // error: re-assignment of immutable variable `x`
}Move thay về mut
Vẫn sẽ an toàn nếu chúng ta chọn “move” variable vào function hoặc struct để lý. Bằng cách này chúng ta có thể tránh việc sử dụng mut và copy giá trị, nhất là với các struct lớn.
fn black_box(x: i32) {
println!("{}", x);
}
fn main() {
let x = 42;
black_box(x);
}Đừng ngại .copy()
Nếu bạn có sự lựa chọn giữa mut và .copy(), đôi khi copy không quá tệ như bạn nghĩ.
Chương trình có thể chậm đi một chút, tuy nhiên immutability có thể giúp bạn tránh khỏi vài ngày debug và nhức đầu.
References
- https://corrode.dev/blog/immutability/
- http://xion.io/post/code/rust-borrowchk-tricks.html
mem::replace và mem::take
std::mem::replace và std::mem::take là hai functions hữu ích giúp thay thế giá trị trong một mutable reference mà không cần clone, đặc biệt hữu dụng khi làm việc với ownership.
mem::replace
mem::replace lấy giá trị hiện tại và thay thế bằng giá trị mới, trả về giá trị cũ:
use std::mem;
fn main() {
let mut v = vec![1, 2, 3];
let old_v = mem::replace(&mut v, vec![4, 5, 6]);
println!("Old: {:?}", old_v); // [1, 2, 3]
println!("New: {:?}", v); // [4, 5, 6]
}Signature
#![allow(unused)]
fn main() {
pub fn replace<T>(dest: &mut T, src: T) -> T
}mem::take
mem::take là shorthand cho mem::replace(&mut dest, Default::default()):
use std::mem;
fn main() {
let mut v = vec![1, 2, 3];
let old_v = mem::take(&mut v);
println!("Old: {:?}", old_v); // [1, 2, 3]
println!("New: {:?}", v); // []
}Signature
#![allow(unused)]
fn main() {
pub fn take<T: Default>(dest: &mut T) -> T
}Use Cases
1. Modify enum variants
Một trong những use case phổ biến nhất là khi cần modify một enum variant:
use std::mem;
enum State {
Active { count: u32 },
Inactive,
}
impl State {
fn increment(&mut self) {
// Lấy ownership của self để pattern match
let old_state = mem::take(self);
*self = match old_state {
State::Active { count } => State::Active { count: count + 1 },
State::Inactive => State::Active { count: 1 },
};
}
}
fn main() {
let mut state = State::Inactive;
state.increment();
if let State::Active { count } = state {
println!("Count: {}", count); // Count: 1
}
}Nếu không dùng mem::take, bạn sẽ gặp borrow checker error:
#![allow(unused)]
fn main() {
// ❌ Compile error!
fn increment_wrong(&mut self) {
*self = match self {
// Error: cannot move out of `*self` which is behind a mutable reference
State::Active { count } => State::Active { count: count + 1 },
State::Inactive => State::Active { count: 1 },
};
}
}2. Implement methods on structs với owned fields
use std::mem;
struct Buffer {
data: Vec<u8>,
}
impl Buffer {
fn process(&mut self) -> Vec<u8> {
// Lấy data ra để xử lý, thay bằng empty vec
let data = mem::take(&mut self.data);
// Process data
let processed = data.into_iter()
.map(|b| b.wrapping_add(1))
.collect();
processed
}
}
fn main() {
let mut buffer = Buffer {
data: vec![1, 2, 3],
};
let result = buffer.process();
println!("Processed: {:?}", result); // [2, 3, 4]
println!("Buffer now: {:?}", buffer.data); // []
}3. Swap values
Sử dụng mem::replace để swap values:
use std::mem;
fn main() {
let mut a = 5;
let mut b = 10;
// Swap using mem::replace
let temp = mem::replace(&mut a, mem::replace(&mut b, a));
println!("a: {}, b: {}", a, b); // a: 10, b: 5
// Hoặc đơn giản hơn, dùng std::mem::swap
mem::swap(&mut a, &mut b);
println!("a: {}, b: {}", a, b); // a: 5, b: 10
}4. Avoid clone trong loops
use std::mem;
struct Node {
value: i32,
next: Option<Box<Node>>,
}
impl Node {
fn into_values(self) -> Vec<i32> {
let mut values = Vec::new();
let mut current = Some(Box::new(self));
while let Some(mut node) = current {
values.push(node.value);
// Take ownership of next without cloning
current = mem::take(&mut node.next);
}
values
}
}
fn main() {
let list = Node {
value: 1,
next: Some(Box::new(Node {
value: 2,
next: Some(Box::new(Node {
value: 3,
next: None,
})),
})),
};
let values = list.into_values();
println!("{:?}", values); // [1, 2, 3]
}5. Working with Option
use std::mem;
struct Cache {
data: Option<String>,
}
impl Cache {
fn take_data(&mut self) -> Option<String> {
mem::take(&mut self.data)
}
fn replace_data(&mut self, new_data: String) -> Option<String> {
mem::replace(&mut self.data, Some(new_data))
}
}
fn main() {
let mut cache = Cache {
data: Some("Hello".to_string()),
};
// Lấy data ra khỏi cache
let data = cache.take_data();
println!("Taken: {:?}", data); // Some("Hello")
println!("Cache: {:?}", cache.data); // None
// Replace với data mới
let old = cache.replace_data("World".to_string());
println!("Old: {:?}", old); // None
println!("Cache: {:?}", cache.data); // Some("World")
}mem::replace vs clone
#![allow(unused)]
fn main() {
use std::mem;
fn process_with_clone(data: &mut Vec<i32>) {
let copy = data.clone(); // ❌ Expensive: allocates new memory
// Process copy...
}
fn process_with_replace(data: &mut Vec<i32>) {
let owned = mem::replace(data, Vec::new()); // ✅ No allocation
// Process owned...
}
}So sánh mem::take vs mem::replace
| Feature | mem::take | mem::replace |
|---|---|---|
| Yêu cầu | T: Default | Bất kỳ T nào |
| Giá trị thay thế | Default::default() | Giá trị tùy chỉnh |
| Use case | Khi muốn giá trị mặc định | Khi cần giá trị cụ thể |
Khi nào nên dùng?
✅ Nên dùng khi:
- Cần move value ra khỏi mutable reference
- Muốn tránh clone expensive values
- Làm việc với enums có multiple variants
- Implement state machines
❌ Không cần dùng khi:
- Type implement
Copy - Có thể dùng
Option::take()(choOptiontypes) - Clone là acceptable
Pattern thực tế: Option::take()
Với Option<T>, có thể dùng method take() thay vì mem::take():
#![allow(unused)]
fn main() {
struct Handler {
resource: Option<String>,
}
impl Handler {
fn consume(&mut self) -> Option<String> {
// Cả hai cách đều work
// Cách 1: Option::take()
self.resource.take()
// Cách 2: mem::take() - ít common hơn cho Option
// std::mem::take(&mut self.resource)
}
}
}Best Practices
- Prefer
mem::takekhi cóDefault: Ngắn gọn hơnmem::replace - Document side effects: Ghi rõ function modifies state
- Consider
Option::take(): ChoOptiontypes - Combine với pattern matching: Rất hữu dụng với enums
Tham khảo
Privacy for Extensibility
Một trong những idioms quan trọng nhất trong Rust API design là sử dụng privacy (tính riêng tư) để đảm bảo API có thể được mở rộng trong tương lai mà không breaking changes.
Nguyên tắc cơ bản
Mặc định, hãy giữ mọi thứ private, chỉ expose những gì cần thiết.
Điều này cho phép bạn thay đổi implementation details trong tương lai mà không ảnh hưởng đến users của library.
Ví dụ: Struct Fields
❌ Không nên: Public fields
pub struct User {
pub username: String,
pub email: String,
pub age: u32,
}
fn main() {
let user = User {
username: "duyet".to_string(),
email: "duyet@example.com".to_string(),
age: 25,
};
// Users có thể truy cập và modify trực tiếp
println!("{}", user.age);
}Vấn đề:
- Không thể thêm validation
- Không thể track changes
- Không thể thay đổi internal representation
- Breaking change nếu rename hoặc xóa field
✅ Nên: Private fields với accessor methods
pub struct User {
username: String,
email: String,
age: u32,
}
impl User {
pub fn new(username: String, email: String, age: u32) -> Result<Self, String> {
if age > 150 {
return Err("Invalid age".to_string());
}
if !email.contains('@') {
return Err("Invalid email".to_string());
}
Ok(User { username, email, age })
}
pub fn username(&self) -> &str {
&self.username
}
pub fn email(&self) -> &str {
&self.email
}
pub fn age(&self) -> u32 {
self.age
}
pub fn set_email(&mut self, email: String) -> Result<(), String> {
if !email.contains('@') {
return Err("Invalid email".to_string());
}
self.email = email;
Ok(())
}
}
fn main() {
let user = User::new(
"duyet".to_string(),
"duyet@example.com".to_string(),
25,
).unwrap();
println!("{}", user.age());
}Ưu điểm:
- Có thể thêm validation logic
- Có thể thay đổi internal representation
- Có thể track changes, logging
- API ổn định hơn
Non-exhaustive Enums
Sử dụng #[non_exhaustive] để cho phép thêm variants trong tương lai:
#![allow(unused)]
fn main() {
#[non_exhaustive]
pub enum Error {
NotFound,
PermissionDenied,
Timeout,
}
// Trong tương lai có thể thêm:
// NetworkError,
// DatabaseError,
// ...mà không breaking existing code
}Users buộc phải có default case khi match:
#![allow(unused)]
fn main() {
fn handle_error(error: Error) {
match error {
Error::NotFound => println!("Not found"),
Error::PermissionDenied => println!("Permission denied"),
Error::Timeout => println!("Timeout"),
// Bắt buộc phải có _ case
_ => println!("Other error"),
}
}
}Non-exhaustive Structs
Tương tự với structs, #[non_exhaustive] prevent users khởi tạo trực tiếp:
#![allow(unused)]
fn main() {
#[non_exhaustive]
pub struct Config {
pub host: String,
pub port: u16,
}
impl Config {
pub fn new(host: String, port: u16) -> Self {
Config { host, port }
}
}
}Users không thể sử dụng struct literal syntax:
#![allow(unused)]
fn main() {
// ❌ Compile error!
// let config = Config {
// host: "localhost".to_string(),
// port: 8080,
// };
// ✅ Must use constructor
let config = Config::new("localhost".to_string(), 8080);
}Builder Pattern cho Extensibility
Builder pattern giúp thêm fields mới mà không breaking changes:
pub struct HttpClient {
timeout: u64,
retry_count: u32,
user_agent: String,
}
pub struct HttpClientBuilder {
timeout: u64,
retry_count: u32,
user_agent: String,
}
impl HttpClient {
pub fn builder() -> HttpClientBuilder {
HttpClientBuilder {
timeout: 30,
retry_count: 3,
user_agent: "MyClient/1.0".to_string(),
}
}
}
impl HttpClientBuilder {
pub fn timeout(mut self, timeout: u64) -> Self {
self.timeout = timeout;
self
}
pub fn retry_count(mut self, count: u32) -> Self {
self.retry_count = count;
self
}
pub fn user_agent(mut self, agent: String) -> Self {
self.user_agent = agent;
self
}
pub fn build(self) -> HttpClient {
HttpClient {
timeout: self.timeout,
retry_count: self.retry_count,
user_agent: self.user_agent,
}
}
}
fn main() {
let client = HttpClient::builder()
.timeout(60)
.retry_count(5)
.build();
}Trong tương lai có thể thêm field mới:
#![allow(unused)]
fn main() {
pub struct HttpClientBuilder {
timeout: u64,
retry_count: u32,
user_agent: String,
// Thêm mới - không breaking change!
max_redirects: u32,
}
impl HttpClientBuilder {
// Thêm method mới
pub fn max_redirects(mut self, max: u32) -> Self {
self.max_redirects = max;
self
}
}
// Existing code vẫn hoạt động bình thường!
let client = HttpClient::builder()
.timeout(60)
.build();
}Private modules
Sử dụng private modules để ẩn implementation details:
#![allow(unused)]
fn main() {
// lib.rs
mod internal {
// Private helper functions
pub(crate) fn helper() {
// ...
}
}
pub mod api {
// Public API
pub fn public_function() {
crate::internal::helper();
}
}
}Sealed Trait Pattern
Prevent users implement trait của bạn:
#![allow(unused)]
fn main() {
mod sealed {
pub trait Sealed {}
}
pub trait MyTrait: sealed::Sealed {
fn do_something(&self);
}
// Chỉ types trong module này có thể implement MyTrait
impl sealed::Sealed for MyType {}
impl MyTrait for MyType {
fn do_something(&self) {
// ...
}
}
// Users không thể implement MyTrait cho types của họ
// vì không thể access sealed::Sealed
}Visibility Modifiers
Rust cung cấp nhiều levels của visibility:
#![allow(unused)]
fn main() {
pub struct Container {
pub public_field: i32, // Accessible everywhere
pub(crate) crate_field: i32, // Accessible within crate
pub(super) parent_field: i32, // Accessible in parent module
private_field: i32, // Accessible in same module
}
}Real-world Example: Database Client
#![allow(unused)]
fn main() {
pub struct Database {
// Private: có thể thay đổi từ String sang URL type
connection_string: String,
// Private: có thể switch sang connection pool
max_connections: u32,
}
impl Database {
pub fn connect(url: &str) -> Result<Self, String> {
// Validation
if url.is_empty() {
return Err("Empty URL".to_string());
}
Ok(Database {
connection_string: url.to_string(),
max_connections: 10,
})
}
pub fn with_max_connections(url: &str, max: u32) -> Result<Self, String> {
let mut db = Self::connect(url)?;
db.max_connections = max;
Ok(db)
}
pub fn execute(&self, query: &str) -> Result<Vec<String>, String> {
// Implementation có thể thay đổi hoàn toàn
println!("Executing: {}", query);
Ok(vec![])
}
}
}Trong tương lai có thể thay đổi implementation:
#![allow(unused)]
fn main() {
use std::sync::Arc;
pub struct Database {
// Thay đổi internal structure
connection_pool: Arc<ConnectionPool>,
config: DatabaseConfig,
}
// Public API không thay đổi!
impl Database {
pub fn connect(url: &str) -> Result<Self, String> {
// New implementation
// ...
}
pub fn execute(&self, query: &str) -> Result<Vec<String>, String> {
// New implementation using pool
// ...
}
}
}Best Practices
- Start private: Mặc định mọi thứ private, expose dần khi cần
- Use
#[non_exhaustive]: Cho enums và structs có thể mở rộng - Prefer methods over public fields: Giữ control và flexibility
- Document stability: Ghi rõ API nào stable, nào experimental
- Use semantic versioning: Breaking changes = major version bump
Anti-patterns
❌ Tránh expose internal types:
#![allow(unused)]
fn main() {
// ❌ Bad
pub use internal::InternalType;
pub fn process() -> InternalType {
// ...
}
}✅ Wrap hoặc convert:
#![allow(unused)]
fn main() {
// ✅ Good
pub struct PublicType {
// ...
}
pub fn process() -> PublicType {
let internal = internal::InternalType::new();
PublicType::from(internal)
}
}Tham khảo
Iterating over Option
Option<T> trong Rust implement IntoIterator, điều này cho phép chúng ta sử dụng Option trong các iterator chains một cách elegant và expressive.
Cơ bản
Option<T> hoạt động như một iterator có 0 hoặc 1 phần tử:
fn main() {
let some = Some(5);
let none: Option<i32> = None;
// Some(5) iterate 1 lần
for value in some {
println!("Value: {}", value); // Prints: Value: 5
}
// None không iterate lần nào
for value in none {
println!("This won't print");
}
}Tại sao hữu dụng?
1. Combining với iterator methods
fn main() {
let numbers = vec![1, 2, 3, 4, 5];
let filter_value = Some(3);
let result: Vec<i32> = numbers
.into_iter()
.filter(|&n| n > 2)
.chain(filter_value) // Thêm Option vào iterator chain
.collect();
println!("{:?}", result); // [3, 4, 5, 3]
}2. FlatMap với Option
fn parse_number(s: &str) -> Option<i32> {
s.parse().ok()
}
fn main() {
let strings = vec!["1", "two", "3", "four", "5"];
let numbers: Vec<i32> = strings
.iter()
.flat_map(|s| parse_number(s)) // flat_map tự động unwrap Option
.collect();
println!("{:?}", numbers); // [1, 3, 5]
}3. Filter_map alternative
fn main() {
let values = vec![Some(1), None, Some(3), None, Some(5)];
// Cách 1: filter + map
let sum1: i32 = values.iter()
.filter(|v| v.is_some())
.map(|v| v.unwrap())
.sum();
// Cách 2: filter_map (idiomatic)
let sum2: i32 = values.iter()
.filter_map(|&v| v)
.sum();
// Cách 3: flatten (Option implements IntoIterator)
let sum3: i32 = values.iter()
.flatten()
.sum();
println!("{}, {}, {}", sum1, sum2, sum3); // 9, 9, 9
}Use Cases thực tế
1. Optional configuration
#![allow(unused)]
fn main() {
#[derive(Debug)]
struct Config {
host: String,
port: u16,
}
impl Config {
fn from_env() -> Self {
let custom_host = std::env::var("HOST").ok();
let custom_port = std::env::var("PORT").ok()
.and_then(|s| s.parse().ok());
let default_host = "localhost".to_string();
let default_port = 8080;
// Sử dụng chain để ưu tiên custom values
Config {
host: custom_host.into_iter()
.chain(Some(default_host))
.next()
.unwrap(),
port: custom_port.into_iter()
.chain(Some(default_port))
.next()
.unwrap(),
}
}
}
}2. Collecting optional values
fn get_user_by_id(id: u32) -> Option<String> {
match id {
1 => Some("Alice".to_string()),
2 => Some("Bob".to_string()),
_ => None,
}
}
fn main() {
let user_ids = vec![1, 3, 2, 5];
// Collect tất cả users tồn tại
let users: Vec<String> = user_ids
.into_iter()
.filter_map(get_user_by_id)
.collect();
println!("{:?}", users); // ["Alice", "Bob"]
}3. Chaining operations
fn divide(a: f64, b: f64) -> Option<f64> {
if b == 0.0 {
None
} else {
Some(a / b)
}
}
fn main() {
let result = divide(10.0, 2.0)
.into_iter()
.map(|x| x * 2.0)
.map(|x| x + 1.0)
.next();
println!("{:?}", result); // Some(11.0)
let error = divide(10.0, 0.0)
.into_iter()
.map(|x| x * 2.0)
.next();
println!("{:?}", error); // None
}4. Flattening nested Options
fn main() {
let nested = vec![
Some(Some(1)),
Some(None),
None,
Some(Some(4)),
];
// Flatten 2 levels
let flat: Vec<i32> = nested
.into_iter()
.flatten() // Option<Option<i32>> -> Option<i32>
.flatten() // Option<i32> -> i32
.collect();
println!("{:?}", flat); // [1, 4]
}So sánh các approaches
Kiểm tra và unwrap
#![allow(unused)]
fn main() {
// ❌ Verbose và unsafe
let value = if option.is_some() {
option.unwrap()
} else {
default_value
};
// ✅ Idiomatic
let value = option.unwrap_or(default_value);
}Iterate và collect
#![allow(unused)]
fn main() {
let options = vec![Some(1), None, Some(3)];
// ❌ Manual loop
let mut result = Vec::new();
for opt in options {
if let Some(val) = opt {
result.push(val);
}
}
// ✅ Using flatten
let result: Vec<i32> = options.into_iter().flatten().collect();
}Advanced: Custom iteration
struct MaybeValue<T> {
value: Option<T>,
}
impl<T> MaybeValue<T> {
fn new(value: Option<T>) -> Self {
MaybeValue { value }
}
fn process<F, U>(self, f: F) -> Option<U>
where
F: FnOnce(T) -> U,
{
self.value.into_iter().map(f).next()
}
}
fn main() {
let maybe = MaybeValue::new(Some(5));
let result = maybe.process(|x| x * 2);
println!("{:?}", result); // Some(10)
let empty = MaybeValue::new(None);
let result = empty.process(|x: i32| x * 2);
println!("{:?}", result); // None
}Option methods tương tự iterator
Option cung cấp nhiều methods tương tự iterator:
fn main() {
let value = Some(5);
// map
let doubled = value.map(|x| x * 2);
println!("{:?}", doubled); // Some(10)
// filter
let filtered = value.filter(|&x| x > 3);
println!("{:?}", filtered); // Some(5)
// and_then (flatMap)
let result = value.and_then(|x| {
if x > 3 {
Some(x * 2)
} else {
None
}
});
println!("{:?}", result); // Some(10)
}Kết hợp với Result
fn parse_and_double(s: &str) -> Option<i32> {
s.parse::<i32>()
.ok() // Result -> Option
.map(|n| n * 2)
}
fn main() {
let strings = vec!["1", "two", "3"];
let numbers: Vec<i32> = strings
.iter()
.filter_map(|s| parse_and_double(s))
.collect();
println!("{:?}", numbers); // [2, 6]
}Performance notes
Iterate over Option không có overhead so với if-let hay match:
#![allow(unused)]
fn main() {
// Tất cả đều compile thành cùng assembly code:
// 1. Using iterator
for value in option {
process(value);
}
// 2. Using if-let
if let Some(value) = option {
process(value);
}
// 3. Using match
match option {
Some(value) => process(value),
None => {}
}
}Best Practices
- Use
flatten()thay vìfilter_map(|x| x)cho clarity - Use
filter_map()khi cần transform + filter - Combine với iterator chains cho expressive code
- Avoid unnecessary unwrap - let iterator handle
None
Common patterns
fn main() {
let options = vec![Some(1), None, Some(3), None, Some(5)];
// Sum của tất cả Some values
let sum: i32 = options.iter().flatten().sum();
println!("Sum: {}", sum); // 9
// Count số lượng Some values
let count = options.iter().flatten().count();
println!("Count: {}", count); // 3
// Find first Some value
let first = options.iter().flatten().next();
println!("First: {:?}", first); // Some(1)
// Check có ít nhất 1 Some value
let has_some = options.iter().flatten().next().is_some();
println!("Has some: {}", has_some); // true
}Tham khảo
Pass variables to closure
Closures trong Rust có thể capture variables từ môi trường xung quanh. Tuy nhiên, việc pass variables vào closure đôi khi gặp các vấn đề với ownership và borrowing. Có nhiều patterns để giải quyết vấn đề này.
Vấn đề: Closure captures by reference
Mặc định, closures capture variables bằng reference:
fn main() {
let s = String::from("hello");
let closure = || {
println!("{}", s); // Capture by reference
};
closure();
println!("{}", s); // s vẫn valid
}Nhưng điều này gây vấn đề khi closure cần outlive scope:
#![allow(unused)]
fn main() {
fn create_closure() -> impl Fn() {
let s = String::from("hello");
// ❌ Compile error!
// || println!("{}", s) // s doesn't live long enough
}
}Solution 1: Move closure
Sử dụng move keyword để transfer ownership:
fn create_closure() -> impl Fn() {
let s = String::from("hello");
// ✅ Move ownership vào closure
move || println!("{}", s)
}
fn main() {
let closure = create_closure();
closure(); // "hello"
}Solution 2: Clone before move
Khi cần giữ lại original value:
fn main() {
let s = String::from("hello");
// Clone trước khi move
let s_clone = s.clone();
let closure = move || {
println!("{}", s_clone);
};
closure();
println!("Original: {}", s); // s vẫn còn
}Solution 3: Explicit move trong closure
fn main() {
let s = String::from("hello");
let closure = {
let s = s.clone(); // Clone trong block
move || println!("{}", s)
};
println!("Original: {}", s); // s vẫn còn
closure();
}Pattern: Rebinding với move
Một pattern phổ biến là rebinding variable với cùng tên:
fn main() {
let data = vec![1, 2, 3];
// Rebind để cho rõ ràng
let data = data.clone();
let closure = move || {
println!("{:?}", data);
};
// data original đã bị moved
closure();
}Working với multiple variables
❌ Vấn đề: Partial move
fn main() {
let x = String::from("x");
let y = String::from("y");
let closure = move || {
println!("{}", x); // Only need x
};
// ❌ Compile error! y cũng bị moved
// println!("{}", y);
}✅ Solution: Selective cloning
fn main() {
let x = String::from("x");
let y = String::from("y");
let x = x; // Chỉ move x
let closure = move || {
println!("{}", x);
};
println!("{}", y); // y vẫn available
closure();
}Use case: Thread spawning
use std::thread;
fn main() {
let data = vec![1, 2, 3, 4, 5];
// Clone để thread có ownership
let data_clone = data.clone();
let handle = thread::spawn(move || {
let sum: i32 = data_clone.iter().sum();
println!("Sum: {}", sum);
});
// data vẫn available trong main thread
println!("Original: {:?}", data);
handle.join().unwrap();
}Pattern: Reference counted (Arc)
Khi cần share data giữa nhiều closures/threads:
use std::sync::Arc;
use std::thread;
fn main() {
let data = Arc::new(vec![1, 2, 3, 4, 5]);
let mut handles = vec![];
for i in 0..3 {
let data = Arc::clone(&data);
let handle = thread::spawn(move || {
println!("Thread {}: {:?}", i, data);
});
handles.push(handle);
}
for handle in handles {
handle.join().unwrap();
}
}Capturing specific fields
Khi chỉ cần capture một field từ struct:
struct Config {
name: String,
value: i32,
}
fn main() {
let config = Config {
name: "test".to_string(),
value: 42,
};
// Chỉ capture field cần thiết
let name = config.name.clone();
let closure = move || {
println!("Name: {}", name);
};
// config.value vẫn available
println!("Value: {}", config.value);
closure();
}Pattern: Combinator style
fn main() {
let numbers = vec![1, 2, 3, 4, 5];
let threshold = 3;
// Clone threshold để use nhiều lần
let filtered: Vec<i32> = numbers
.iter()
.filter(|&&n| n > threshold)
.copied()
.collect();
println!("{:?}", filtered);
}Closure với mutable variables
fn main() {
let mut count = 0;
{
let mut closure = || {
count += 1;
println!("Count: {}", count);
};
closure(); // 1
closure(); // 2
}
println!("Final: {}", count); // 2
}Move với mutable
fn main() {
let mut count = 0;
let mut closure = move || {
count += 1; // Modifying moved copy
count
};
println!("{}", closure()); // 1
println!("{}", closure()); // 2
// Original count vẫn là 0
println!("Original: {}", count); // 0
}Real-world example: Event handlers
struct Button {
on_click: Box<dyn Fn()>,
}
impl Button {
fn new<F>(on_click: F) -> Self
where
F: Fn() + 'static,
{
Button {
on_click: Box::new(on_click),
}
}
fn click(&self) {
(self.on_click)();
}
}
fn main() {
let message = String::from("Button clicked!");
let button = Button::new(move || {
println!("{}", message);
});
button.click();
button.click();
}Pattern: Builder with closures
struct Request {
url: String,
on_success: Box<dyn Fn(String)>,
on_error: Box<dyn Fn(String)>,
}
impl Request {
fn new(url: String) -> RequestBuilder {
RequestBuilder {
url,
on_success: None,
on_error: None,
}
}
}
struct RequestBuilder {
url: String,
on_success: Option<Box<dyn Fn(String)>>,
on_error: Option<Box<dyn Fn(String)>>,
}
impl RequestBuilder {
fn on_success<F>(mut self, callback: F) -> Self
where
F: Fn(String) + 'static,
{
self.on_success = Some(Box::new(callback));
self
}
fn on_error<F>(mut self, callback: F) -> Self
where
F: Fn(String) + 'static,
{
self.on_error = Some(Box::new(callback));
self
}
fn send(self) {
// Simulate request
let success = true;
if success {
if let Some(callback) = self.on_success {
callback("Success!".to_string());
}
} else {
if let Some(callback) = self.on_error {
callback("Error!".to_string());
}
}
}
}
fn main() {
let prefix = String::from("[LOG]");
Request::new("https://api.example.com".to_string())
.on_success(move |msg| {
println!("{} {}", prefix, msg);
})
.send();
}Closure types và capture modes
Rust có 3 closure traits tùy thuộc vào cách capture:
fn main() {
let s = String::from("hello");
// FnOnce: Consumes captured variables
let consume = move || {
drop(s); // Takes ownership
};
consume();
// consume(); // ❌ Can't call twice
let s = String::from("hello");
// FnMut: Mutably borrows captured variables
let mut mutate = || {
s.push_str(" world"); // ❌ Won't compile: can't mutate
};
let mut s = String::from("hello");
// Fn: Immutably borrows captured variables
let borrow = || {
println!("{}", s); // Just reads
};
borrow();
borrow(); // ✅ Can call multiple times
}Best Practices
- Clone judiciously: Chỉ clone khi cần thiết
- Use
Arccho shared ownership: Đặc biệt với threads - Prefer
movecho long-lived closures: Tránh lifetime issues - Document capture behavior: Ghi rõ closure captures gì
- Consider using structs: Cho complex state management
Common mistakes
❌ Forgetting move with threads
#![allow(unused)]
fn main() {
// ❌ Won't compile
fn wrong() {
let data = vec![1, 2, 3];
thread::spawn(|| {
println!("{:?}", data); // Error: may outlive borrowed value
});
}
// ✅ Correct
fn correct() {
let data = vec![1, 2, 3];
thread::spawn(move || {
println!("{:?}", data);
});
}
}❌ Moving when you need to borrow
#![allow(unused)]
fn main() {
fn wrong() {
let data = vec![1, 2, 3];
let closure = move || {
println!("{:?}", data);
};
closure();
// println!("{:?}", data); // ❌ Error: value moved
}
// ✅ Just borrow
fn correct() {
let data = vec![1, 2, 3];
let closure = || {
println!("{:?}", data);
};
closure();
println!("{:?}", data); // ✅ Still available
}
}Tham khảo
let-else Pattern
let-else là một tính năng được giới thiệu trong Rust 1.65 (2022), cho phép pattern matching với early return một cách elegant và concise.
Syntax cơ bản
#![allow(unused)]
fn main() {
let PATTERN = EXPRESSION else {
DIVERGING_CODE
};
}Nếu pattern matching thất bại, code trong else block sẽ chạy. Block này phải diverge (return, break, continue, panic, etc.)
Ví dụ đơn giản
Với Option
fn process_value(maybe_value: Option<i32>) {
let Some(value) = maybe_value else {
println!("No value provided");
return;
};
// value có type i32, không phải Option<i32>
println!("Processing: {}", value);
}
fn main() {
process_value(Some(42)); // Processing: 42
process_value(None); // No value provided
}Với Result
fn parse_config(input: &str) -> Result<(), String> {
let Ok(port) = input.parse::<u16>() else {
return Err("Invalid port number".to_string());
};
println!("Port: {}", port);
Ok(())
}
fn main() {
parse_config("8080").ok(); // Port: 8080
parse_config("invalid").ok(); // Returns Err
}So sánh với các approaches khác
❌ Before let-else (verbose)
#![allow(unused)]
fn main() {
fn get_first_word(text: &str) -> Result<String, &'static str> {
let words: Vec<&str> = text.split_whitespace().collect();
// Cách 1: if-let với nested logic
if let Some(first) = words.first() {
Ok(first.to_string())
} else {
Err("No words found")
}
}
}#![allow(unused)]
fn main() {
fn get_first_word(text: &str) -> Result<String, &'static str> {
let words: Vec<&str> = text.split_whitespace().collect();
// Cách 2: match
match words.first() {
Some(first) => Ok(first.to_string()),
None => Err("No words found"),
}
}
}✅ With let-else (concise)
#![allow(unused)]
fn main() {
fn get_first_word(text: &str) -> Result<String, &'static str> {
let words: Vec<&str> = text.split_whitespace().collect();
let Some(first) = words.first() else {
return Err("No words found");
};
Ok(first.to_string())
}
}Use Cases
1. Function argument validation
fn create_user(name: Option<String>, age: Option<u32>) -> Result<User, String> {
let Some(name) = name else {
return Err("Name is required".to_string());
};
let Some(age) = age else {
return Err("Age is required".to_string());
};
if age < 18 {
return Err("Must be 18 or older".to_string());
}
Ok(User { name, age })
}
struct User {
name: String,
age: u32,
}
fn main() {
match create_user(Some("Alice".to_string()), Some(25)) {
Ok(user) => println!("Created user: {}", user.name),
Err(e) => println!("Error: {}", e),
}
}2. Parsing và validation
fn parse_port(s: &str) -> Result<u16, String> {
let Ok(port) = s.parse::<u16>() else {
return Err(format!("'{}' is not a valid port number", s));
};
if port < 1024 {
return Err(format!("Port {} is reserved", port));
}
Ok(port)
}
fn main() {
println!("{:?}", parse_port("8080")); // Ok(8080)
println!("{:?}", parse_port("invalid")); // Err(...)
println!("{:?}", parse_port("80")); // Err("Port 80 is reserved")
}3. Destructuring structs/tuples
struct Point {
x: i32,
y: i32,
}
fn process_point(maybe_point: Option<Point>) {
let Some(Point { x, y }) = maybe_point else {
println!("No point provided");
return;
};
println!("Point: ({}, {})", x, y);
}
fn main() {
process_point(Some(Point { x: 10, y: 20 }));
process_point(None);
}4. Working với enums
enum Message {
Text(String),
Number(i32),
}
fn process_text(msg: Message) -> Result<(), String> {
let Message::Text(content) = msg else {
return Err("Expected text message".to_string());
};
println!("Text: {}", content);
Ok(())
}
fn main() {
process_text(Message::Text("Hello".to_string())).ok();
process_text(Message::Number(42)).ok();
}5. Guard clauses
fn calculate_discount(price: f64, coupon: Option<String>) -> f64 {
let Some(code) = coupon else {
return price; // No discount
};
let discount = match code.as_str() {
"SAVE10" => 0.10,
"SAVE20" => 0.20,
_ => return price, // Invalid code
};
price * (1.0 - discount)
}
fn main() {
println!("{}", calculate_discount(100.0, Some("SAVE10".to_string()))); // 90
println!("{}", calculate_discount(100.0, None)); // 100
}Multiple let-else trong sequence
fn process_config(
host: Option<String>,
port: Option<String>,
) -> Result<(String, u16), String> {
let Some(host) = host else {
return Err("Host is required".to_string());
};
let Some(port_str) = port else {
return Err("Port is required".to_string());
};
let Ok(port) = port_str.parse::<u16>() else {
return Err(format!("Invalid port: {}", port_str));
};
Ok((host, port))
}
fn main() {
let result = process_config(
Some("localhost".to_string()),
Some("8080".to_string()),
);
println!("{:?}", result); // Ok(("localhost", 8080))
}Pattern với slices
fn get_first_two(numbers: &[i32]) -> Result<(i32, i32), &'static str> {
let [first, second, ..] = numbers else {
return Err("Need at least 2 elements");
};
Ok((*first, *second))
}
fn main() {
println!("{:?}", get_first_two(&[1, 2, 3])); // Ok((1, 2))
println!("{:?}", get_first_two(&[1])); // Err(...)
}Combining với other patterns
let-else + if-let
#![allow(unused)]
fn main() {
fn process_nested(value: Option<Option<i32>>) {
let Some(inner) = value else {
println!("Outer None");
return;
};
if let Some(number) = inner {
println!("Number: {}", number);
} else {
println!("Inner None");
}
}
}let-else + while-let
#![allow(unused)]
fn main() {
fn process_iterator(mut iter: impl Iterator<Item = Result<i32, String>>) {
while let Some(result) = iter.next() {
let Ok(value) = result else {
eprintln!("Skipping error");
continue;
};
println!("Value: {}", value);
}
}
}Best practices
✅ Use khi có early return
#![allow(unused)]
fn main() {
// ✅ Good: early return
fn process(value: Option<i32>) -> Result<i32, String> {
let Some(v) = value else {
return Err("No value".to_string());
};
Ok(v * 2)
}
}❌ Avoid cho simple cases
#![allow(unused)]
fn main() {
// ❌ Overkill for simple case
let Some(value) = option else {
panic!("No value");
};
// ✅ Better
let value = option.expect("No value");
}✅ Use cho validation chains
#![allow(unused)]
fn main() {
fn validate_user(
name: Option<String>,
email: Option<String>,
age: Option<u32>,
) -> Result<User, String> {
let Some(name) = name else {
return Err("Name required".to_string());
};
let Some(email) = email else {
return Err("Email required".to_string());
};
let Some(age) = age else {
return Err("Age required".to_string());
};
// All validations passed
Ok(User { name, age })
}
}Error messages
#![allow(unused)]
fn main() {
fn parse_number(s: &str) -> Result<i32, String> {
let Ok(num) = s.parse::<i32>() else {
// Có thể customize error message
return Err(format!(
"Failed to parse '{}' as number",
s
));
};
Ok(num)
}
}let-else vs unwrap/expect
#![allow(unused)]
fn main() {
// ❌ Using unwrap (panics)
let value = option.unwrap();
// ❌ Using expect (panics with message)
let value = option.expect("Value required");
// ✅ Using let-else (controlled error handling)
let Some(value) = option else {
return Err("Value required".to_string());
};
}Real-world example: Request handling
#![allow(unused)]
fn main() {
#[derive(Debug)]
struct Request {
path: String,
method: String,
body: Option<String>,
}
fn handle_create_user(req: Request) -> Result<String, String> {
// Validate method
if req.method != "POST" {
return Err(format!("Expected POST, got {}", req.method));
}
// Validate body exists
let Some(body) = req.body else {
return Err("Request body is required".to_string());
};
// Parse body as JSON (simplified)
let Ok(user_data) = serde_json::from_str::<serde_json::Value>(&body) else {
return Err("Invalid JSON".to_string());
};
// Extract name
let Some(name) = user_data.get("name").and_then(|v| v.as_str()) else {
return Err("Missing 'name' field".to_string());
};
Ok(format!("Created user: {}", name))
}
}Limitations
- else block must diverge: Phải return, break, continue, hoặc panic
- Cannot use với if-let chains: Chỉ work với
letstatements - Pattern must be refutable: Không work với irrefutable patterns
Tham khảo
Newtype Pattern
Newtype pattern sử dụng một tuple struct với một field duy nhất để tạo wrapper cho một type, tạo ra một type mới thay vì một alias. Pattern này giúp tăng type safety và tránh nhầm lẫn giữa các giá trị có cùng underlying type nhưng khác ý nghĩa.
Vấn đề
Khi làm việc với data, ta thường có nhiều giá trị cùng kiểu nhưng khác ý nghĩa:
// ❌ Dễ nhầm lẫn - tất cả đều là f64
fn calculate_distance(lat1: f64, lon1: f64, lat2: f64, lon2: f64) -> f64 {
// Dễ truyền sai thứ tự parameters
// ...
0.0
}
fn main() {
let latitude = 37.7749;
let longitude = -122.4194;
// Có thể vô tình đảo vị trí
calculate_distance(longitude, latitude, 0.0, 0.0); // ❌ Bug!
}Giải pháp: Newtype Pattern
// ✅ Type-safe với newtypes
struct Latitude(f64);
struct Longitude(f64);
struct Kilometers(f64);
fn calculate_distance(
lat1: Latitude,
lon1: Longitude,
lat2: Latitude,
lon2: Longitude
) -> Kilometers {
// Compiler đảm bảo đúng thứ tự!
Kilometers(0.0)
}
fn main() {
let lat = Latitude(37.7749);
let lon = Longitude(-122.4194);
// ✅ Type-safe - compiler sẽ báo lỗi nếu sai thứ tự
calculate_distance(lat, lon, Latitude(0.0), Longitude(0.0));
// ❌ Compile error!
// calculate_distance(lon, lat, Latitude(0.0), Longitude(0.0));
}Zero-Cost Abstraction
Newtypes không có runtime overhead:
struct UserId(u64);
struct ProductId(u64);
fn main() {
let user = UserId(12345);
let product = ProductId(67890);
// ❌ Compile error - không thể nhầm lẫn!
// let x: UserId = product;
// Compiled code giống như dùng trực tiếp u64
// Zero runtime cost!
}Ứng dụng trong Data Engineering
1. Phân biệt các loại IDs
#[derive(Debug, Clone, Copy, PartialEq, Eq, Hash)]
struct CustomerId(u64);
#[derive(Debug, Clone, Copy, PartialEq, Eq, Hash)]
struct OrderId(u64);
#[derive(Debug, Clone, Copy, PartialEq, Eq, Hash)]
struct ProductId(u64);
use std::collections::HashMap;
struct DataWarehouse {
customer_orders: HashMap<CustomerId, Vec<OrderId>>,
order_products: HashMap<OrderId, Vec<ProductId>>,
}
impl DataWarehouse {
fn get_customer_orders(&self, customer: CustomerId) -> Option<&Vec<OrderId>> {
self.customer_orders.get(&customer)
}
// ✅ Type system đảm bảo không truyền nhầm ID type
fn get_order_products(&self, order: OrderId) -> Option<&Vec<ProductId>> {
self.order_products.get(&order)
}
}
fn main() {
let customer = CustomerId(1001);
let order = OrderId(5001);
let warehouse = DataWarehouse {
customer_orders: HashMap::new(),
order_products: HashMap::new(),
};
// ✅ Type-safe
warehouse.get_customer_orders(customer);
// ❌ Compile error!
// warehouse.get_customer_orders(order);
}2. Units và Measurements
#[derive(Debug, Clone, Copy)]
struct Meters(f64);
#[derive(Debug, Clone, Copy)]
struct Feet(f64);
#[derive(Debug, Clone, Copy)]
struct Celsius(f64);
#[derive(Debug, Clone, Copy)]
struct Fahrenheit(f64);
impl Meters {
fn to_feet(self) -> Feet {
Feet(self.0 * 3.28084)
}
}
impl Feet {
fn to_meters(self) -> Meters {
Meters(self.0 / 3.28084)
}
}
impl Celsius {
fn to_fahrenheit(self) -> Fahrenheit {
Fahrenheit(self.0 * 9.0 / 5.0 + 32.0)
}
}
fn main() {
let height_m = Meters(1.75);
let height_ft = height_m.to_feet();
println!("Height: {:?} = {:?}", height_m, height_ft);
let temp_c = Celsius(25.0);
let temp_f = temp_c.to_fahrenheit();
println!("Temperature: {:?} = {:?}", temp_c, temp_f);
// ❌ Compile error - không thể cộng các units khác nhau!
// let x = height_m.0 + temp_c.0;
}3. Validated Data
use std::error::Error;
#[derive(Debug)]
struct Email(String);
impl Email {
fn new(email: String) -> Result<Self, Box<dyn Error>> {
if email.contains('@') && email.contains('.') {
Ok(Email(email))
} else {
Err("Invalid email format".into())
}
}
fn as_str(&self) -> &str {
&self.0
}
}
#[derive(Debug)]
struct PhoneNumber(String);
impl PhoneNumber {
fn new(phone: String) -> Result<Self, Box<dyn Error>> {
if phone.len() >= 10 {
Ok(PhoneNumber(phone))
} else {
Err("Phone number too short".into())
}
}
}
fn send_notification(email: Email, phone: PhoneNumber) {
// Email và PhoneNumber đã được validated!
println!("Sending to {} and {:?}", email.as_str(), phone);
}
fn main() -> Result<(), Box<dyn Error>> {
let email = Email::new("user@example.com".to_string())?;
let phone = PhoneNumber::new("1234567890".to_string())?;
send_notification(email, phone);
// ❌ Invalid data không thể tạo được Email
let bad_email = Email::new("notanemail".to_string());
assert!(bad_email.is_err());
Ok(())
}4. Currency và Money
#[derive(Debug, Clone, Copy, PartialEq, Eq)]
struct USD(i64); // Cents
#[derive(Debug, Clone, Copy, PartialEq, Eq)]
struct EUR(i64); // Cents
impl USD {
fn from_dollars(dollars: f64) -> Self {
USD((dollars * 100.0) as i64)
}
fn to_dollars(&self) -> f64 {
self.0 as f64 / 100.0
}
fn add(self, other: USD) -> USD {
USD(self.0 + other.0)
}
}
impl EUR {
fn from_euros(euros: f64) -> Self {
EUR((euros * 100.0) as i64)
}
fn to_euros(&self) -> f64 {
self.0 as f64 / 100.0
}
}
fn calculate_total_revenue(amounts: &[USD]) -> USD {
amounts.iter()
.fold(USD(0), |acc, &amount| acc.add(amount))
}
fn main() {
let price1 = USD::from_dollars(19.99);
let price2 = USD::from_dollars(29.99);
let total = price1.add(price2);
println!("Total: ${:.2}", total.to_dollars());
let euro_price = EUR::from_euros(45.50);
// ❌ Compile error - không thể cộng USD và EUR!
// let wrong = price1.add(euro_price);
// ✅ Type-safe calculations
let revenues = vec![
USD::from_dollars(100.0),
USD::from_dollars(250.5),
USD::from_dollars(75.25),
];
let total_revenue = calculate_total_revenue(&revenues);
println!("Total revenue: ${:.2}", total_revenue.to_dollars());
}Implementing Traits cho Newtypes
use std::fmt;
#[derive(Clone, Copy, PartialEq, Eq, PartialOrd, Ord, Hash)]
struct RowId(usize);
impl RowId {
fn new(id: usize) -> Self {
RowId(id)
}
fn value(&self) -> usize {
self.0
}
}
// Custom Display
impl fmt::Display for RowId {
fn fmt(&self, f: &mut fmt::Formatter<'_>) -> fmt::Result {
write!(f, "Row#{}", self.0)
}
}
// Custom Debug
impl fmt::Debug for RowId {
fn fmt(&self, f: &mut fmt::Formatter<'_>) -> fmt::Result {
write!(f, "RowId({})", self.0)
}
}
fn main() {
let row = RowId::new(42);
println!("{}", row); // Row#42
println!("{:?}", row); // RowId(42)
// Có thể dùng trong collections nhờ Hash, Eq
let mut rows = std::collections::HashSet::new();
rows.insert(row);
rows.insert(RowId::new(100));
println!("Rows: {:?}", rows);
}Deref Coercion
Cho phép newtype tự động convert sang underlying type trong một số contexts:
use std::ops::Deref;
struct DatabaseUrl(String);
impl DatabaseUrl {
fn new(url: String) -> Self {
DatabaseUrl(url)
}
}
impl Deref for DatabaseUrl {
type Target = str;
fn deref(&self) -> &Self::Target {
&self.0
}
}
fn connect(url: &str) {
println!("Connecting to: {}", url);
}
fn main() {
let db_url = DatabaseUrl::new("postgres://localhost:5432/mydb".to_string());
// ✅ Tự động deref từ &DatabaseUrl sang &str
connect(&db_url);
// ✅ Có thể gọi String methods
println!("Length: {}", db_url.len());
println!("Starts with postgres: {}", db_url.starts_with("postgres"));
}Ví dụ thực tế: Data Pipeline
use std::collections::HashMap;
// Newtypes cho data pipeline
#[derive(Debug, Clone, Hash, PartialEq, Eq)]
struct SourceId(String);
#[derive(Debug, Clone, Hash, PartialEq, Eq)]
struct DatasetId(String);
#[derive(Debug, Clone, Copy)]
struct Timestamp(i64);
#[derive(Debug, Clone, Copy)]
struct RecordCount(usize);
struct DataPipeline {
datasets: HashMap<DatasetId, DatasetInfo>,
}
#[derive(Debug)]
struct DatasetInfo {
source: SourceId,
last_updated: Timestamp,
record_count: RecordCount,
}
impl DataPipeline {
fn new() -> Self {
DataPipeline {
datasets: HashMap::new(),
}
}
fn add_dataset(
&mut self,
dataset_id: DatasetId,
source: SourceId,
timestamp: Timestamp,
count: RecordCount,
) {
self.datasets.insert(
dataset_id,
DatasetInfo {
source,
last_updated: timestamp,
record_count: count,
},
);
}
fn get_dataset(&self, dataset_id: &DatasetId) -> Option<&DatasetInfo> {
self.datasets.get(dataset_id)
}
}
fn main() {
let mut pipeline = DataPipeline::new();
let dataset = DatasetId("users_2024".to_string());
let source = SourceId("postgresql".to_string());
let timestamp = Timestamp(1704067200); // 2024-01-01
let count = RecordCount(1_000_000);
pipeline.add_dataset(dataset.clone(), source, timestamp, count);
if let Some(info) = pipeline.get_dataset(&dataset) {
println!("Dataset info: {:?}", info);
}
}Best Practices
1. Derive useful traits
#![allow(unused)]
fn main() {
// ✅ Derive các traits thường dùng
#[derive(Debug, Clone, Copy, PartialEq, Eq, Hash)]
struct TransactionId(u64);
#[derive(Debug, Clone, PartialEq)]
struct Amount(f64);
}2. Provide accessor methods
#![allow(unused)]
fn main() {
struct Score(f64);
impl Score {
fn new(value: f64) -> Self {
Score(value.max(0.0).min(100.0)) // Clamp 0-100
}
// Accessor
fn value(&self) -> f64 {
self.0
}
// Business logic
fn is_passing(&self) -> bool {
self.0 >= 60.0
}
}
}3. Implement conversion traits
struct Percentage(f64);
impl From<f64> for Percentage {
fn from(value: f64) -> Self {
Percentage(value)
}
}
impl From<Percentage> for f64 {
fn from(p: Percentage) -> Self {
p.0
}
}
fn main() {
let p: Percentage = 75.5.into();
let f: f64 = p.into();
println!("{}", f); // 75.5
}Khi nào nên dùng Newtype?
✅ Nên dùng khi:
- Phân biệt giá trị cùng type - IDs, measurements, currencies
- Validation - Email, phone, URL phải valid
- Type safety - Tránh truyền sai parameters
- Domain modeling - Express business concepts
- Implementing traits cho external types - Orphan rule workaround
❌ Không cần dùng khi:
- Simple local variables - Overhead không đáng
- Performance-critical code - Nếu cần optimize extreme
- Prototype code - Quá nhiều boilerplate ban đầu
Tổng kết
Newtype pattern là một idiom quan trọng trong Rust:
- ✅ Zero-cost abstraction
- ✅ Type safety tăng cao
- ✅ Self-documenting code
- ✅ Compile-time guarantees
- ✅ Tránh bugs phổ biến
Best practices:
- Dùng cho IDs, units, validated data
- Derive useful traits
- Provide accessor methods
- Implement conversion traits khi cần
- Document the invariants
References
- Newtype Pattern - Rust Design Patterns
- New Type Idiom - Rust By Example
- Advanced Types - The Rust Book
RAII Guards
RAII (Resource Acquisition Is Initialization) là một pattern quan trọng trong Rust, đảm bảo resources được giải phóng tự động khi object ra khỏi scope. RAII guards sử dụng pattern này để quản lý locks, files, connections và các resources khác một cách an toàn.
RAII trong Rust
Rust enforces RAII - khi một object đi ra khỏi scope, destructor của nó được gọi tự động:
struct Resource {
name: String,
}
impl Resource {
fn new(name: &str) -> Self {
println!("Acquiring resource: {}", name);
Resource {
name: name.to_string(),
}
}
}
impl Drop for Resource {
fn drop(&mut self) {
println!("Releasing resource: {}", self.name);
}
}
fn main() {
println!("Program start");
{
let _r = Resource::new("database");
println!("Using resource");
} // Resource tự động được drop ở đây
println!("Program end");
}Output:
Program start
Acquiring resource: database
Using resource
Releasing resource: database
Program end
Mutex Guards
Standard library sử dụng RAII guards cho mutex locks:
use std::sync::{Arc, Mutex};
use std::thread;
fn main() {
let counter = Arc::new(Mutex::new(0));
let mut handles = vec![];
for _ in 0..10 {
let counter = Arc::clone(&counter);
let handle = thread::spawn(move || {
// lock() trả về MutexGuard
let mut num = counter.lock().unwrap();
*num += 1;
// MutexGuard tự động unlock khi ra khỏi scope
});
handles.push(handle);
}
for handle in handles {
handle.join().unwrap();
}
println!("Result: {}", *counter.lock().unwrap());
}Custom RAII Guard
Tạo custom guard cho database connection:
use std::fmt;
struct DatabaseConnection {
name: String,
}
impl DatabaseConnection {
fn new(name: &str) -> Self {
println!("Opening database connection: {}", name);
DatabaseConnection {
name: name.to_string(),
}
}
fn execute(&self, query: &str) {
println!("[{}] Executing: {}", self.name, query);
}
}
impl Drop for DatabaseConnection {
fn drop(&mut self) {
println!("Closing database connection: {}", self.name);
}
}
fn main() {
{
let db = DatabaseConnection::new("postgres");
db.execute("SELECT * FROM users");
db.execute("INSERT INTO logs VALUES (...)");
// Connection tự động close khi db ra khỏi scope
}
println!("Connection đã được đóng");
}File Guards trong Data Engineering
use std::fs::File;
use std::io::{self, BufReader, BufRead, Write};
struct CsvWriter {
file: File,
records_written: usize,
}
impl CsvWriter {
fn new(path: &str) -> io::Result<Self> {
println!("Opening CSV file for writing: {}", path);
let file = File::create(path)?;
Ok(CsvWriter {
file,
records_written: 0,
})
}
fn write_record(&mut self, record: &str) -> io::Result<()> {
writeln!(self.file, "{}", record)?;
self.records_written += 1;
Ok(())
}
}
impl Drop for CsvWriter {
fn drop(&mut self) {
println!(
"Closing CSV file. Total records written: {}",
self.records_written
);
// File tự động flush và close
}
}
fn main() -> io::Result<()> {
{
let mut writer = CsvWriter::new("output.csv")?;
writer.write_record("name,age,city")?;
writer.write_record("Alice,30,NYC")?;
writer.write_record("Bob,25,SF")?;
// File tự động close khi writer ra khỏi scope
}
println!("File đã được đóng và flushed");
Ok(())
}Timer Guard cho Performance Tracking
use std::time::Instant;
struct Timer {
name: String,
start: Instant,
}
impl Timer {
fn new(name: &str) -> Self {
println!("Starting timer: {}", name);
Timer {
name: name.to_string(),
start: Instant::now(),
}
}
}
impl Drop for Timer {
fn drop(&mut self) {
let duration = self.start.elapsed();
println!("Timer '{}' finished: {:.2?}", self.name, duration);
}
}
fn process_data() {
let _timer = Timer::new("process_data");
// Simulate work
let mut sum = 0;
for i in 0..1_000_000 {
sum += i;
}
println!("Processing complete, sum = {}", sum);
// Timer tự động print elapsed time khi function return
}
fn main() {
process_data();
println!("Done");
}Transaction Guard
use std::cell::RefCell;
struct Database {
data: RefCell<Vec<String>>,
}
struct Transaction<'a> {
db: &'a Database,
changes: Vec<String>,
committed: bool,
}
impl Database {
fn new() -> Self {
Database {
data: RefCell::new(Vec::new()),
}
}
fn begin_transaction(&self) -> Transaction {
println!("BEGIN TRANSACTION");
Transaction {
db: self,
changes: Vec::new(),
committed: false,
}
}
fn get_data(&self) -> Vec<String> {
self.data.borrow().clone()
}
}
impl<'a> Transaction<'a> {
fn insert(&mut self, value: String) {
println!("INSERT: {}", value);
self.changes.push(value);
}
fn commit(mut self) {
println!("COMMIT");
let mut data = self.db.data.borrow_mut();
data.extend(self.changes.drain(..));
self.committed = true;
}
}
impl<'a> Drop for Transaction<'a> {
fn drop(&mut self) {
if !self.committed {
println!("ROLLBACK - transaction was not committed");
}
}
}
fn main() {
let db = Database::new();
// Transaction được commit
{
let mut tx = db.begin_transaction();
tx.insert("Record 1".to_string());
tx.insert("Record 2".to_string());
tx.commit();
}
println!("Data after commit: {:?}", db.get_data());
// Transaction bị rollback
{
let mut tx = db.begin_transaction();
tx.insert("Record 3".to_string());
// Không commit - sẽ tự động rollback
}
println!("Data after rollback: {:?}", db.get_data());
}Scoped Thread Guard
use std::thread;
use std::sync::mpsc;
struct Worker {
name: String,
handle: Option<thread::JoinHandle<()>>,
}
impl Worker {
fn new(name: &str) -> Self {
let name_clone = name.to_string();
let handle = thread::spawn(move || {
println!("Worker {} started", name_clone);
thread::sleep(std::time::Duration::from_millis(100));
println!("Worker {} finished", name_clone);
});
Worker {
name: name.to_string(),
handle: Some(handle),
}
}
}
impl Drop for Worker {
fn drop(&mut self) {
println!("Waiting for worker {} to finish...", self.name);
if let Some(handle) = self.handle.take() {
handle.join().unwrap();
}
println!("Worker {} cleaned up", self.name);
}
}
fn main() {
{
let _worker1 = Worker::new("A");
let _worker2 = Worker::new("B");
println!("Workers created");
// Workers tự động joined khi ra khỏi scope
}
println!("All workers finished");
}Data Pipeline Guard
use std::time::Instant;
struct PipelineStage {
name: String,
start_time: Instant,
items_processed: usize,
}
impl PipelineStage {
fn new(name: &str) -> Self {
println!("▶ Starting stage: {}", name);
PipelineStage {
name: name.to_string(),
start_time: Instant::now(),
items_processed: 0,
}
}
fn process_item(&mut self) {
self.items_processed += 1;
}
}
impl Drop for PipelineStage {
fn drop(&mut self) {
let duration = self.start_time.elapsed();
let rate = if duration.as_secs() > 0 {
self.items_processed as f64 / duration.as_secs_f64()
} else {
0.0
};
println!(
"✓ Finished stage: {} | Items: {} | Duration: {:.2?} | Rate: {:.2} items/sec",
self.name, self.items_processed, duration, rate
);
}
}
fn process_pipeline(data: &[i32]) {
{
let mut stage1 = PipelineStage::new("Extract");
for _ in data {
stage1.process_item();
}
}
{
let mut stage2 = PipelineStage::new("Transform");
for _ in data {
stage2.process_item();
// Simulate work
std::thread::sleep(std::time::Duration::from_micros(10));
}
}
{
let mut stage3 = PipelineStage::new("Load");
for _ in data {
stage3.process_item();
}
}
}
fn main() {
let data: Vec<i32> = (1..=1000).collect();
println!("Processing pipeline with {} items\n", data.len());
process_pipeline(&data);
println!("\nPipeline complete");
}Resource Pool Guard
use std::sync::{Arc, Mutex};
struct ConnectionPool {
connections: Arc<Mutex<Vec<String>>>,
}
struct PooledConnection {
connection: Option<String>,
pool: Arc<Mutex<Vec<String>>>,
}
impl ConnectionPool {
fn new(size: usize) -> Self {
let mut connections = Vec::new();
for i in 0..size {
connections.push(format!("Connection-{}", i));
}
ConnectionPool {
connections: Arc::new(Mutex::new(connections)),
}
}
fn acquire(&self) -> Option<PooledConnection> {
let mut pool = self.connections.lock().unwrap();
pool.pop().map(|conn| {
println!("Acquired: {}", conn);
PooledConnection {
connection: Some(conn),
pool: Arc::clone(&self.connections),
}
})
}
fn size(&self) -> usize {
self.connections.lock().unwrap().len()
}
}
impl PooledConnection {
fn execute(&self, query: &str) {
if let Some(conn) = &self.connection {
println!("[{}] Executing: {}", conn, query);
}
}
}
impl Drop for PooledConnection {
fn drop(&mut self) {
if let Some(conn) = self.connection.take() {
println!("Returning to pool: {}", conn);
let mut pool = self.pool.lock().unwrap();
pool.push(conn);
}
}
}
fn main() {
let pool = ConnectionPool::new(3);
println!("Pool size: {}\n", pool.size());
{
let conn1 = pool.acquire().unwrap();
conn1.execute("SELECT * FROM users");
{
let conn2 = pool.acquire().unwrap();
conn2.execute("SELECT * FROM orders");
println!("\nPool size during usage: {}", pool.size());
// conn2 returns to pool here
}
println!("Pool size after conn2 released: {}", pool.size());
// conn1 returns to pool here
}
println!("\nPool size after all released: {}", pool.size());
}Defer Pattern với Guards
struct Defer<F: FnMut()> {
f: Option<F>,
}
impl<F: FnMut()> Defer<F> {
fn new(f: F) -> Self {
Defer { f: Some(f) }
}
}
impl<F: FnMut()> Drop for Defer<F> {
fn drop(&mut self) {
if let Some(mut f) = self.f.take() {
f();
}
}
}
macro_rules! defer {
($($body:tt)*) => {
let _defer = Defer::new(|| {
$($body)*
});
};
}
fn main() {
println!("Function start");
defer! {
println!("This runs at the end!");
}
println!("Function middle");
defer! {
println!("This also runs at the end!");
}
println!("Function end");
// Defers execute in reverse order (LIFO)
}Best Practices
1. Always implement Drop correctly
#![allow(unused)]
fn main() {
struct FileHandle {
path: String,
handle: Option<std::fs::File>,
}
impl Drop for FileHandle {
fn drop(&mut self) {
if let Some(_file) = self.handle.take() {
println!("Closing file: {}", self.path);
// File automatically closed
}
}
}
}2. Use guards cho critical sections
#![allow(unused)]
fn main() {
use std::sync::Mutex;
struct CriticalData {
data: Mutex<Vec<i32>>,
}
impl CriticalData {
fn modify(&self) {
let mut guard = self.data.lock().unwrap();
guard.push(42);
// Lock tự động released
}
}
}3. Document guard lifetime
#![allow(unused)]
fn main() {
/// Returns a guard that holds a lock on the data.
/// The lock is released when the guard is dropped.
struct DataGuard<'a> {
data: &'a Mutex<String>,
_guard: std::sync::MutexGuard<'a, String>,
}
}Khi nào dùng RAII Guards?
✅ Nên dùng khi:
- Resource management - Files, connections, locks
- Cleanup logic - Phải chắc chắn cleanup được gọi
- Scoped operations - Timing, logging, metrics
- Transaction semantics - Commit/rollback
- Lock management - Mutex, RwLock
❌ Không phù hợp khi:
- Manual control needed - Cần explicit release
- Complex lifecycle - Guards không đủ flexible
- Performance overhead - Drop có cost cao
Ưu điểm
- ✅ Exception safe - Cleanup luôn được gọi
- ✅ No memory leaks - Resources tự động freed
- ✅ Clear ownership - Type system enforced
- ✅ Composable - Guards có thể nest
- ✅ Zero-cost - Compiler optimize away
Tổng kết
RAII Guards là một idiom cốt lõi trong Rust:
- Đảm bảo resources được cleanup đúng cách
- Type system enforces correct usage
- Tránh resource leaks và bugs
- Đặc biệt quan trọng trong data engineering cho connections, files, transactions
Best practices:
- Implement Drop trait cho cleanup logic
- Use guards cho locks và resources
- Document guard lifetimes
- Test cleanup behavior
- Prefer RAII over manual management
References
Zero-Cost Abstractions
Zero-cost abstractions là một trong những principles quan trọng nhất của Rust: bạn có thể viết high-level code với abstractions mạnh mẽ, nhưng không phải trả giá về performance. Compiler tối ưu abstractions thành machine code hiệu quả như hand-written low-level code.
Nguyên tắc
“What you don’t use, you don’t pay for. And further: What you do use, you couldn’t hand code any better.”
- Bjarne Stroustrup
Trong Rust:
- Abstractions không có runtime overhead
- Compiler inline và optimize tối đa
- High-level code = Low-level performance
Iterator Chains vs Loops
Loop thủ công
#![allow(unused)]
fn main() {
fn sum_of_squares_manual(numbers: &[i32]) -> i32 {
let mut sum = 0;
for i in 0..numbers.len() {
let n = numbers[i];
if n % 2 == 0 {
sum += n * n;
}
}
sum
}
}Iterator chain (zero-cost!)
fn sum_of_squares_iterator(numbers: &[i32]) -> i32 {
numbers.iter()
.filter(|n| *n % 2 == 0)
.map(|n| n * n)
.sum()
}
fn main() {
let nums = vec![1, 2, 3, 4, 5, 6];
let manual = sum_of_squares_manual(&nums);
let iterator = sum_of_squares_iterator(&nums);
assert_eq!(manual, iterator); // 56
println!("Result: {}", iterator);
// Cả hai compile thành CÙNG machine code!
}Compiler Optimization
Compiler Rust optimize iterator chains qua:
1. Inlining
#![allow(unused)]
fn main() {
// High-level code
let result: i32 = (1..=100)
.filter(|x| x % 2 == 0)
.map(|x| x * x)
.sum();
// Compiler tối ưu thành tương đương:
let mut result = 0;
for x in 1..=100 {
if x % 2 == 0 {
result += x * x;
}
}
}2. Loop Fusion
#![allow(unused)]
fn main() {
// Nhiều operations
let result: Vec<_> = data
.iter()
.map(|x| x + 1)
.filter(|x| x % 2 == 0)
.map(|x| x * 2)
.collect();
// Compiler merge thành single loop
// Không có intermediate allocations!
}Generic Functions - Zero Overhead
// Generic function
fn print_value<T: std::fmt::Display>(value: T) {
println!("{}", value);
}
fn main() {
print_value(42); // Monomorphized cho i32
print_value("hello"); // Monomorphized cho &str
print_value(3.14); // Monomorphized cho f64
// Compiler tạo 3 versions riêng biệt
// Mỗi version được inline và optimize
// Zero runtime cost!
}Trait Objects vs Generics
Static Dispatch (zero-cost)
trait Process {
fn process(&self) -> i32;
}
struct AddOne;
struct Double;
impl Process for AddOne {
fn process(&self, value: i32) -> i32 {
value + 1
}
}
impl Process for Double {
fn process(&self, value: i32) -> i32 {
value * 2
}
}
// ✅ Static dispatch - zero cost
fn apply_static<T: Process>(processor: &T, value: i32) -> i32 {
processor.process(value) // Compile-time dispatch
}
fn main() {
let add = AddOne;
let result = apply_static(&add, 10); // Direct function call!
println!("{}", result);
}Dynamic Dispatch (có runtime cost)
// ❌ Dynamic dispatch - runtime overhead
fn apply_dynamic(processor: &dyn Process, value: i32) -> i32 {
processor.process(value) // Virtual function call
}
fn main() {
let add = AddOne;
let result = apply_dynamic(&add as &dyn Process, 10);
println!("{}", result);
}Newtype Pattern - Zero Cost
struct UserId(u64);
struct ProductId(u64);
fn get_user(id: UserId) -> String {
format!("User {}", id.0)
}
fn main() {
let user = UserId(123);
// Type safety với zero runtime cost
// Compiled code giống như truyền u64 trực tiếp!
println!("{}", get_user(user));
}Smart Pointers
Box - Heap Allocation
fn main() {
let x = Box::new(5);
// Box chỉ là pointer wrapper
// Deref tự động - zero cost!
println!("{}", *x);
// Compiled thành simple pointer operations
}Rc - Reference Counting
use std::rc::Rc;
fn main() {
let data = Rc::new(vec![1, 2, 3]);
let data2 = Rc::clone(&data);
// Reference counting có cost (increment/decrement)
// Nhưng efficient và predictable!
}Data Processing Pipeline - Zero Cost
#[derive(Debug, Clone)]
struct Record {
id: u64,
value: f64,
active: bool,
}
fn process_records(records: &[Record]) -> Vec<f64> {
records.iter()
.filter(|r| r.active) // Zero-cost filter
.filter(|r| r.value > 100.0) // Chain filters
.map(|r| r.value * 1.1) // Transform
.collect() // Single allocation
}
fn main() {
let records = vec![
Record { id: 1, value: 150.0, active: true },
Record { id: 2, value: 50.0, active: true },
Record { id: 3, value: 200.0, active: false },
Record { id: 4, value: 120.0, active: true },
];
let results = process_records(&records);
println!("Processed: {:?}", results);
// [165.0, 132.0]
// Compiler optimize thành efficient loop
// Không có intermediate collections!
}Benchmark: Iterator vs Loop
use std::time::Instant;
fn benchmark_iterator(data: &[i32]) -> i32 {
data.iter()
.filter(|&&x| x % 2 == 0)
.map(|&x| x * x)
.sum()
}
fn benchmark_loop(data: &[i32]) -> i32 {
let mut sum = 0;
for &x in data {
if x % 2 == 0 {
sum += x * x;
}
}
sum
}
fn main() {
let data: Vec<i32> = (1..=1_000_000).collect();
// Benchmark iterator
let start = Instant::now();
let result1 = benchmark_iterator(&data);
let duration1 = start.elapsed();
// Benchmark loop
let start = Instant::now();
let result2 = benchmark_loop(&data);
let duration2 = start.elapsed();
assert_eq!(result1, result2);
println!("Iterator: {:?}", duration1);
println!("Loop: {:?}", duration2);
// Performance gần như giống nhau!
}Closure Optimization
Zero-cost closures
fn apply_operation<F>(data: &[i32], op: F) -> Vec<i32>
where
F: Fn(i32) -> i32,
{
data.iter().map(|&x| op(x)).collect()
}
fn main() {
let numbers = vec![1, 2, 3, 4, 5];
// Closure được inline!
let doubled = apply_operation(&numbers, |x| x * 2);
println!("{:?}", doubled);
// Compiled thành direct operations - zero overhead!
}Const Generics - Compile-time Computation
struct Matrix<T, const ROWS: usize, const COLS: usize> {
data: [[T; COLS]; ROWS],
}
impl<T: Default + Copy, const ROWS: usize, const COLS: usize> Matrix<T, ROWS, COLS> {
fn new() -> Self {
Matrix {
data: [[T::default(); COLS]; ROWS],
}
}
}
fn main() {
// Size checked tại compile-time
let matrix1: Matrix<f64, 3, 3> = Matrix::new();
let matrix2: Matrix<f64, 5, 5> = Matrix::new();
// Zero runtime overhead cho size checks!
}Option và Result - Zero Cost
Option
fn find_value(data: &[i32], target: i32) -> Option<usize> {
for (i, &value) in data.iter().enumerate() {
if value == target {
return Some(i);
}
}
None
}
fn main() {
let numbers = vec![10, 20, 30, 40];
match find_value(&numbers, 30) {
Some(index) => println!("Found at index: {}", index),
None => println!("Not found"),
}
// Option được optimize thành simple enum
// Không có heap allocation hoặc indirection!
}Parallel Iterators với Rayon - Near Zero Cost
use rayon::prelude::*;
fn sum_sequential(data: &[i32]) -> i32 {
data.iter().map(|&x| x * x).sum()
}
fn sum_parallel(data: &[i32]) -> i32 {
data.par_iter().map(|&x| x * x).sum()
}
fn main() {
let data: Vec<i32> = (1..=10_000_000).collect();
let start = std::time::Instant::now();
let seq = sum_sequential(&data);
println!("Sequential: {:?}", start.elapsed());
let start = std::time::Instant::now();
let par = sum_parallel(&data);
println!("Parallel: {:?}", start.elapsed());
assert_eq!(seq, par);
// Parallel faster với minimal overhead!
}Match Expression - Zero Cost
enum DataType {
Integer(i64),
Float(f64),
Text(String),
}
fn process_data(data: DataType) -> String {
match data {
DataType::Integer(n) => format!("Int: {}", n),
DataType::Float(f) => format!("Float: {:.2}", f),
DataType::Text(s) => format!("Text: {}", s),
}
}
fn main() {
let values = vec![
DataType::Integer(42),
DataType::Float(3.14),
DataType::Text("hello".to_string()),
];
for value in values {
println!("{}", process_data(value));
}
// Match compiled thành efficient jump table
// Zero overhead vs if-else chain!
}Best Practices
1. Prefer iterators over manual loops
#![allow(unused)]
fn main() {
// ✅ Zero-cost và clear intent
let sum: i32 = data.iter().filter(|&&x| x > 0).sum();
// ❌ Verbose và dễ bugs
let mut sum = 0;
for &x in data {
if x > 0 {
sum += x;
}
}
}2. Use generics cho reusable code
#![allow(unused)]
fn main() {
// ✅ Generic - monomorphized tại compile-time
fn process<T: std::fmt::Display>(value: T) {
println!("{}", value);
}
// ❌ Trait object - runtime overhead
fn process_dyn(value: &dyn std::fmt::Display) {
println!("{}", value);
}
}3. Chain operations
#![allow(unused)]
fn main() {
// ✅ Chaining - compiler optimize
let result = data
.iter()
.filter(|x| x.is_valid())
.map(|x| x.transform())
.collect();
// ❌ Intermediate collections - allocations
let filtered: Vec<_> = data.iter().filter(|x| x.is_valid()).collect();
let mapped: Vec<_> = filtered.iter().map(|x| x.transform()).collect();
}4. Leverage type system
#![allow(unused)]
fn main() {
// ✅ Newtype - compile-time safety, zero runtime cost
struct UserId(u64);
fn get_user(id: UserId) { }
// ❌ Primitive type - dễ nhầm lẫn
fn get_user_raw(id: u64) { }
}Ví dụ thực tế: ETL Pipeline
#[derive(Debug, Clone)]
struct Customer {
id: u64,
name: String,
age: u32,
revenue: f64,
}
fn extract_transform_load(customers: &[Customer]) -> Vec<(String, f64)> {
customers
.iter()
.filter(|c| c.age >= 18) // Filter
.filter(|c| c.revenue > 1000.0) // Additional filter
.map(|c| (c.name.to_uppercase(), c.revenue * 1.1)) // Transform
.collect() // Load
}
fn main() {
let customers = vec![
Customer { id: 1, name: "Alice".to_string(), age: 25, revenue: 5000.0 },
Customer { id: 2, name: "Bob".to_string(), age: 17, revenue: 2000.0 },
Customer { id: 3, name: "Charlie".to_string(), age: 30, revenue: 500.0 },
Customer { id: 4, name: "Diana".to_string(), age: 28, revenue: 3000.0 },
];
let result = extract_transform_load(&customers);
for (name, revenue) in result {
println!("{}: ${:.2}", name, revenue);
}
// ALICE: $5500.00
// DIANA: $3300.00
// Entire pipeline compiled thành efficient loop
// Single pass qua data
// Minimal allocations
}Assembly Comparison
Xem compiler output với cargo asm hoặc Compiler Explorer (godbolt.org):
#![allow(unused)]
fn main() {
pub fn iterator_sum(data: &[i32]) -> i32 {
data.iter().filter(|&&x| x > 0).sum()
}
pub fn loop_sum(data: &[i32]) -> i32 {
let mut sum = 0;
for &x in data {
if x > 0 {
sum += x;
}
}
sum
}
// Cả hai functions compile thành CÙNG assembly code!
}Khi nào abstractions CÓ cost?
1. Dynamic dispatch
#![allow(unused)]
fn main() {
// Runtime overhead do virtual function calls
fn process(handler: &dyn Handler) {
handler.handle(); // Indirect call
}
}2. Excessive allocations
#![allow(unused)]
fn main() {
// Mỗi step allocate new Vec
let step1: Vec<_> = data.iter().map(|x| x + 1).collect();
let step2: Vec<_> = step1.iter().map(|x| x * 2).collect();
let step3: Vec<_> = step2.iter().filter(|&&x| x > 10).collect();
}3. Unnecessary clones
#![allow(unused)]
fn main() {
// Clone toàn bộ data mỗi iteration
for item in data.clone() { // ❌
// ...
}
}Tổng kết
Zero-cost abstractions trong Rust:
- ✅ High-level code = Low-level performance
- ✅ Iterators nhanh như loops
- ✅ Generics không có runtime overhead
- ✅ Newtypes không có cost
- ✅ Smart abstractions được optimize tối đa
Best practices:
- Prefer iterators và chaining
- Use generics cho static dispatch
- Leverage type system
- Trust the optimizer
- Measure khi optimization quan trọng
Rust motto: “Zero-cost abstractions - you don’t pay for what you don’t use!”
References
Typestate Pattern
Typestate pattern encode runtime state của một object vào compile-time type, cho phép compiler verify rằng object được sử dụng đúng cách. Pattern này đặc biệt hữu ích cho state machines, builders, và protocols.
Vấn đề
Runtime state checking dễ dẫn đến bugs:
// ❌ Runtime state checking
struct Connection {
url: String,
connected: bool,
}
impl Connection {
fn new(url: String) -> Self {
Connection {
url,
connected: false,
}
}
fn connect(&mut self) {
if self.connected {
panic!("Already connected!"); // Runtime error!
}
println!("Connecting to {}", self.url);
self.connected = true;
}
fn send(&self, data: &str) {
if !self.connected {
panic!("Not connected!"); // Runtime error!
}
println!("Sending: {}", data);
}
}
fn main() {
let mut conn = Connection::new("localhost".to_string());
// ❌ Có thể gọi send trước khi connect - runtime panic!
// conn.send("data");
conn.connect();
conn.send("Hello");
// ❌ Có thể connect lại - runtime panic!
// conn.connect();
}Giải pháp: Typestate Pattern
// ✅ Compile-time state checking
struct Disconnected;
struct Connected;
struct Connection<State> {
url: String,
state: std::marker::PhantomData<State>,
}
impl Connection<Disconnected> {
fn new(url: String) -> Self {
Connection {
url,
state: std::marker::PhantomData,
}
}
fn connect(self) -> Connection<Connected> {
println!("Connecting to {}", self.url);
Connection {
url: self.url,
state: std::marker::PhantomData,
}
}
}
impl Connection<Connected> {
fn send(&self, data: &str) {
println!("Sending: {}", data);
}
fn disconnect(self) -> Connection<Disconnected> {
println!("Disconnecting from {}", self.url);
Connection {
url: self.url,
state: std::marker::PhantomData,
}
}
}
fn main() {
let conn = Connection::new("localhost".to_string());
// ❌ Compile error - send không available khi Disconnected!
// conn.send("data");
let conn = conn.connect();
// ✅ OK - send available khi Connected
conn.send("Hello");
// ❌ Compile error - connect không available khi đã Connected!
// conn.connect();
let conn = conn.disconnect();
// ❌ Compile error - send không available sau disconnect!
// conn.send("data");
}Builder Pattern với Typestate
// States
struct NoUrl;
struct HasUrl;
struct NoAuth;
struct HasAuth;
struct HttpClient<UrlState, AuthState> {
url: Option<String>,
api_key: Option<String>,
_url_state: std::marker::PhantomData<UrlState>,
_auth_state: std::marker::PhantomData<AuthState>,
}
impl HttpClient<NoUrl, NoAuth> {
fn new() -> Self {
HttpClient {
url: None,
api_key: None,
_url_state: std::marker::PhantomData,
_auth_state: std::marker::PhantomData,
}
}
}
impl<AuthState> HttpClient<NoUrl, AuthState> {
fn url(self, url: String) -> HttpClient<HasUrl, AuthState> {
HttpClient {
url: Some(url),
api_key: self.api_key,
_url_state: std::marker::PhantomData,
_auth_state: std::marker::PhantomData,
}
}
}
impl<UrlState> HttpClient<UrlState, NoAuth> {
fn api_key(self, key: String) -> HttpClient<UrlState, HasAuth> {
HttpClient {
url: self.url,
api_key: Some(key),
_url_state: std::marker::PhantomData,
_auth_state: std::marker::PhantomData,
}
}
}
// Chỉ có thể build khi có đủ cả URL và Auth
impl HttpClient<HasUrl, HasAuth> {
fn build(self) -> ConfiguredClient {
ConfiguredClient {
url: self.url.unwrap(),
api_key: self.api_key.unwrap(),
}
}
}
struct ConfiguredClient {
url: String,
api_key: String,
}
impl ConfiguredClient {
fn get(&self, path: &str) {
println!("GET {}/{} with key {}", self.url, path, self.api_key);
}
}
fn main() {
// ✅ Compiler enforce phải set cả url và api_key
let client = HttpClient::new()
.url("https://api.example.com".to_string())
.api_key("secret123".to_string())
.build();
client.get("users");
// ❌ Compile error - thiếu api_key!
// let client = HttpClient::new()
// .url("https://api.example.com".to_string())
// .build();
// ❌ Compile error - thiếu url!
// let client = HttpClient::new()
// .api_key("secret123".to_string())
// .build();
}Data Pipeline States
use std::marker::PhantomData;
// Pipeline states
struct New;
struct Validated;
struct Transformed;
struct Ready;
struct DataPipeline<State> {
data: Vec<String>,
state: PhantomData<State>,
}
impl DataPipeline<New> {
fn new(data: Vec<String>) -> Self {
println!("Creating new pipeline with {} records", data.len());
DataPipeline {
data,
state: PhantomData,
}
}
fn validate(self) -> Result<DataPipeline<Validated>, String> {
println!("Validating {} records...", self.data.len());
for record in &self.data {
if record.is_empty() {
return Err("Found empty record".to_string());
}
}
Ok(DataPipeline {
data: self.data,
state: PhantomData,
})
}
}
impl DataPipeline<Validated> {
fn transform(self) -> DataPipeline<Transformed> {
println!("Transforming {} records...", self.data.len());
let data = self.data
.into_iter()
.map(|s| s.to_uppercase())
.collect();
DataPipeline {
data,
state: PhantomData,
}
}
}
impl DataPipeline<Transformed> {
fn prepare(self) -> DataPipeline<Ready> {
println!("Preparing {} records...", self.data.len());
DataPipeline {
data: self.data,
state: PhantomData,
}
}
}
impl DataPipeline<Ready> {
fn execute(self) {
println!("Executing pipeline:");
for (i, record) in self.data.iter().enumerate() {
println!(" [{}] {}", i + 1, record);
}
println!("Pipeline complete!");
}
}
fn main() -> Result<(), String> {
let data = vec![
"alice".to_string(),
"bob".to_string(),
"charlie".to_string(),
];
// ✅ Compiler enforce correct order!
let pipeline = DataPipeline::new(data)
.validate()?
.transform()
.prepare()
.execute();
// ❌ Compile error - không thể skip steps!
// let pipeline = DataPipeline::new(data)
// .transform(); // Error: transform not available on New state
// ❌ Compile error - không thể execute trước khi ready!
// let pipeline = DataPipeline::new(data)
// .validate()?
// .execute(); // Error: execute not available on Validated state
Ok(())
}File Processor với Typestate
use std::marker::PhantomData;
// States
struct Closed;
struct Open;
struct Written;
struct FileProcessor<State> {
path: String,
content: Option<String>,
state: PhantomData<State>,
}
impl FileProcessor<Closed> {
fn new(path: String) -> Self {
FileProcessor {
path,
content: None,
state: PhantomData,
}
}
fn open(self) -> FileProcessor<Open> {
println!("Opening file: {}", self.path);
FileProcessor {
path: self.path,
content: Some(String::new()),
state: PhantomData,
}
}
}
impl FileProcessor<Open> {
fn write(mut self, data: &str) -> FileProcessor<Written> {
println!("Writing to file: {}", data);
if let Some(ref mut content) = self.content {
content.push_str(data);
}
FileProcessor {
path: self.path,
content: self.content,
state: PhantomData,
}
}
}
impl FileProcessor<Written> {
fn close(self) {
println!("Closing file: {}", self.path);
if let Some(content) = self.content {
println!("Final content ({} bytes): {}", content.len(), content);
}
}
fn write_more(self, data: &str) -> FileProcessor<Written> {
println!("Writing more to file: {}", data);
let mut content = self.content.unwrap();
content.push_str(data);
FileProcessor {
path: self.path,
content: Some(content),
state: PhantomData,
}
}
}
fn main() {
let file = FileProcessor::new("output.txt".to_string())
.open()
.write("Hello, ")
.write_more("World!")
.close();
// ❌ Compile error - write không available khi Closed!
// let file = FileProcessor::new("test.txt".to_string())
// .write("data");
}Transaction State Machine
use std::marker::PhantomData;
struct Idle;
struct Active;
struct Committed;
struct RolledBack;
struct Transaction<State> {
id: u64,
operations: Vec<String>,
state: PhantomData<State>,
}
impl Transaction<Idle> {
fn new(id: u64) -> Self {
Transaction {
id,
operations: Vec::new(),
state: PhantomData,
}
}
fn begin(self) -> Transaction<Active> {
println!("BEGIN TRANSACTION {}", self.id);
Transaction {
id: self.id,
operations: self.operations,
state: PhantomData,
}
}
}
impl Transaction<Active> {
fn execute(mut self, operation: &str) -> Self {
println!("EXEC [{}]: {}", self.id, operation);
self.operations.push(operation.to_string());
self
}
fn commit(self) -> Transaction<Committed> {
println!("COMMIT {} ({} operations)", self.id, self.operations.len());
Transaction {
id: self.id,
operations: self.operations,
state: PhantomData,
}
}
fn rollback(self) -> Transaction<RolledBack> {
println!("ROLLBACK {} ({} operations)", self.id, self.operations.len());
Transaction {
id: self.id,
operations: self.operations,
state: PhantomData,
}
}
}
impl Transaction<Committed> {
fn summary(&self) {
println!("Transaction {} committed successfully:", self.id);
for (i, op) in self.operations.iter().enumerate() {
println!(" {}. {}", i + 1, op);
}
}
}
impl Transaction<RolledBack> {
fn summary(&self) {
println!("Transaction {} rolled back. {} operations discarded.",
self.id, self.operations.len());
}
}
fn main() {
// Successful transaction
let tx = Transaction::new(1)
.begin()
.execute("INSERT INTO users VALUES (1, 'Alice')")
.execute("INSERT INTO orders VALUES (100, 1)")
.commit();
tx.summary();
println!();
// Failed transaction
let tx = Transaction::new(2)
.begin()
.execute("UPDATE balance SET amount = 1000")
.rollback();
tx.summary();
// ❌ Compile error - không thể execute trên Idle state!
// let tx = Transaction::new(3)
// .execute("INSERT ...");
// ❌ Compile error - không thể commit đã committed transaction!
// tx.commit();
}Database Connection Pool với Typestate
use std::marker::PhantomData;
struct Uninitialized;
struct Initialized;
struct Connected;
struct ConnectionPool<State> {
max_connections: usize,
active_connections: usize,
state: PhantomData<State>,
}
impl ConnectionPool<Uninitialized> {
fn new() -> Self {
ConnectionPool {
max_connections: 0,
active_connections: 0,
state: PhantomData,
}
}
fn with_capacity(self, max: usize) -> ConnectionPool<Initialized> {
println!("Initializing pool with capacity: {}", max);
ConnectionPool {
max_connections: max,
active_connections: 0,
state: PhantomData,
}
}
}
impl ConnectionPool<Initialized> {
fn connect(self) -> ConnectionPool<Connected> {
println!("Connecting to database...");
ConnectionPool {
max_connections: self.max_connections,
active_connections: 0,
state: PhantomData,
}
}
}
impl ConnectionPool<Connected> {
fn acquire(&mut self) -> Option<PooledConnection> {
if self.active_connections < self.max_connections {
self.active_connections += 1;
println!("Acquired connection ({}/{})",
self.active_connections, self.max_connections);
Some(PooledConnection {
id: self.active_connections,
})
} else {
println!("Pool exhausted!");
None
}
}
fn release(&mut self) {
if self.active_connections > 0 {
self.active_connections -= 1;
println!("Released connection ({}/{})",
self.active_connections, self.max_connections);
}
}
fn stats(&self) {
println!("Pool stats: {}/{} active",
self.active_connections, self.max_connections);
}
}
struct PooledConnection {
id: usize,
}
impl PooledConnection {
fn query(&self, sql: &str) {
println!("[Conn {}] Executing: {}", self.id, sql);
}
}
fn main() {
let mut pool = ConnectionPool::new()
.with_capacity(3)
.connect();
if let Some(conn1) = pool.acquire() {
conn1.query("SELECT * FROM users");
}
if let Some(conn2) = pool.acquire() {
conn2.query("SELECT * FROM orders");
}
pool.stats();
pool.release();
pool.stats();
// ❌ Compile error - acquire không available trên Uninitialized!
// let mut pool = ConnectionPool::new();
// pool.acquire();
}Best Practices
1. Use PhantomData cho zero-cost states
#![allow(unused)]
fn main() {
use std::marker::PhantomData;
struct MyType<State> {
data: String,
state: PhantomData<State>, // Zero runtime cost!
}
}2. Consume self cho state transitions
#![allow(unused)]
fn main() {
impl MyType<StateA> {
// ✅ Consume self - không thể dùng old state sau transition
fn transition(self) -> MyType<StateB> {
MyType {
data: self.data,
state: PhantomData,
}
}
}
}3. Document state transitions
#![allow(unused)]
fn main() {
/// A connection that can be in one of three states:
/// - `Disconnected`: Initial state, can call `connect()`
/// - `Connected`: Can call `send()` and `disconnect()`
/// - After `disconnect()`, returns to `Disconnected` state
struct Connection<State> { /* ... */ }
}4. Provide helpful error messages
#![allow(unused)]
fn main() {
// Use type aliases cho clearer errors
type DisconnectedConnection = Connection<Disconnected>;
type ConnectedConnection = Connection<Connected>;
}Ưu điểm
- ✅ Compile-time safety - Impossible states không thể represent
- ✅ Zero runtime cost - PhantomData không chiếm memory
- ✅ Self-documenting - States rõ ràng trong type signature
- ✅ API misuse prevention - Compiler prevent incorrect usage
- ✅ Refactoring safety - Changes caught tại compile-time
Nhược điểm
- ❌ Complexity - More types và boilerplate
- ❌ Flexibility - Khó dynamic state transitions
- ❌ Learning curve - Requires understanding của advanced types
Khi nào dùng Typestate?
✅ Nên dùng khi:
- State machines - Rõ ràng states và transitions
- Builders - Enforce required fields
- Protocols - Network protocols, file formats
- Resources - Database connections, file handles
- Multi-step processes - Data pipelines, workflows
❌ Không phù hợp khi:
- Simple state - Boolean flag đủ
- Dynamic transitions - State phụ thuộc runtime data
- Many states - Too many types
- Prototype code - Overhead quá cao
Tổng kết
Typestate pattern là idiom mạnh mẽ trong Rust:
- Encode states vào types
- Compiler verify correct usage
- Zero runtime overhead
- Prevent entire classes of bugs
Best practices:
- Use PhantomData cho state markers
- Consume self trong transitions
- Document states và transitions
- Provide clear type aliases
- Balance complexity vs safety
References
Error Handling Patterns
Rust error handling patterns sử dụng Result<T, E> type cùng với các idioms và libraries như thiserror và anyhow để handle errors một cách idiomatic, type-safe và ergonomic.
Nguyên tắc
- Libraries: Dùng custom error types với
thiserror - Applications: Dùng
anyhow::Resultcho flexibility - Avoid
unwrap(): Chỉ dùng khi chắc chắn không fail - Contextual errors: Thêm context cho easier debugging
Basic Error Handling
Pattern 1: Result với Standard Errors
use std::fs::File;
use std::io::{self, Read};
fn read_file(path: &str) -> io::Result<String> {
let mut file = File::open(path)?;
let mut contents = String::new();
file.read_to_string(&mut contents)?;
Ok(contents)
}
fn main() {
match read_file("data.txt") {
Ok(contents) => println!("Contents: {}", contents),
Err(e) => eprintln!("Error reading file: {}", e),
}
}Pattern 2: Custom Error Enum
#[derive(Debug)]
enum DataError {
IoError(std::io::Error),
ParseError(String),
ValidationError(String),
}
impl std::fmt::Display for DataError {
fn fmt(&self, f: &mut std::fmt::Formatter) -> std::fmt::Result {
match self {
DataError::IoError(e) => write!(f, "IO error: {}", e),
DataError::ParseError(msg) => write!(f, "Parse error: {}", msg),
DataError::ValidationError(msg) => write!(f, "Validation error: {}", msg),
}
}
}
impl std::error::Error for DataError {}
impl From<std::io::Error> for DataError {
fn from(error: std::io::Error) -> Self {
DataError::IoError(error)
}
}
fn process_data(data: &str) -> Result<i32, DataError> {
if data.is_empty() {
return Err(DataError::ValidationError("Data is empty".to_string()));
}
data.parse::<i32>()
.map_err(|_| DataError::ParseError(format!("Cannot parse: {}", data)))
}
fn main() {
match process_data("42") {
Ok(num) => println!("Parsed: {}", num),
Err(e) => eprintln!("Error: {}", e),
}
}Using thiserror - For Libraries
thiserror giúp define custom error types dễ dàng hơn:
[dependencies]
thiserror = "1.0"
use thiserror::Error;
#[derive(Error, Debug)]
enum DataError {
#[error("IO error: {0}")]
Io(#[from] std::io::Error),
#[error("Parse error: {0}")]
Parse(String),
#[error("Validation failed: {field} is {reason}")]
Validation {
field: String,
reason: String,
},
#[error("Record not found: {0}")]
NotFound(u64),
#[error("Database error")]
Database(#[from] DatabaseError),
}
#[derive(Error, Debug)]
#[error("Database connection failed")]
struct DatabaseError;
// Automatic From implementation nhờ #[from]
fn read_config() -> Result<String, DataError> {
std::fs::read_to_string("config.toml")? // Auto convert io::Error
}
fn validate_email(email: &str) -> Result<(), DataError> {
if !email.contains('@') {
return Err(DataError::Validation {
field: "email".to_string(),
reason: "missing @ symbol".to_string(),
});
}
Ok(())
}
fn main() {
match validate_email("invalid") {
Ok(_) => println!("Valid email"),
Err(e) => eprintln!("Error: {}", e),
// Output: Error: Validation failed: email is missing @ symbol
}
}Using anyhow - For Applications
anyhow cung cấp error type linh hoạt cho applications:
[dependencies]
anyhow = "1.0"
use anyhow::{Context, Result, bail, ensure};
fn read_user_from_file(path: &str) -> Result<User> {
let contents = std::fs::read_to_string(path)
.context(format!("Failed to read user file: {}", path))?;
let user: User = serde_json::from_str(&contents)
.context("Failed to parse user JSON")?;
ensure!(user.age >= 18, "User must be 18 or older, got {}", user.age);
if user.name.is_empty() {
bail!("User name cannot be empty");
}
Ok(user)
}
#[derive(serde::Deserialize)]
struct User {
name: String,
age: u32,
}
fn main() -> Result<()> {
let user = read_user_from_file("user.json")?;
println!("User: {}", user.name);
Ok(())
}
// Error chain example:
// Error: Failed to read user file: user.json
//
// Caused by:
// No such file or directory (os error 2)Pattern: Error Context
Với anyhow
#![allow(unused)]
fn main() {
use anyhow::{Context, Result};
fn load_dataset(id: u64) -> Result<Vec<Record>> {
let path = format!("data_{}.csv", id);
let file = std::fs::File::open(&path)
.with_context(|| format!("Failed to open dataset {}", id))?;
let mut reader = csv::Reader::from_reader(file);
let records: Vec<Record> = reader.deserialize()
.collect::<Result<Vec<_>, _>>()
.with_context(|| format!("Failed to parse CSV for dataset {}", id))?;
ensure!(!records.is_empty(), "Dataset {} is empty", id);
Ok(records)
}
#[derive(serde::Deserialize)]
struct Record {
id: u64,
value: String,
}
}Custom Context Chain
#![allow(unused)]
fn main() {
use anyhow::{Result, Context};
fn process_pipeline(input_path: &str, output_path: &str) -> Result<()> {
extract(input_path)
.context("Extract stage failed")?;
transform()
.context("Transform stage failed")?;
load(output_path)
.context("Load stage failed")?;
Ok(())
}
fn extract(path: &str) -> Result<()> {
std::fs::read_to_string(path)
.with_context(|| format!("Cannot read input file: {}", path))?;
Ok(())
}
fn transform() -> Result<()> {
// Transform logic
Ok(())
}
fn load(path: &str) -> Result<()> {
std::fs::write(path, "data")
.with_context(|| format!("Cannot write output file: {}", path))?;
Ok(())
}
}Pattern: Error Conversion
#![allow(unused)]
fn main() {
use thiserror::Error;
#[derive(Error, Debug)]
enum PipelineError {
#[error("IO error: {0}")]
Io(#[from] std::io::Error),
#[error("CSV error: {0}")]
Csv(#[from] csv::Error),
#[error("JSON error: {0}")]
Json(#[from] serde_json::Error),
#[error("Parse error: {0}")]
Parse(#[from] std::num::ParseIntError),
}
fn read_csv(path: &str) -> Result<Vec<Vec<String>>, PipelineError> {
let file = std::fs::File::open(path)?; // Auto convert io::Error
let mut reader = csv::Reader::from_reader(file);
let mut records = Vec::new();
for result in reader.records() {
let record = result?; // Auto convert csv::Error
records.push(record.iter().map(|s| s.to_string()).collect());
}
Ok(records)
}
fn parse_numbers(data: &str) -> Result<Vec<i32>, PipelineError> {
data.split(',')
.map(|s| s.trim().parse::<i32>())
.collect::<Result<Vec<_>, _>>()
.map_err(|e| e.into()) // Auto convert ParseIntError
}
}Pattern: Result Extensions
trait ResultExt<T> {
fn log_error(self) -> Self;
fn with_field(self, field: &str, value: &str) -> Self;
}
impl<T, E: std::fmt::Display> ResultExt<T> for Result<T, E> {
fn log_error(self) -> Self {
if let Err(ref e) = self {
eprintln!("Error occurred: {}", e);
}
self
}
fn with_field(self, field: &str, value: &str) -> Self {
if let Err(ref e) = self {
eprintln!("Error in {} ({}): {}", field, value, e);
}
self
}
}
fn main() -> Result<(), Box<dyn std::error::Error>> {
let result = process_user("user123")
.log_error()
.with_field("user_id", "user123")?;
Ok(())
}
fn process_user(id: &str) -> Result<(), Box<dyn std::error::Error>> {
// Processing logic
Ok(())
}Pattern: Early Return với ?
use anyhow::Result;
fn validate_and_process(data: &str) -> Result<i32> {
// Early returns với ?
let trimmed = data.trim();
ensure!(!trimmed.is_empty(), "Input is empty");
let number: i32 = trimmed.parse()
.context("Failed to parse as integer")?;
ensure!(number > 0, "Number must be positive, got {}", number);
ensure!(number < 1000, "Number too large: {}", number);
Ok(number * 2)
}
fn main() -> Result<()> {
let result = validate_and_process(" 42 ")?;
println!("Result: {}", result);
Ok(())
}Pattern: Multiple Error Types
#![allow(unused)]
fn main() {
use anyhow::Result;
fn complex_operation() -> Result<String> {
// Có thể mix nhiều error types khác nhau
let file_contents = std::fs::read_to_string("config.toml")?; // io::Error
let config: Config = toml::from_str(&file_contents)?; // toml::Error
let response = reqwest::blocking::get(&config.url)?; // reqwest::Error
let data = response.text()?; // reqwest::Error
Ok(data)
}
#[derive(serde::Deserialize)]
struct Config {
url: String,
}
}Pattern: Fallback với or_else
#![allow(unused)]
fn main() {
use anyhow::Result;
fn read_config() -> Result<String> {
// Try primary source
std::fs::read_to_string("config.toml")
.or_else(|_| {
// Fallback to backup
println!("Primary config not found, using backup");
std::fs::read_to_string("config.backup.toml")
})
.or_else(|_| {
// Last resort: default config
println!("No config files found, using defaults");
Ok(String::from("[default]"))
})
}
}Pattern: Collect Results
use anyhow::Result;
fn process_files(paths: &[&str]) -> Result<Vec<String>> {
// Collect results - dừng tại error đầu tiên
paths.iter()
.map(|path| std::fs::read_to_string(path))
.collect::<Result<Vec<_>, _>>()
.map_err(|e| e.into())
}
fn process_files_continue(paths: &[&str]) -> Vec<Result<String>> {
// Process tất cả, collect các results
paths.iter()
.map(|path| {
std::fs::read_to_string(path)
.map_err(|e| e.into())
})
.collect()
}
fn main() -> Result<()> {
let paths = vec!["file1.txt", "file2.txt", "file3.txt"];
// Stop on first error
let results = process_files(&paths)?;
// Or continue processing
let all_results = process_files_continue(&paths);
for (i, result) in all_results.iter().enumerate() {
match result {
Ok(contents) => println!("File {}: {} bytes", i, contents.len()),
Err(e) => eprintln!("File {}: Error - {}", i, e),
}
}
Ok(())
}Real-World Example: Data Pipeline
use anyhow::{Context, Result, bail};
use thiserror::Error;
#[derive(Error, Debug)]
enum PipelineError {
#[error("Validation failed: {0}")]
Validation(String),
#[error("Processing error at row {row}: {message}")]
Processing { row: usize, message: String },
#[error(transparent)]
Io(#[from] std::io::Error),
#[error(transparent)]
Csv(#[from] csv::Error),
}
struct DataPipeline {
input_path: String,
output_path: String,
}
impl DataPipeline {
fn new(input: &str, output: &str) -> Self {
DataPipeline {
input_path: input.to_string(),
output_path: output.to_string(),
}
}
fn run(&self) -> Result<PipelineStats> {
println!("Starting pipeline...");
let records = self.extract()
.context("Extract stage failed")?;
let processed = self.transform(records)
.context("Transform stage failed")?;
self.load(&processed)
.context("Load stage failed")?;
Ok(PipelineStats {
records_processed: processed.len(),
records_written: processed.len(),
})
}
fn extract(&self) -> Result<Vec<Record>, PipelineError> {
let file = std::fs::File::open(&self.input_path)?;
let mut reader = csv::Reader::from_reader(file);
let mut records = Vec::new();
for result in reader.deserialize() {
let record: Record = result?;
records.push(record);
}
if records.is_empty() {
return Err(PipelineError::Validation(
"No records found in input file".to_string()
));
}
Ok(records)
}
fn transform(&self, records: Vec<Record>) -> Result<Vec<Record>, PipelineError> {
let mut processed = Vec::new();
for (i, mut record) in records.into_iter().enumerate() {
// Validate
if record.value < 0.0 {
return Err(PipelineError::Processing {
row: i,
message: format!("Negative value: {}", record.value),
});
}
// Transform
record.value *= 1.1;
processed.push(record);
}
Ok(processed)
}
fn load(&self, records: &[Record]) -> Result<(), PipelineError> {
let file = std::fs::File::create(&self.output_path)?;
let mut writer = csv::Writer::from_writer(file);
for record in records {
writer.serialize(record)?;
}
writer.flush()?;
Ok(())
}
}
#[derive(Debug, serde::Serialize, serde::Deserialize)]
struct Record {
id: u64,
name: String,
value: f64,
}
struct PipelineStats {
records_processed: usize,
records_written: usize,
}
fn main() -> Result<()> {
let pipeline = DataPipeline::new("input.csv", "output.csv");
match pipeline.run() {
Ok(stats) => {
println!("Pipeline completed successfully!");
println!(" Processed: {}", stats.records_processed);
println!(" Written: {}", stats.records_written);
}
Err(e) => {
eprintln!("Pipeline failed: {}", e);
eprintln!("\nError chain:");
for cause in e.chain() {
eprintln!(" - {}", cause);
}
return Err(e);
}
}
Ok(())
}Best Practices
1. Use ? for propagation
#![allow(unused)]
fn main() {
// ✅ Clean và concise
fn read_data(path: &str) -> Result<String> {
let data = std::fs::read_to_string(path)?;
Ok(data)
}
// ❌ Verbose
fn read_data_verbose(path: &str) -> Result<String> {
match std::fs::read_to_string(path) {
Ok(data) => Ok(data),
Err(e) => Err(e.into()),
}
}
}2. Add context cho errors
#![allow(unused)]
fn main() {
// ✅ Helpful error messages
use anyhow::Context;
fn load_user(id: u64) -> Result<User> {
let path = format!("users/{}.json", id);
let data = std::fs::read_to_string(&path)
.with_context(|| format!("Failed to load user {}", id))?;
serde_json::from_str(&data)
.with_context(|| format!("Failed to parse user {}", id))
}
}3. Avoid unwrap() trong production code
#![allow(unused)]
fn main() {
// ❌ Dangerous
let value = some_operation().unwrap();
// ✅ Handle errors properly
let value = some_operation()
.context("Operation failed")?;
// ✅ Or provide default
let value = some_operation().unwrap_or_default();
}4. Use thiserror cho libraries
#![allow(unused)]
fn main() {
// Library code - concrete error types
#[derive(Error, Debug)]
pub enum MyLibError {
#[error("Configuration error: {0}")]
Config(String),
#[error("Network error: {0}")]
Network(#[from] std::io::Error),
}
pub fn library_function() -> Result<(), MyLibError> {
// ...
Ok(())
}
}5. Use anyhow cho applications
// Application code - flexible errors
use anyhow::Result;
fn main() -> Result<()> {
let config = load_config()?;
let data = fetch_data(&config)?;
process(data)?;
Ok(())
}When to Use What?
| Use Case | Recommendation |
|---|---|
| Library code | thiserror - Concrete error types |
| Application code | anyhow - Flexible error handling |
| Need error details | thiserror - Callers handle variants |
| Just propagate errors | anyhow - Simple error passing |
| Error context | Both - Use .context() |
| Multiple error types | anyhow - Easy mixing |
Tổng kết
Error handling patterns trong Rust:
- ✅ Type-safe với
Result<T, E> - ✅
thiserrorcho custom errors - ✅
anyhowcho application errors - ✅ Context cho better debugging
- ✅
?operator cho propagation
Best practices:
- Use
?thay vìunwrap() - Add context với
.context() thiserrorcho libraries,anyhowcho apps- Handle errors, không ignore
- Provide helpful error messages